Experiencing a high-pitched squeal every time you flush? You’re not alone. Many homeowners find the sound of water pipes whistle when toilet is flushed incredibly frustrating. The flapper valve, a crucial component within your toilet tank, often contributes to this issue by causing pressure fluctuations in the water supply line. Fortunately, understanding how your plumbing system works can help you diagnose and often resolve this problem yourself, preventing costly calls to a plumber and restoring peace and quiet to your bathroom.
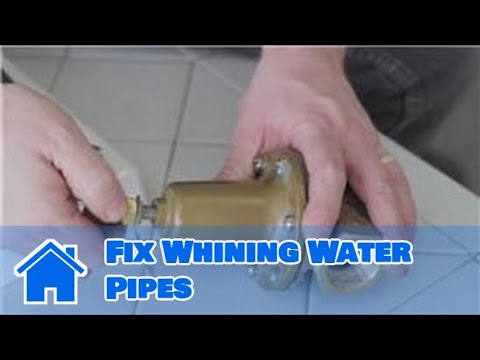
Image taken from the YouTube channel homesteady , from the video titled Plumbing Advice : How to Fix Whining Water Pipes .
Silencing the Toilet’s Annoying Whistle: A Guide to a Quieter Bathroom
That high-pitched squeal emanating from your bathroom isn’t a stray tea kettle; it’s likely your toilet announcing its discontent. A whistling toilet, while seemingly a minor nuisance, is a common household problem often stemming from issues within the water supply system connected to the toilet. While frustrating, the good news is that it’s frequently fixable with some simple troubleshooting and do-it-yourself solutions. Before you resign yourself to a life of bathroom cacophony or reach for the Yellow Pages to call a plumber, let’s explore the world of whistling toilets and how you can restore peace and quiet to your home.
The Whistle: A Symptom of a Deeper Problem
Think of the whistling as your toilet’s way of waving a red flag. It’s not just a random noise; it’s a symptom indicating that something isn’t quite right with the internal mechanisms or even your home’s water pressure. Ignoring it won’t make it go away; in fact, it could lead to more significant problems down the line. The irritating sound usually means a component is failing or that there’s an imbalance in the water flow within the tank.
The Potential Cost of Neglect: Water Waste
Beyond the annoyance factor, a whistling toilet can also be a silent contributor to a higher water bill. The incessant noise often signals that the toilet is constantly trying to refill, meaning water is perpetually running, even when it’s not being flushed. This wastage adds up over time, impacting both your wallet and the environment. The constant trickling can lead to gallons of water being wasted unknowingly.
A Preview of Solutions: Restoring Harmony
This article serves as your comprehensive guide to diagnosing and resolving the mystery of the whistling toilet. We’ll delve into the common culprits behind the noise, providing a step-by-step process for identifying the specific issue in your toilet. We’ll then equip you with practical DIY solutions to tackle the problem head-on. Finally, we’ll discuss when it’s time to call in a professional plumber.
From replacing a faulty fill valve to adjusting water levels, we will discuss each solution thoroughly. Together, let’s regain the peace of your bathroom and save water in the process.
Understanding the Culprit: Common Causes of Toilet Whistle
To truly silence that persistent toilet serenade, it’s essential to understand what is causing the noise in the first place. The whistling sound is rarely random; it’s a direct consequence of how your toilet’s components interact and how water flows through them. Let’s delve into the most common culprits behind the high-pitched hum, focusing on the fill valve, flush valve, water pressure, and even the often-overlooked issue of sediment buildup.
The Fill Valve: The Conductor of the Refill Orchestra
The fill valve’s primary role is to refill the toilet tank after each flush. It’s the mechanism that opens to allow water into the tank and shuts off once the water reaches the appropriate level.
When this valve begins to fail, it can create a whistling sound. This typically occurs because the internal components become worn or corroded, leading to vibrations within the valve itself.
Imagine the water rushing through a slightly obstructed passage; the turbulence creates the tell-tale whistle. A faulty fill valve prevents the water from flowing smoothly and consistently.
The Ballcock’s Ballad: An Older Culprit
If you have an older toilet, it might use a ballcock fill valve. These valves use a floating ball attached to a lever to regulate the water level.
Ballcock valves are notoriously prone to issues as they age. The various linkages and pivot points can wear down, causing the valve to stick or vibrate, resulting in the dreaded whistle.
Modern fill valves are generally more reliable and quieter.
The Flush Valve: Leaks and the Constant Refill
The flush valve sits at the bottom of the tank and controls the release of water into the bowl when you flush. A rubber flapper seals the opening, preventing water from leaking out of the tank.
Over time, this flapper can deteriorate, warp, or become coated with mineral deposits, creating a partial or incomplete seal.
When the flush valve leaks, even slightly, it causes water to continuously drain from the tank into the bowl.
In response, the fill valve kicks in to replenish the lost water. This constant, albeit slow, refill process can cause the fill valve to strain, producing that annoying whistle. Essentially, the fill valve is working overtime trying to compensate for the leak.
Water Pressure: The Force Behind the Fiasco
The water pressure in your home plays a significant role in how your toilet operates. Excessively high water pressure can put a strain on all plumbing fixtures, including the toilet.
This added pressure can force water through the fill valve with excessive force, causing vibrations and noise.
Many homes have a Pressure Reducing Valve (PRV) to regulate incoming water pressure. If the PRV malfunctions or is improperly set, it can lead to pressure spikes that stress the toilet’s components.
It’s worth noting that water pressure issues can affect more than just your toilet. Check other fixtures like faucets and showerheads for unusual noises or leaks that might point to an issue with your PRV or overall water pressure.
Sediment and Mineral Buildup: The Silent Saboteurs
Don’t underestimate the impact of sediment and mineral deposits. Over time, minerals like calcium and magnesium can accumulate inside the toilet tank and within the fill and flush valves.
This buildup can obstruct water flow, leading to turbulence and whistling. Sediment can also damage the valve components, accelerating wear and tear and contributing to leaks.
DIY Diagnosis: Pinpointing the Source of the Whistle
Now that you have a better understanding of the common causes behind a whistling toilet, it’s time to roll up your sleeves and play detective. Accurately identifying the source of the noise is crucial for choosing the correct solution. The following steps will guide you through a simple, yet effective diagnostic process.
Observing the Refill Process: Listen and Watch
The first step is all about observation. After flushing the toilet, carefully watch and listen as the tank refills. Where does the sound seem to be originating from?
-
Focus on the Fill Valve: Is the whistle coming directly from the fill valve assembly? Place your ear close to it (without touching!) to get a better sense.
-
Check for Vibrations: Sometimes, you can feel the vibration that’s causing the sound. Gently touch the fill valve and connecting pipes to see if you can detect any unusual movement.
-
Note the Timing: When does the whistle occur during the refill cycle? Does it happen only at the beginning, throughout the entire process, or just as the tank is nearly full? This can provide clues about the specific issue.
Flush Valve Leak Check: The Silent Culprit
A leaky flush valve can be deceptively quiet, yet it can force the fill valve to constantly top off the tank, leading to a whistle. Here’s how to check:
-
Dye Test: Add a few drops of food coloring (any color except yellow) to the toilet tank.
-
Wait: Do not flush the toilet. Wait for about 20-30 minutes.
-
Inspect the Bowl: After the waiting period, check the toilet bowl. If you see colored water in the bowl, it means water is leaking from the tank through the flush valve.
Even a small leak can be the reason your fill valve is working overtime and creating that annoying whistle.
Water Pressure Considerations: A Job for the Pros
Excessive water pressure can put a strain on all your plumbing fixtures, including your toilet. Ideally, your home water pressure should be between 40 and 60 PSI (pounds per square inch).
Unfortunately, most homeowners don’t have a water pressure gauge readily available.
-
If you have a gauge: Locate your water pressure gauge (usually near the main water shut-off valve). Check the reading. If it’s consistently above 60 PSI, this could be contributing to the problem, and you may need a Pressure Reducing Valve (PRV) installed.
-
If you don’t have a gauge: Do not attempt to install one yourself unless you have plumbing experience. Instead, if you suspect high water pressure, it’s best to call a licensed plumber. They can accurately measure the pressure and recommend appropriate solutions.
Ignoring high water pressure can lead to more than just a whistling toilet; it can damage pipes and appliances throughout your home.
Visual Inspection of the Fill Valve: Look for Clues
Even if the fill valve seems to be the source of the noise, a closer visual inspection can reveal the underlying cause.
-
Check for Mineral Buildup: Look for white or greenish deposits around the fill valve, especially near the water inlet. Mineral buildup can restrict water flow and cause whistling.
-
Inspect for Damage: Carefully examine the fill valve for any cracks, breaks, or other signs of physical damage. Worn or damaged components can vibrate and create noise.
-
Examine the Float: Ensure the float (the part that rises with the water level) is moving freely and not getting caught on anything. A stuck float can prevent the valve from shutting off properly.
By carefully observing, testing, and inspecting, you can significantly narrow down the source of the whistling and determine the best course of action to restore peace and quiet to your bathroom.
Easy Fixes: Simple Solutions to Stop the Noise
So, you’ve diligently investigated and pinpointed the likely source of that incessant whistling. Now comes the rewarding part: implementing some easy fixes to restore peace and quiet to your bathroom. The good news is that many common toilet whistling issues can be resolved with simple DIY solutions, saving you the expense of a plumber’s visit.
Replacing the Fill Valve: A Common Remedy
The fill valve, responsible for refilling the tank after a flush, is a frequent culprit behind whistling noises. Over time, its internal components can wear out, vibrate, or become clogged with sediment, leading to that irritating sound. Replacing it is a relatively straightforward process.
Gathering Your Tools
Before you begin, gather the necessary tools. You’ll typically need:
- An adjustable wrench.
- A screwdriver (usually both Phillips and flathead).
- A new fill valve kit (make sure it’s compatible with your toilet model).
- A small bucket or towel (to catch any spills).
Step-by-Step Replacement
- Shut Off the Water Supply: This is crucial. Locate the shut-off valve behind the toilet (usually near the floor) and turn it clockwise until it’s completely closed.
- Flush the Toilet: This empties the tank, making the next steps easier and preventing water from spilling everywhere.
- Disconnect the Water Supply Line: Use your adjustable wrench to loosen the nut connecting the water supply line to the fill valve. Have your bucket or towel ready to catch any remaining water in the line.
- Remove the Old Fill Valve: Depending on the model, the fill valve is usually secured with a lock nut underneath the tank. Use your wrench to loosen this nut, then carefully remove the old fill valve from inside the tank.
- Install the New Fill Valve: Follow the instructions included with your new fill valve kit. Generally, this involves inserting the new valve into the tank, securing it with the lock nut, and connecting the float arm or cup. Ensure all connections are snug but not overtightened.
- Reconnect the Water Supply Line: Reattach the water supply line to the new fill valve, tightening the nut with your wrench.
- Turn the Water Supply Back On: Slowly open the shut-off valve and watch for any leaks around the connections. If you see any, tighten the connections further.
- Adjust the Water Level: Most fill valves have an adjustment mechanism to control the water level in the tank. Adjust it according to the instructions in your kit, ensuring the water level is below the overflow tube.
- Flush and Test: Flush the toilet several times to ensure it’s filling and flushing properly, and that the whistling noise is gone.
Addressing the Flush Valve Flapper
A worn or damaged flush valve flapper can also contribute to a whistling toilet. If the flapper isn’t creating a tight seal, water will constantly leak into the bowl, causing the fill valve to refill intermittently and potentially whistle.
Cleaning the Flapper
Sometimes, a simple cleaning is all that’s needed.
- Shut off the water supply and flush the toilet to empty the tank.
- Detach the flapper from its mounting points.
- Clean the flapper and the flush valve seat (the area where the flapper sits) with a mild abrasive cleaner or a scrub brush to remove any mineral buildup or debris.
- Reattach the flapper and test the flush.
Replacing the Flapper
If cleaning doesn’t solve the problem, the flapper may need to be replaced.
- Purchase a new flapper that’s compatible with your toilet model.
- Detach the old flapper and install the new one, following the instructions on the packaging.
- Test the flush to ensure the new flapper is creating a tight seal.
Adjusting the Water Level
An improperly adjusted water level can also lead to whistling. If the water level is too high, it can cause the fill valve to constantly try to shut off, leading to vibrations and noise.
Locate the water level adjustment mechanism on your fill valve. This is usually a screw or clip that allows you to raise or lower the float. Experiment with slight adjustments until the water level is below the overflow tube and the whistling stops.
Flushing the Tank to Remove Sediment
Sediment and mineral buildup can accumulate in the toilet tank over time, clogging the fill valve and other components. Flushing the tank can help remove this debris.
- Shut off the water supply to the toilet.
- Flush the toilet and hold down the flush lever to completely empty the tank.
- Use a sponge or brush to scrub the inside of the tank, dislodging any loose sediment.
- Turn the water supply back on and allow the tank to refill.
- Flush the toilet several times to flush out any remaining sediment.
By following these easy fixes, you can often eliminate that annoying whistling sound and restore your toilet to proper working order. Remember to always prioritize safety by shutting off the water supply before working on any plumbing components.
So, with a bit of elbow grease and the right tools, many whistling toilet woes can be silenced. But, there comes a point where the DIY spirit should yield to professional expertise. Knowing when to call a plumber isn’t a sign of defeat; it’s a smart move that can save you time, money, and potential plumbing disasters.
When to Call a Pro: Recognizing the Limits of DIY
While tackling minor toilet repairs can be empowering, it’s essential to recognize the boundaries of your DIY abilities. Certain plumbing issues demand the specialized knowledge and tools that only a licensed plumber possesses. Attempting to fix these problems yourself could lead to further damage, costly repairs, and even safety hazards.
Complex Plumbing Problems: Beyond the Basics
Some plumbing issues are simply too complex for the average homeowner to handle. These often involve problems within the walls, the main water line, or the sewer system.
Dealing with these issues requires specialized tools and expertise to diagnose and resolve the underlying cause effectively.
For instance, if you suspect a blockage in your main sewer line, attempting to clear it yourself with a store-bought drain snake could worsen the problem and potentially damage the line. Similarly, repairing a leaking water pipe within a wall requires specialized tools and knowledge to avoid further water damage and mold growth.
Ignoring these problems or attempting a superficial fix is akin to putting a band-aid on a burst dam.
The Persistent Whistle: When DIY Isn’t Enough
If you’ve tried replacing the fill valve, cleaning the flush valve, and adjusting the water level, yet the toilet continues to whistle, it’s time to call a plumber.
A persistent whistling sound despite your best efforts indicates a deeper, more complex issue that requires professional diagnosis.
It could be a sign of a hidden leak, a problem with the water pressure regulator, or even an issue with the plumbing within your walls.
Don’t let the annoying sound lull you into complacency. A professional can find the hidden cause that evades the DIY approach.
Taming the Water Hammer: A Job for the Experts
A "water hammer" is a loud banging noise that occurs when water flow is suddenly stopped, creating a pressure surge in the pipes. While a whistling toilet may simply be an annoyance, water hammer can damage your pipes and appliances over time.
A water hammer arrestor is a device that absorbs this pressure surge, preventing the banging and protecting your plumbing system. However, installing a water hammer arrestor requires cutting into the water pipes, which is a task best left to a qualified plumber.
Incorrect installation could lead to leaks, further damage, and even void your home insurance.
Choosing the right size and type of arrestor also requires the expertise of a professional.
Water Pressure Woes: Gauging Your Limits
If you suspect that high water pressure is the cause of your whistling toilet, it’s best to consult a plumber. While some homes have a pressure gauge that homeowners can read, interpreting the readings and adjusting the pressure requires specialized knowledge.
A faulty Pressure Reducing Valve (PRV) can cause excessively high water pressure, straining toilet components and causing whistling.
Adjusting or replacing a PRV requires specialized tools and expertise to ensure proper functionality and prevent damage to your plumbing system. A plumber can accurately measure your water pressure and recommend the appropriate solutions.
The Risks of Incorrect Plumbing Repairs: Safety First
Attempting plumbing repairs without the proper knowledge and skills can be dangerous. Working with water and pipes can expose you to potential hazards, such as:
- Water Damage: Incorrectly installed pipes or fittings can lead to leaks, causing water damage to your walls, floors, and ceilings.
- Mold Growth: Water damage can create a breeding ground for mold, which can pose serious health risks.
- Electrical Hazards: If water comes into contact with electrical wiring, it can create a risk of electrocution.
- Scalding: Hot water pipes can cause severe burns if handled improperly.
- Contamination: Incorrectly installed backflow preventers can allow contaminated water to flow back into your clean water supply.
Plumbing is more than connecting pipes. It’s an intricate system with potential dangers if not handled correctly.
Moreover, building codes and regulations often govern plumbing work. A licensed plumber is familiar with these codes and will ensure that your repairs are up to standard. Improper repairs can lead to fines or even require you to redo the work.
By recognizing the limits of your DIY abilities and seeking professional help when needed, you can protect your home, your health, and your wallet. A qualified plumber can diagnose and resolve complex plumbing issues safely and effectively, giving you peace of mind knowing that your plumbing system is in good hands.
Ignoring these problems or attempting a superficial fix is akin to putting a band-aid on a burst dam. Now, let’s consider what steps we can take to avoid these noisy intrusions altogether, and ensure our toilets remain silent and efficient.
Preventative Measures: Keeping Your Toilet Quiet
A whistling toilet, as we’ve explored, is often a symptom of neglect or the gradual wear and tear on its components. But the good news is that with a little proactive care, you can significantly reduce the likelihood of this annoying issue cropping up. Think of it as regular maintenance for your plumbing system, much like changing the oil in your car. Prevention, in this case, truly is better – and quieter – than cure.
Regular Tank Flushing: Banishing Sediment Buildup
One of the simplest and most effective preventative measures is to periodically flush out the toilet tank. Over time, sediment, minerals, and other debris can accumulate at the bottom of the tank. This buildup can interfere with the proper functioning of the fill and flush valves, leading to leaks, clogs, and, you guessed it, that telltale whistle.
Flushing the tank is a straightforward process:
- Turn off the water supply to the toilet using the shut-off valve located behind the toilet.
- Flush the toilet and hold down the handle until all the water has drained from the tank.
- With the tank empty, use a sponge or brush to scrub the bottom and sides of the tank to remove any loose sediment.
- Turn the water supply back on and allow the tank to refill. This will flush out any remaining debris.
This simple act, performed every few months, can make a significant difference in the lifespan and performance of your toilet’s components.
Periodic Valve Inspections: A Proactive Approach
In addition to regular flushing, it’s wise to periodically inspect the fill and flush valves for signs of wear, damage, or mineral buildup. Look for cracks, corrosion, or any other visible issues. Pay close attention to the flapper at the bottom of the flush valve, ensuring it creates a tight seal when closed.
A worn or damaged flapper is a common cause of leaks, which can trigger the fill valve to constantly refill the tank, leading to that incessant whistling. If you notice any issues, replacing the affected valve is a relatively inexpensive and straightforward repair that can prevent more serious problems down the line. It’s better to catch a failing part early than deal with an emergency repair.
Monitoring Water Pressure: Catching Problems Early
Excessively high water pressure can put undue strain on your toilet’s components, accelerating wear and tear and increasing the risk of leaks and whistling. While most homeowners don’t have a water pressure gauge readily available, it’s worth having your water pressure checked by a plumber, especially if you live in an area known for high water pressure.
Ideally, your home’s water pressure should be between 40 and 60 psi. If it exceeds this range, a Pressure Reducing Valve (PRV) can be installed to regulate the pressure and protect your plumbing system. This is generally a job best left to a professional, as incorrect installation can lead to further complications.
Water Softening Systems: Combating Hard Water
If you live in an area with hard water, which is water with a high mineral content, installing a water softening system can be a worthwhile investment. Hard water can cause mineral buildup in your toilet tank and plumbing system, contributing to clogs, leaks, and that irritating whistle.
Water softeners work by removing minerals like calcium and magnesium from the water, preventing them from accumulating in your pipes and appliances. While the initial cost of a water softening system may seem significant, it can save you money in the long run by extending the life of your plumbing system and reducing the need for repairs.
So, next time those water pipes whistle when toilet is flushed, don’t panic! Give these tips a try, and hopefully, you’ll be back to flushing in peace in no time. Happy tinkering!