DIY enthusiasts often seek cost-effective and versatile materials for their projects, leading them to discover the incredible potential in furring strip board uses. Home improvement projects such as creating shelving, or furniture framing becomes accessible when using this often overlooked material. Lumber yards typically stock a wide selection of furring strips, making them easily obtainable for projects both large and small, that can bring a touch of craftsmanship.
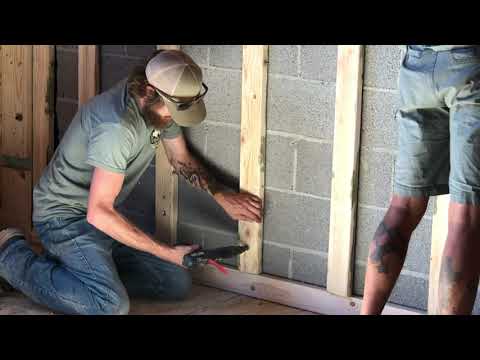
Image taken from the YouTube channel Teams on Beams , from the video titled How to attach wood to a concrete block IN SECONDS! .
Optimizing Article Layout: "Furring Strip Board Uses: 7 Genius DIY Projects You Need!"
This breakdown details the best layout for an article titled "Furring Strip Board Uses: 7 Genius DIY Projects You Need!", ensuring it’s engaging, informative, and practical for readers interested in DIY projects using furring strips.
Introduction: Hooking the Reader and Setting Expectations
The introduction is crucial for grabbing attention. It should achieve the following:
- Define Furring Strips: Briefly explain what furring strips are – their composition (typically inexpensive softwood), dimensions (common sizes), and availability (easily found at hardware stores). Avoid overly technical definitions.
- Highlight Versatility: Emphasize the unexpected versatility of furring strips and their affordability, hinting at the projects to come.
- State the Article’s Purpose: Clearly state that the article will showcase seven creative DIY projects using furring strips, promising practical and budget-friendly ideas.
- Engage with a Question: Consider opening with a question like: "Looking for budget-friendly ways to upgrade your home decor and organization? Look no further than the humble furring strip!"
Understanding Furring Strips: A Mini-Guide
Before diving into the projects, provide some essential background information.
Types of Furring Strips
- Briefly discuss common wood types used for furring strips (e.g., pine, fir).
-
Mention variations in thickness and width. A small table showcasing common sizes can be helpful:
Size (inches) Common Use 1×2 Framing, leveling 1×3 Siding attachment, creating a grid 1×4 Creating deeper ledges, general construction
Working with Furring Strips: Tips and Tricks
- Cutting: Emphasize the importance of accurate cuts and using the correct tools (saw, miter box).
- Fastening: Detail appropriate fasteners: nails (various types), screws (wood screws), and adhesives (wood glue).
- Finishing: Discuss options like painting, staining, or sealing the wood for protection and aesthetics. Highlight the need for sanding before finishing.
Project Showcase: 7 Genius DIY Ideas
This section forms the core of the article, where each project receives dedicated attention.
Consistent Structure for Each Project
Maintain a consistent structure for each of the seven projects to ensure clarity and ease of use for the reader. Each project description should include:
-
Project Title: A descriptive title that highlights the project’s function or style (e.g., "Rustic Pallet-Style Headboard," "Modern Geometric Wall Art").
-
Project Image: A high-quality, visually appealing photograph of the finished project.
-
Materials List: A comprehensive list of all materials needed, including:
- Quantity of furring strips.
- Specific fasteners (nails, screws, glue).
- Finishing materials (paint, stain, sealer).
- Any additional items (e.g., fabric for upholstery, hardware for hanging).
-
Tools List: A list of all tools required for completing the project. This might include:
- Saw (hand saw, circular saw, miter saw)
- Measuring tape
- Pencil
- Drill/Screwdriver
- Sanding block or sander
- Clamps
- Safety glasses
-
Step-by-Step Instructions: Clear, concise, and numbered instructions for completing the project. Each step should be easily understandable, even for beginners. Break down complex steps into smaller, more manageable tasks. Include visual aids (photos or illustrations) for each step whenever possible.
-
Difficulty Level: Indicate the project’s difficulty (e.g., Beginner, Intermediate, Advanced).
-
Estimated Time: Provide an estimate of the time required to complete the project.
Example Project Layout: Rustic Photo Display
-
Project Title: Rustic Photo Display
-
Project Image: [Insert Image of Rustic Photo Display]
-
Materials List:
- 4 Furring Strips (1x2x8)
- Small Clothespins
- Wood Glue
- Stain (optional)
- Screws (optional, for added support)
-
Tools List:
- Saw
- Measuring Tape
- Pencil
- Sandpaper
- Clamps
-
Step-by-Step Instructions:
- Cut the furring strips to the desired lengths. (e.g., four 24-inch lengths)
- Sand the edges of the furring strips to remove any splinters.
- Arrange the furring strips in a rectangle shape.
- Apply wood glue to the corners of the rectangle where the furring strips meet.
- Clamp the corners together and let the glue dry completely. (Use screws for extra strength, if desired)
- Stain the wood (optional).
- Attach clothespins to the furring strips using glue or small screws. These will hold the photos.
-
Difficulty Level: Beginner
-
Estimated Time: 1 hour
Optimizing for Search Engines (SEO Considerations)
- Keyword Integration: Naturally incorporate the main keyword "furring strip board uses" and related keywords (e.g., "DIY projects," "budget home decor," "woodworking projects") throughout the article, especially in headings and the introduction.
- Image Optimization: Use descriptive alt text for all images, including relevant keywords.
- Internal Linking: Link to other relevant articles on your website where appropriate.
- External Linking: Link to reputable sources when referencing specific techniques or materials.
- Readability: Use short paragraphs, clear headings, and bullet points to improve readability.
FAQs: Furring Strip Board Uses in DIY Projects
Got questions about putting those furring strips to work? Here are some common queries answered.
What exactly is a furring strip board?
Furring strips are thin strips of wood, typically pine, used to create a level surface for attaching other materials. They’re inexpensive and versatile, making them great for all sorts of DIY projects.
Are furring strips only for wall projects?
No, not at all! While furring strips are commonly used on walls to create a framework for drywall or paneling, their versatility extends far beyond. The "Furring Strip Board Uses: 7 Genius DIY Projects You Need!" article highlights creative alternatives for shelves, frames, and even decor.
How strong are projects made with furring strips?
The strength of a project depends on the design, construction, and type of furring strip board used. Generally, furring strips are best suited for lighter-duty projects. Reinforcing connections with glue and screws is key. For heavier loads, consider thicker lumber.
Where can I buy furring strips?
You can find furring strip board uses at most home improvement stores like Home Depot or Lowe’s, or at lumber yards. They are typically sold in various lengths. Be sure to inspect them for straightness and any defects before purchasing.
So, what are you waiting for? Get out there and explore the exciting world of furring strip board uses! I can’t wait to see what you create!