Experiencing a keypad lockout with your LiftMaster garage door can be frustrating, but understanding the underlying issue empowers you to regain access quickly. LiftMaster, a leading manufacturer of garage door openers, integrates keypads for convenient entry. A common cause is accidental activation of the lock feature, preventing operation from the keypad. Successfully reset liftmaster garage door opener keypad involves understanding the correct sequence of button presses, often referencing the user manual for specific models. Troubleshooting keypad issues efficiently can also prevent unnecessary service calls from professional installers.
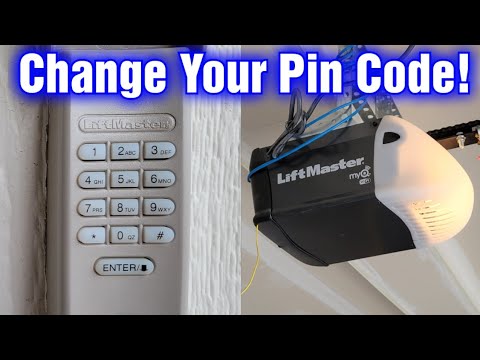
Image taken from the YouTube channel Todd’s Garage , from the video titled How To Change Your Keypad Pin Code On A Liftmaster Garage Door .
Unlocking Your LiftMaster Garage Door Keypad: A Quick Reset Guide
Few things are more frustrating than standing in your driveway, groceries in hand, only to find your garage door keypad unresponsive. You punch in your code, maybe once, maybe twice, but the door remains stubbornly closed. This common scenario, a LiftMaster garage door keypad lockout, can quickly turn a minor inconvenience into a major headache.
The frustration stems not just from the immediate barrier to entry, but also the feeling of helplessness. Are you locked out indefinitely? Do you need to call a professional? The good news is, in many cases, the solution is surprisingly simple: a quick reset.
Why a Quick Reset Matters
Knowing how to quickly reset your LiftMaster keypad is essential for several reasons.
First, it saves you time and stress. Instead of waiting for the lockout period to expire (which can be surprisingly long), you can regain access in a matter of minutes.
Second, it avoids potential security risks. A locked-out keypad might tempt some to seek alternative, less secure entry methods.
Finally, it empowers you to maintain control over your property. Understanding the reset process allows you to address the problem yourself, without relying on outside assistance.
Your Guide to Regaining Access
This article serves as your comprehensive guide to resetting your LiftMaster garage door keypad. We will walk you through the process step-by-step, providing clear instructions and helpful tips along the way. Our goal is to equip you with the knowledge and confidence to tackle this issue efficiently and effectively.
Understanding Lockout Mode: Why Your Keypad Stopped Working
So, you’re staring at a seemingly lifeless keypad, wondering what went wrong. Before you start questioning your memory or the device’s reliability, it’s crucial to understand the concept of lockout mode.
Lockout mode is a built-in security feature designed to prevent unauthorized access to your garage. Think of it as the keypad’s way of saying, "I suspect someone’s trying to guess the code."
What Triggers Lockout Mode?
The primary trigger for lockout mode is typically entering an incorrect code multiple times in a row.
The specific number of incorrect attempts that activate lockout can vary slightly depending on the LiftMaster model, but it’s usually around three to five.
After exceeding this limit, the keypad will temporarily disable itself to deter further guessing.
This measure helps prevent someone from repeatedly trying different combinations in an attempt to gain entry to your garage.
Identifying Lockout Mode: The Tell-Tale Signs
Recognizing the symptoms of lockout mode is the first step toward resolving the issue. Here are some common indicators:
- Unresponsive Keypad: The keypad may not respond at all when you press the buttons.
- Flashing Light: A red or amber light may be flashing continuously. This is a common visual cue indicating lockout.
- Delayed Response: Even after entering the correct code, there might be a significant delay before the garage door opener activates, or it might not activate at all.
- Error Sounds: You might hear a series of beeps or error sounds when you attempt to enter a code.
Why Resetting is Better Than Waiting
While lockout mode is temporary, waiting for it to expire can be frustrating and inconvenient.
The duration of the lockout period also varies based on the model but can range from a few minutes to upwards of an hour.
Why waste valuable time waiting when you can regain access much faster?
Resetting the keypad offers a more efficient solution, allowing you to bypass the lockout period and reprogram your security code immediately.
This proactive approach ensures minimal disruption to your routine and eliminates the need to stand around impatiently.
Furthermore, attempting to use alternative (potentially risky) ways of entering the garage while waiting for the lockout to expire can be avoided, keeping your garage more secure.
The Reset Process: A Step-by-Step Guide to Regaining Access
Having identified the tell-tale signs of lockout mode, it’s time to take action and restore access to your garage. Resetting your LiftMaster keypad is a straightforward process, but it requires careful attention to detail. Follow these steps meticulously to ensure a successful outcome.
Safety First: Prioritize Your Well-being
Before you begin, consider a crucial safety precaution. If you feel uncomfortable working with electrical devices, or if your garage door opener is exhibiting unusual behavior (strange noises, erratic movements), immediately disconnect the unit from its power source. This simple step can prevent potential electrical shocks or further damage to the opener.
Locating the Elusive Reset Button
The reset button is your key to bypassing the lockout. However, its location isn’t always obvious. On most LiftMaster keypads, you’ll find it in one of these places:
- On the back of the Keypad: Some models have a small, recessed button on the rear casing.
- Underneath the Cover: Others conceal the reset button beneath the protective cover that shields the keypad from the elements. You may need to gently pry open the cover to access it.
Carefully inspect your keypad and consult your user manual if you are having trouble locating the reset button. A small screwdriver or similar tool may be necessary to access the button, but avoid using excessive force.
The Art of the Press and Hold
Once you’ve located the reset button, the next step is to press and hold it. But there’s a technique to this, it is not simply just pressing the button:
- Using a pen or other pointed object (if the button is recessed), firmly press and hold the reset button.
- Maintain constant pressure.
- The duration for which you need to hold the button can vary depending on the model.
-
A general rule of thumb is to hold it for 5 to 10 seconds.
The key is to be patient and maintain consistent pressure throughout the process.
Deciphering the Light Show
Indicator lights are your visual guide during the reset process. Pay close attention to their behavior:
- During the Press: As you hold the reset button, the LED light on the keypad will likely blink or change color. This indicates that the reset process has been initiated.
-
After the Reset: Once the reset is complete (after the 5-10 seconds of holding the button), the LED light may turn off briefly, then turn back on, or it may blink in a different pattern. The exact behavior varies.
The goal is to observe a change in the light pattern that signals a successful reset. If the light remains unchanged after holding the button for the specified duration, repeat the process, ensuring you are applying firm and consistent pressure. If issues persist, ensure the battery is not low and try again, or seek professional help.
Reprogramming Your Keypad: Setting Up New Security Codes
With the keypad successfully reset, you’ve essentially wiped its memory clean. This means the existing security codes, which previously granted access to your garage, are now gone. Reprogramming the keypad with a new, secure code is absolutely crucial to maintaining the security of your garage and home.
Why Reprogramming is Necessary
Think of the reset process as a factory reset on your smartphone. It returns the device to its original, out-of-the-box state. Just as you wouldn’t leave a freshly reset phone without a password, you shouldn’t leave your garage door keypad without a newly programmed code.
Leaving the keypad un-programmed leaves your garage vulnerable.
Anyone could potentially program their own code and gain access.
Step-by-Step Programming Instructions
The exact programming procedure can vary slightly depending on your specific LiftMaster keypad model. Always refer to your user manual for the most accurate instructions. If you’ve misplaced your manual, you can usually find a digital version on the LiftMaster website by searching for your model number.
However, a general outline of the process is as follows:
-
Enter Program Mode: Typically, this involves pressing and holding the " * " or "#" button until the keypad’s indicator light begins to blink. Some models might require you to first enter a factory default code (often found in the manual).
-
Enter Your New Code: Key in your desired security code (usually 4-6 digits). Be sure to write this down in a secure location.
-
Press the "Enter" or "#" Button: This confirms your new code and signals the keypad to store it.
-
Test the Code: After programming, immediately test the new code to ensure it works correctly. Open and close your garage door using the keypad.
Finding Your User Manual Online
As mentioned, the LiftMaster website is your best resource for finding a digital copy of your keypad’s user manual. Simply visit their support section and search for your specific model number. The manual will provide detailed, model-specific instructions for programming and troubleshooting.
The Importance of Strong, Unique Security Codes
When choosing a new security code, avoid easily guessable combinations like "1234," "0000," or your birthdate. These are prime targets for would-be intruders.
Instead, opt for a longer code (if your keypad allows) that combines random numbers.
Consider using a code that you can easily remember but is difficult for others to figure out.
For example, a combination of meaningful dates interspersed with random numbers can be effective. Also, change your code periodically (every few months) to further enhance security.
With your keypad reprogrammed and sporting a fresh, secure code, you’re one step closer to reliable garage access. But there’s another vital component that often gets overlooked: the battery. Just like any electronic device, your LiftMaster keypad relies on a healthy power source to function correctly.
Battery Health: Ensuring Reliable Keypad Performance
The performance of your LiftMaster garage door keypad is inextricably linked to the health of its battery. A weak or dead battery can manifest in a variety of frustrating ways, hindering your ability to access your garage. Addressing battery issues proactively is key to avoiding unexpected lockouts and maintaining seamless operation.
How Low Batteries Affect Keypad Functionality
A low or dead battery can wreak havoc on your keypad’s performance. Instead of reliably opening your garage door, you might encounter the following issues:
-
Unresponsiveness: The keypad may become completely unresponsive, failing to register button presses.
-
Intermittent Operation: The keypad might work sporadically, opening the door sometimes but failing at other times. This inconsistency can be particularly frustrating.
-
Reduced Range: The keypad’s signal strength may diminish, requiring you to stand closer to the garage door opener for it to function.
-
Incorrect Code Acceptance: In some cases, the keypad might incorrectly accept or reject your code due to insufficient power.
Essentially, a weak battery undermines the keypad’s ability to communicate effectively with the garage door opener. This can lead to missed signals, garbled transmissions, and, ultimately, a failure to operate the door.
Replacing the Keypad Battery: A Step-by-Step Guide
Replacing the battery in your LiftMaster keypad is a straightforward process. However, always consult your user manual for model-specific instructions before proceeding. Here’s a general guide:
-
Gather Your Supplies: You’ll need a replacement battery. Most LiftMaster keypads use a 9-volt battery, but double-check your manual to confirm the correct type. Also, have a small Phillips head screwdriver handy.
-
Locate the Battery Compartment: The battery compartment is typically located on the back of the keypad or underneath a small, removable cover.
-
Remove the Old Battery: Use the screwdriver to open the battery compartment. Carefully disconnect the old battery from the terminals.
-
Install the New Battery: Connect the new battery to the terminals, ensuring proper polarity (+ and -).
-
Close the Compartment: Replace the battery compartment cover and secure it with the screw.
-
Test the Keypad: Enter your security code to verify that the keypad is functioning correctly. The indicator light should illuminate, and the garage door should open.
Visual Aid: Refer to your LiftMaster keypad’s user manual or search online for model-specific videos demonstrating the battery replacement procedure. Visual aids can be incredibly helpful in clarifying the process.
Choosing the Right Battery for Optimal Performance
Not all batteries are created equal. Investing in a high-quality battery can significantly improve your keypad’s reliability and lifespan. Consider the following when choosing a replacement:
-
Alkaline Batteries: Alkaline batteries are a good general-purpose choice for garage door keypads.
-
Lithium Batteries: Lithium batteries offer superior performance and longevity, especially in extreme temperatures. They are a worthwhile investment if you live in an area with hot summers or cold winters.
-
Battery Expiration Date: Always check the expiration date on the battery packaging to ensure freshness.
By prioritizing battery health and opting for quality replacements, you can ensure that your LiftMaster keypad remains a reliable and convenient way to access your garage. Don’t underestimate the power of a fresh battery!
With your keypad reprogrammed and sporting a fresh, secure code, you’re one step closer to reliable garage access. But there’s another vital component that often gets overlooked: the battery. Just like any electronic device, your LiftMaster keypad relies on a healthy power source to function correctly.
Troubleshooting: Addressing Common Post-Reset Issues
Resetting your LiftMaster garage door keypad is often the key to unlocking a smooth and functional entry. However, like any technical process, hiccups can occur. Understanding how to troubleshoot common post-reset issues can save you time and frustration.
Keypad Not Responding After Reset
One of the most disheartening scenarios is a keypad that refuses to respond after a reset. You press the buttons, but nothing happens. Here’s what to investigate:
-
Check the Batteries (Again): Even if you recently replaced them, ensure the batteries are correctly installed and are making proper contact. Sometimes, a seemingly new set can be defective.
-
Confirm Power to the Opener: Rule out a power outage or a tripped circuit breaker affecting the garage door opener itself. The keypad won’t work if the opener isn’t receiving power.
-
Examine the Keypad’s Condition: Look for any visible damage to the keypad, such as cracked buttons or a compromised circuit board. If damage is present, the keypad may need replacing.
-
Try Re-Pairing: On occasion, the reset process might require you to re-pair the keypad with the garage door opener receiver. Consult your LiftMaster user manual for specific pairing instructions.
Keypad Accepts Code, But the Door Doesn’t Open
In this scenario, the keypad acknowledges your code, often with a confirming light or sound, but the garage door remains stubbornly shut. This points to a communication breakdown between the keypad and the opener.
Addressing Communication Problems
-
Check the Antenna: Make sure the antenna on your garage door opener is extended and free from obstructions. A weakened or blocked signal can prevent the opener from receiving the keypad’s signal.
-
Inspect Wiring: Examine the wiring connections between the garage door opener and the motor unit. Loose or damaged wires can disrupt the signal transmission.
-
Distance Issues: Even if the range was previously adequate, try standing closer to the garage door opener when entering the code. Environmental factors can sometimes interfere with the signal.
-
Frequency Interference: Other devices operating on similar frequencies (e.g., some wireless routers or baby monitors) can sometimes interfere with the keypad’s signal. Temporarily turn off potential sources of interference to see if it resolves the issue.
General Troubleshooting Tips and Advice
Beyond these specific scenarios, keep these general troubleshooting tips in mind:
-
Read the Manual: Your LiftMaster user manual is an invaluable resource. It contains specific troubleshooting steps and diagrams relevant to your model.
-
Double-Check Programming: Carefully review the keypad programming instructions. A small error in the programming sequence can prevent the keypad from functioning correctly.
-
Test with the Wall Control: If your garage door opener has a wall-mounted control, test it to ensure the opener itself is functioning properly. This will help you isolate whether the issue lies with the keypad or the opener.
-
Be Patient: Troubleshooting can sometimes be a process of elimination. Try one solution at a time and test the keypad after each attempt. Rushing through the process can lead to overlooked details.
By systematically addressing these common post-reset issues, you can often restore your LiftMaster garage door keypad to full functionality and regain convenient, secure access to your garage.
With your keypad reprogrammed and sporting a fresh, secure code, you’re one step closer to reliable garage access. But there’s another vital component that often gets overlooked: the battery. Just like any electronic device, your LiftMaster keypad relies on a healthy power source to function correctly.
Resetting your LiftMaster garage door keypad is often the key to unlocking a smooth and functional entry. However, like any technical process, hiccups can occur. Understanding how to troubleshoot common post-reset issues can save you time and frustration.
Keypad Not Responding After Reset
One of the most disheartening scenarios is a keypad that refuses to respond after a reset. You press the buttons, but nothing happens. Here’s what to investigate:
Check the Batteries (Again): Even if you recently replaced them, ensure the batteries are correctly installed and are making proper contact. Sometimes, a seemingly new set can be defective.
Confirm Power to the Opener: Rule out a power outage or a tripped circuit breaker affecting the garage door opener itself. The keypad won’t work if the opener isn’t receiving power.
Examine the Keypad’s Condition: Look for any visible damage to the keypad, such as cracked buttons or a compromised circuit board. If damage is present, the keypad may need replacing.
Try Re-Pairing: On occasion, the reset process might require you to re-pair the keypad with the garage door opener receiver. Consult your LiftMaster user manual for specific pairing instructions.
Keypad Accepts Code, But the Door Doesn’t Open
In this situation, the keypad appears to be working correctly – it accepts your code without issue. However, the garage door stubbornly refuses to budge.
When to Seek Professional Assistance: Recognizing Complex Problems
While this guide aims to empower you with the knowledge to tackle common LiftMaster keypad issues, there are times when the problem extends beyond a simple DIY fix. Recognizing these situations and knowing when to call in the experts can save you time, money, and potential frustration.
Persistent Problems Indicate Deeper Issues
If you’ve diligently followed the reset instructions, reprogrammed your keypad, checked the batteries, and explored the troubleshooting tips, yet the keypad still malfunctions, it’s a strong indicator that a more complex problem is at play.
Don’t keep banging your head against the wall.
Further, issues could be lurking within the garage door opener unit itself, the wiring, or the receiver. These problems require specialized knowledge and tools to diagnose and repair.
Electrical Issues: A Red Flag
Any suspicion of electrical problems should immediately prompt a call to a qualified professional. Never attempt to repair electrical components yourself unless you possess the necessary training and experience.
Garage door openers involve high-voltage circuits, and tampering with them can be extremely dangerous, leading to serious injury or even death.
Component Failure: Beyond a Simple Fix
Sometimes, the underlying issue stems from a failed component within the garage door opener or the keypad itself. This could include a malfunctioning circuit board, a damaged receiver, or a faulty motor. Identifying and replacing these components often requires specialized diagnostic equipment and expertise.
When to Contact a Professional
Here’s a clear checklist to help you determine when it’s time to call for professional assistance:
- You’ve tried all the troubleshooting steps and the keypad still doesn’t work.
- You suspect an electrical problem.
- You notice any signs of physical damage to the garage door opener or keypad.
- The garage door opener makes unusual noises or operates erratically.
- You’re uncomfortable working with electrical or mechanical components.
Who to Contact
When seeking professional help, consider the following options:
- A qualified garage door technician: Look for a reputable local company with experienced technicians who are familiar with LiftMaster products.
- LiftMaster Support: Contact LiftMaster directly for technical assistance or to find authorized service providers in your area. Their website provides valuable information.
Don’t hesitate to reach out for professional help. Your safety and the proper functioning of your garage door system are worth it.
Keypad Lockout FAQs: LiftMaster Garage Door Reset
Need clarity on your LiftMaster keypad lockout? Here are some quick answers:
Why did my LiftMaster garage door opener keypad lock me out?
LiftMaster keypads typically lockout after too many incorrect PIN entries. This is a security feature to prevent unauthorized access.
How long does the keypad lockout last?
The lockout duration varies depending on the model, but it’s often a few minutes. Patience is key! Avoid pressing buttons during this period.
How do I reset my LiftMaster garage door opener keypad after a lockout?
The simplest method is often to wait out the lockout period. If that fails, try removing and reinserting the battery. For advanced troubleshooting, consult your LiftMaster manual.
Will resetting the keypad erase my programmed PIN?
Not necessarily, but it’s possible. If resetting doesn’t restore function, you may need to reprogram your PIN by following the instructions in your LiftMaster user manual. Refer to your manual when you reset liftmaster garage door opener keypad.
So, next time your LiftMaster garage door keypad throws a fit, you’ll know exactly what to do! Hopefully, these tips helped you reset liftmaster garage door opener keypad. Happy garage-dooring!