Is your toilet acting up? A continuously running toilet, often involving the flapper mechanism and potentially the fill valve, is a common household annoyance. Troubleshooting toilet running doesn’t need to be a daunting task. In fact, following simple steps often resolves the issue without calling a professional plumber. This guide provides straightforward solutions to silence that persistent trickle, saving both water and money. Regular maintenance from services like Roto-Rooter also helps to keep your toilet and your wallet happy.
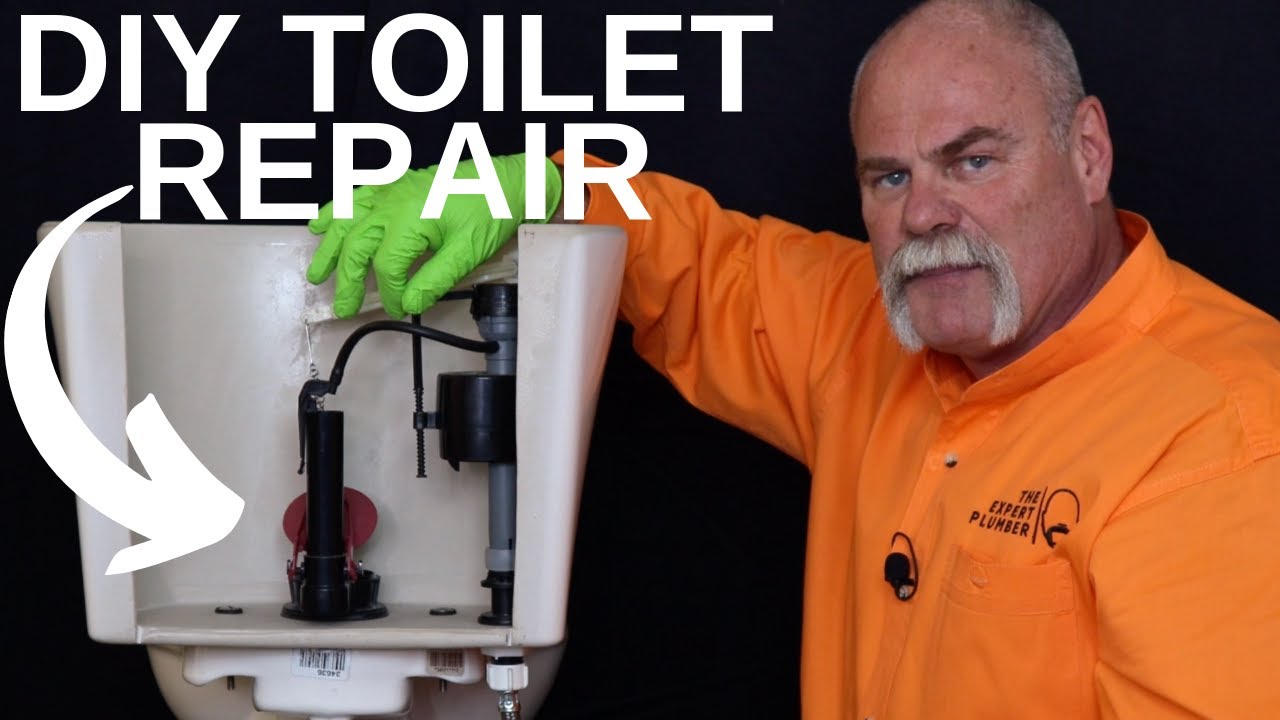
Image taken from the YouTube channel Roger Wakefield Plumbing Education , from the video titled How to Fix A Running Toilet GUARANTEED | DIY Plumbing Repair .
Silence the Flow – Stop Your Running Toilet Now!
A running toilet is more than just a minor household annoyance. That constant sound of trickling or gushing water can quickly escalate from a subtle irritation to a major source of stress.
Beyond the auditory disruption, a running toilet can silently and steadily drain your wallet and undermine your efforts to conserve water. Addressing this problem promptly is crucial, not only for your peace of mind but also for responsible resource management.
The Annoying Sound: Why a Running Toilet Needs Immediate Attention
The persistent sound of a running toilet, whether a faint trickle or a noticeable gurgle, can be incredibly distracting. Over time, this constant noise can disrupt sleep, make it difficult to concentrate, and generally contribute to a less relaxing home environment.
Ignoring the sound won’t make it go away; it will likely only get worse.
More importantly, the sound is a clear indicator of wasted water.
Impact on Your Water Bill and Water Conservation Efforts
A seemingly small leak in your toilet can translate into a significant amount of wasted water over time. Even a slow, steady trickle can add hundreds, if not thousands, of gallons to your water bill each month.
This not only increases your expenses but also contributes to unnecessary strain on local water resources.
In areas facing drought or water scarcity, fixing a running toilet becomes even more critical for environmental responsibility. Conserving water is a shared responsibility, and addressing a leaky toilet is a simple yet impactful way to contribute.
DIY Repair vs. Calling a Plumber: Knowing Your Limits
While many toilet repairs are relatively straightforward and can be tackled by the average homeowner, it’s essential to assess your skills and comfort level honestly. Simple fixes like replacing a flapper or adjusting the fill valve are often within reach for DIY enthusiasts.
However, more complex issues, such as a cracked tank or persistent problems after attempting initial repairs, may require the expertise of a licensed plumber.
Attempting a repair beyond your capabilities could potentially lead to further damage and higher repair costs in the long run.
Knowing when to call for professional help is just as important as knowing how to perform basic repairs.
Understanding Your Toilet’s Inner Workings: A Quick Anatomy Lesson
Before diving into the diagnosis and repair of a running toilet, it’s essential to understand the basic components that make up this essential household fixture. Think of your toilet as a simple machine; understanding its parts and how they interact will make troubleshooting significantly easier.
This section provides a basic overview of the components inside a toilet tank and how they function together to flush and refill. It demystifies the system, making it easier for readers to understand the potential causes of a running toilet.
Key Toilet Parts Explained: Tank, Bowl, and Beyond
The toilet can be broadly divided into two main parts: the tank and the bowl. The tank holds the water used for flushing, while the bowl is where waste is collected and then flushed away.
Understanding these key components will allow you to tackle repairs.
Connecting the two is the flush valve, which opens to release water from the tank into the bowl.
External Connections
Beyond the visible components, the toilet also has external connections, including the water supply line, which feeds water into the tank, and the drainpipe, which carries waste away.
The Roles of the Flapper, Fill Valve, and Flush Valve
Within the tank, several key components work together to control the flushing and refilling process.
The flapper is a rubber or silicone seal that covers the flush valve opening at the bottom of the tank. When you flush, the flapper lifts, allowing water to rush into the bowl.
The fill valve (also known as the ballcock) controls the flow of water into the tank after a flush.
It’s typically located on one side of the tank and has a float that rises with the water level. When the water reaches a certain level, the float shuts off the fill valve, stopping the water flow.
The flush valve is the opening at the bottom of the tank that the flapper seals against. When you push the handle, a chain lifts the flapper, opening the flush valve and allowing water to flow into the bowl.
How the Chain, Float, and Overflow Tube Coordinate
The chain connects the flush handle to the flapper. Its length is crucial; if it’s too long, it can get tangled, preventing the flapper from sealing properly. If it’s too short, it might not allow the flapper to open fully.
The float is connected to the fill valve and rises (or lowers, depending on the type) with the water level in the tank. As the water level rises, so does the float, eventually shutting off the fill valve when the tank is full.
The overflow tube is a vertical tube inside the tank that prevents the tank from overfilling. If the fill valve fails to shut off, the excess water will drain into the overflow tube and into the bowl, preventing water damage.
By understanding how these components work together, you’ll be better equipped to diagnose and fix a running toilet effectively. Remember, a little knowledge of your toilet’s anatomy can save you time, money, and frustration.
Diagnosing the Problem: Common Causes of a Running Toilet
Now that you have a grasp of your toilet’s inner workings, it’s time to put on your detective hat and pinpoint the reason behind that incessant running. A running toilet isn’t just an auditory nuisance; it’s a drain on your wallet and a waste of precious water. Fortunately, the culprit is often one of a few common issues. This section provides a systematic checklist to help you identify the source of the problem.
The Flapper: Worn Out, Misaligned, or Not Sealing?
The flapper, that crucial rubber or silicone seal at the bottom of the tank, is a prime suspect. Over time, it can become brittle, cracked, or warped, preventing it from forming a tight seal against the flush valve opening. This leads to water slowly leaking from the tank into the bowl, triggering the fill valve to refill the tank intermittently – hence, the running sound.
Inspecting and Testing Your Flapper for Leaks
Begin by visually inspecting the flapper. Look for any signs of wear and tear: cracks, discoloration, or a general deterioration of the material. Feel the flapper; is it still pliable, or has it become hard and inflexible?
Next, perform a simple dye test. Add a few drops of food coloring (avoid dark colors that could stain) to the tank water. Wait 15-20 minutes without flushing. If you see colored water seeping into the bowl, it confirms that the flapper is leaking.
You can also try gently cleaning the flapper and the flush valve seat (the surface it seals against) with a non-abrasive pad. Sometimes, a bit of debris is all that’s preventing a proper seal.
The Fill Valve: Failing to Shut Off Properly?
The fill valve’s job is to refill the tank after a flush and then shut off the water supply once the water reaches the correct level. If the fill valve malfunctions and doesn’t shut off completely, water will continuously flow into the tank, eventually overflowing into the overflow tube.
Adjusting the Fill Valve and Diagnosing Common Issues
Start by observing the fill valve during and after a flush. Does it shut off completely, or does water continue to trickle or spray? Locate the adjustment mechanism, usually a screw or clip, on the fill valve. Experiment with small adjustments to see if you can get the valve to shut off cleanly.
If adjusting doesn’t work, examine the fill valve for mineral buildup or debris that could be interfering with its operation. You might also check the valve’s float.
A float that’s damaged or stuck can cause the valve to overfill or not fill at all.
The Chain: Tangled, Too Long, or Disconnected?
The chain connects the flush lever to the flapper. Its length and condition are critical for proper flushing and sealing. If the chain is too long, it can get tangled or caught under the flapper, preventing it from sealing correctly. Conversely, if the chain is disconnected or too short, the flapper may not lift enough to allow a full flush.
Ensuring Proper Chain Length and Smooth Operation
Inspect the chain for kinks, rust, or tangles. Ensure it has enough slack to allow the flapper to seal completely, but not so much that it gets trapped underneath. Adjust the chain length by moving it to a different link on the flush lever or the flapper. The goal is to achieve a smooth, unobstructed pull that lifts the flapper fully and allows it to fall back into place correctly.
Water Level Issues: Too High, Leading to Overflow?
The water level in the tank is controlled by the float, which is connected to the fill valve. If the water level is set too high, it will continuously drain into the overflow tube, creating a running toilet.
Adjusting the Float to the Correct Water Level
Locate the float, which is typically a plastic ball or cylinder. Most floats have an adjustment screw or clip that allows you to raise or lower its position. Lowering the float will reduce the water level in the tank. Adjust the float until the water level is about an inch below the top of the overflow tube. Flush the toilet to test the new water level and make further adjustments if needed.
Mineral Deposits: Interfering with Seals and Mechanisms?
Hard water can leave behind mineral deposits, such as calcium and lime, which can accumulate on various toilet components, including the flapper, flush valve seat, and fill valve. These deposits can interfere with the proper sealing and operation of these parts, leading to leaks and a running toilet.
Identifying and Safely Removing Mineral Buildup
Look for white or chalky deposits on the flapper, flush valve seat, and fill valve. You can try gently scrubbing these areas with a non-abrasive pad and a limescale remover specifically designed for toilet bowls. In severe cases, you might need to soak the affected parts in vinegar or a descaling solution. Always follow the manufacturer’s instructions when using cleaning products and wear gloves to protect your hands.
Silent Leaks: Detecting and Addressing Hidden Water Waste
Sometimes, a running toilet doesn’t make any noticeable noise. These silent leaks can be particularly insidious, wasting significant amounts of water without your knowledge.
To check for a silent leak, perform the dye test described earlier, even if you don’t hear any running water. Also, inspect the area around the toilet for any signs of water damage, such as dampness or discoloration, which could indicate a leak in the bowl or the tank. If you suspect a silent leak but can’t pinpoint the source, it’s best to call a plumber for a professional inspection.
DIY Solutions: Step-by-Step Repair Guides
Now that you’ve diagnosed the reason behind your toilet’s incessant running, it’s time to roll up your sleeves and put your newfound knowledge to work. The following sections provide detailed, step-by-step guides to tackle each of the common problems we’ve discussed. Remember to turn off the water supply to the toilet before beginning any repairs.
Fixing a Faulty Flapper: Replacement and Adjustment Guide
A worn or misaligned flapper is one of the most frequent culprits behind a running toilet. Fortunately, it’s also one of the easiest fixes.
Steps to Replace a Flapper
-
Turn off the water supply: Locate the shut-off valve behind the toilet (usually near the floor) and turn it clockwise until the water stops flowing.
-
Flush the toilet: This will remove most of the water from the tank.
-
Detach the old flapper: Unhook the chain from the flush lever arm. Then, detach the old flapper from the pins or clips on the flush valve.
-
Install the new flapper: Attach the new flapper to the flush valve pins or clips.
-
Reattach the chain: Connect the chain to the flush lever arm, leaving a small amount of slack. The chain should be long enough to allow the flapper to seat properly but not so long that it gets tangled.
-
Turn the water supply back on: Slowly turn the shut-off valve counter-clockwise to refill the tank.
-
Test the flush: Flush the toilet several times to ensure the flapper seals correctly and the running stops.
Adjusting the Flapper Chain
If the flapper seems to be sealing okay but the toilet still runs intermittently, the chain length might be the issue.
Too much slack can cause the chain to get caught under the flapper, preventing a tight seal.
Too little slack can hold the flapper open slightly, causing a continuous leak.
Adjust the chain by moving it to a different link on the flush lever arm until you find the optimal length.
Adjusting or Replacing the Fill Valve: A Comprehensive Guide
If the water level in your tank is consistently too high, or if the fill valve continues to run even after the tank is full, the fill valve is likely the problem.
Adjusting the Fill Valve
Many fill valves have an adjustment screw or clip that allows you to raise or lower the float. This controls the water level in the tank.
-
Locate the adjustment mechanism on your fill valve. It might be a screw, a clip, or a sliding adjustment rod.
-
Turn the screw or move the clip to lower the float. This will cause the fill valve to shut off sooner.
-
Flush the toilet and observe the water level. Adjust as needed until the water level is about an inch below the top of the overflow tube.
Replacing the Fill Valve
If adjusting the fill valve doesn’t solve the problem, you may need to replace it.
-
Turn off the water supply and flush the toilet to empty the tank.
-
Disconnect the water supply line from the bottom of the fill valve. Have a small bucket handy to catch any remaining water.
-
Remove the old fill valve: Depending on the model, you may need to unscrew a retaining nut from underneath the tank.
-
Install the new fill valve: Insert the new fill valve into the tank and secure it with the retaining nut.
-
Connect the water supply line: Attach the water supply line to the bottom of the new fill valve.
-
Adjust the float to the correct water level.
-
Turn the water supply back on and test the flush.
Untangling and Adjusting the Chain for Optimal Flush
A tangled or improperly adjusted chain can prevent the flapper from seating correctly, leading to a running toilet. This is often a simple fix.
Steps to Address Chain Issues
-
Inspect the chain: Check for any tangles, kinks, or obstructions.
-
Untangle the chain: Carefully untangle any knots or twists.
-
Adjust the length: As mentioned earlier, the chain should have a small amount of slack. Adjust it by moving the chain to a different link on the flush lever arm.
-
Ensure free movement: Make sure the chain moves freely without any obstructions. It should not rub against the tank walls or any other components.
Solving Water Level Problems by Adjusting the Float
If the water level is consistently too high, causing water to flow into the overflow tube, you need to adjust the float.
Steps to Adjust the Float
-
Identify the float mechanism: There are two main types of floats: ball floats and cylinder floats.
-
Adjust a ball float: Gently bend the float arm downward to lower the water level.
-
Adjust a cylinder float: Squeeze the clip and slide the float down the rod to lower the water level.
-
Test the flush: Flush the toilet and observe the water level. Adjust as needed until the water level is about an inch below the top of the overflow tube.
Cleaning and Removing Mineral Deposits Effectively and Safely
Mineral deposits, such as calcium and lime, can build up on toilet components over time, interfering with their proper function.
Safe Removal Techniques
-
Turn off the water supply and flush the toilet.
-
Vinegar Soak: Pour white vinegar into the tank and let it sit for several hours, or overnight. Vinegar is a natural and effective cleaner for mineral deposits.
-
Scrub Gently: Use a non-abrasive brush or sponge to scrub away any remaining deposits.
-
Rinse Thoroughly: Turn the water supply back on and flush the toilet several times to rinse away any loosened deposits.
Caution: Avoid using harsh chemicals or abrasive cleaners, as they can damage the toilet components.
Checking and Maintaining the Water Supply Line
While often overlooked, a leaky or corroded water supply line can also contribute to water waste and a seemingly "running" toilet.
Inspection and Maintenance
-
Inspect the supply line: Check for any signs of leaks, cracks, or corrosion.
-
Tighten connections: If you notice any leaks, try tightening the connections at both ends of the supply line.
-
Replace if necessary: If the supply line is damaged or corroded, replace it with a new one. Make sure to use a flexible supply line for easy installation.
Knowing When to Call for Help: When to Hire a Plumber
Even with a detailed guide, some toilet troubles are best left to the professionals. Knowing when to throw in the towel (or, more accurately, the plunger) can save you time, money, and potential plumbing disasters. This section will help you assess your capabilities and guide you through finding a qualified plumber if needed.
Recognizing Your Limits: Is DIY Repair Beyond Your Skill Level?
Honesty is the best policy, especially when dealing with plumbing. While many toilet repairs are straightforward, some situations demand the expertise and tools of a licensed plumber. It’s crucial to recognize your limitations to avoid making the problem worse.
Consider calling a plumber if:
-
You’re uncomfortable working with plumbing: If the thought of disconnecting water lines or handling tools fills you with dread, it’s best to step aside.
-
The problem persists after attempting basic fixes: If you’ve tried replacing the flapper, adjusting the fill valve, and addressing other simple issues, but the toilet still runs, there may be a more complex underlying problem.
-
You encounter frozen or corroded pipes: Trying to force a stuck valve or connection can lead to leaks or even burst pipes.
-
There’s evidence of water damage: If you notice water stains, mold, or other signs of water damage around the toilet or in adjacent areas, a professional should assess the situation to identify the source of the leak and prevent further damage.
-
The toilet requires significant disassembly: Repairs that involve removing the entire toilet or accessing pipes within the wall should generally be handled by a plumber.
-
You lack the necessary tools: Certain repairs require specialized tools, such as pipe wrenches, plumbers’ putty, or drain snakes. Investing in these tools for a single repair might not be cost-effective.
Ultimately, your safety and the integrity of your plumbing system should be your top priorities. If you’re unsure about any aspect of the repair, it’s always best to err on the side of caution and call a professional.
Finding a Reputable Plumber: Questions to Ask and Red Flags to Watch For
Finding a trustworthy plumber is essential for a successful and stress-free repair. Don’t just pick the first name you see in the phone book. Take the time to do your research and choose a plumber who is qualified, experienced, and reliable.
Essential Questions to Ask Potential Plumbers
Before hiring a plumber, ask these key questions:
-
Are you licensed and insured? This is the most important question. A license ensures that the plumber has met certain standards of training and expertise. Insurance protects you from liability if the plumber causes damage to your property.
-
How much experience do you have with toilet repairs? Look for a plumber with specific experience in fixing running toilets, as they will be better equipped to diagnose and resolve the problem efficiently.
-
Do you offer a warranty on your work? A reputable plumber will stand behind their work and offer a warranty on parts and labor.
-
Can you provide references from past clients? Contacting previous clients can give you valuable insights into the plumber’s professionalism, reliability, and quality of work.
-
What are your rates and payment terms? Get a clear understanding of the plumber’s hourly rate, any additional fees, and accepted payment methods. Ask for a written estimate before any work begins.
Red Flags to Watch Out For
Be wary of plumbers who exhibit any of the following red flags:
-
Refusal to provide a license or insurance information.
-
Unwillingness to provide a written estimate.
-
Demanding full payment upfront before the work is completed.
-
Pressuring you to make a decision immediately.
-
Using high-pressure sales tactics or scare tactics.
-
Lack of clear communication or professional demeanor.
By taking the time to research and carefully select a plumber, you can ensure that your toilet repair is handled properly and that you receive fair and honest service.
Preventative Maintenance: Keeping Your Toilet Running Smoothly
While knowing how to fix a running toilet is essential, preventing the problem from occurring in the first place is even better. Shifting your mindset from reactive repair to proactive maintenance can save you water, money, and the frustration of dealing with a constantly running toilet. This section outlines simple, yet effective, strategies to keep your toilet operating efficiently and problem-free for years to come.
Regular Inspections: Catching Small Problems Before They Escalate
Think of your toilet as you would your car – regular check-ups can prevent major breakdowns. A quick visual inspection every month or two can identify minor issues before they turn into costly repairs.
Listen carefully after each flush to ensure the tank refills and shuts off completely. Any lingering hissing or gurgling sounds could indicate a slow leak.
Examine the area around the base of the toilet for any signs of moisture, which could point to a leaking wax ring or a faulty supply line connection.
Visually inspect the components inside the tank. Look for signs of wear and tear on the flapper, chain, and fill valve. Are there any mineral deposits accumulating on these parts? Catching these small problems early allows for simple adjustments or replacements before they cause major issues.
Proper Cleaning Techniques to Minimize Mineral Deposit Buildup
Hard water, common in many areas, contains minerals like calcium and magnesium that can accumulate inside your toilet tank. These deposits can interfere with the smooth operation of the flapper, fill valve, and other components, leading to leaks and inefficiencies.
Avoid using harsh chemical cleaners, especially those containing bleach, directly in the tank. While they might seem effective at removing stains, they can degrade the rubber and plastic parts over time, shortening their lifespan and causing them to malfunction.
Instead, opt for gentler cleaning methods. Pouring a cup of white vinegar into the tank and letting it sit for a few hours can help dissolve mineral deposits without damaging the components. Flush the toilet a few times afterward to rinse away the loosened debris.
For stubborn mineral buildup, use a non-abrasive scrub brush or sponge to gently scrub the affected areas. Remember to turn off the water supply before cleaning to prevent overflow.
Consider installing a water softener for your home if you have particularly hard water. This will reduce mineral buildup throughout your plumbing system, extending the life of your toilet and other water-using appliances.
Water Conservation Tips for Efficient Toilet Operation
Toilets are a significant source of water consumption in most households. Implementing water conservation strategies not only reduces your water bill but also helps protect our precious natural resources.
Ensure your toilet is a low-flow model. Toilets manufactured before 1994 can use as much as 3.5 to 7 gallons per flush (GPF), while modern low-flow toilets use 1.6 GPF or less. Replacing an old toilet with a WaterSense-certified model can save you a substantial amount of water each year.
Avoid using the toilet as a trash can. Flushing tissues, cotton balls, and other non-biodegradable items can clog the toilet and strain the flushing mechanism, leading to leaks and other problems.
Be mindful of partial flushes. If only liquid waste is being flushed, holding the handle down for a shorter period can save water. However, ensure that the waste is completely cleared to prevent odors and sanitation issues.
Check for leaks regularly by adding a few drops of food coloring to the toilet tank. Wait about 30 minutes without flushing. If the colored water appears in the bowl, you have a leak, even if it’s silent.
By adopting these preventative maintenance measures, you can keep your toilet running smoothly and efficiently, saving water, money, and the hassle of frequent repairs.
FAQs: Stop Your Running Toilet!
Here are some frequently asked questions regarding common causes of a running toilet and how to fix them. We hope these answers provide quick solutions!
Why does my toilet keep running after I flush?
A toilet runs continuously after flushing because water keeps flowing into the bowl. This typically indicates a problem with the internal components of the tank, usually the flapper, fill valve, or chain. Troubleshooting toilet running issues starts with identifying which part is failing to seal or shut off properly.
How can I tell which part is causing the toilet to run?
Start by observing the water level in the tank. If the water level is above the overflow tube, the fill valve is likely the culprit. If the water level is below the overflow tube, the flapper is likely leaking. A tangled or misaligned chain can also prevent the flapper from sealing correctly, leading to a constant drain.
What tools will I need for basic toilet running troubleshooting?
For most basic repairs, you’ll need adjustable pliers, a sponge, a small bucket, and possibly a new flapper or fill valve (depending on the problem). Rubber gloves are also a good idea.
When should I call a plumber instead of trying to fix a running toilet myself?
If you’ve tried the simple fixes outlined and the toilet continues to run, or if you notice signs of significant corrosion, leaks outside the tank, or are uncomfortable working with plumbing, it’s best to call a professional plumber. Ignoring a running toilet can waste significant water and lead to higher water bills.
So, did you manage to conquer that running toilet? Hope these tips made troubleshooting toilet running a breeze! Don’t hesitate to revisit this guide if the problem pops up again. Happy flushing!