Effective crack repair is crucial for maintaining structural integrity. Sikaflex, a leading manufacturer, offers a range of solutions, and their sikaflex crack flex sealant stands out for its flexibility and durability. Proper application techniques, often involving a caulking gun for precise placement, are key to achieving a lasting bond. This guide will explore these techniques, along with considerations for different concrete substrates, ensuring your repairs withstand environmental stressors.
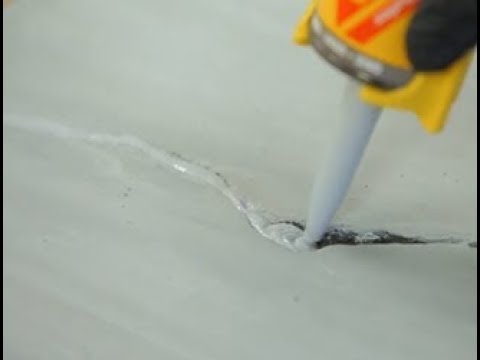
Image taken from the YouTube channel Sika USA , from the video titled Sikaflex® Crack Flex Sealant .
Sikaflex Crack Fix: Sealant Secrets for Lasting Repairs – An Article Layout Guide
This outline provides a structured approach to crafting an informative and practical article focusing on using Sikaflex crack flex sealant for lasting repairs. The aim is to guide readers through the process from understanding the product to achieving a professional-quality fix.
Understanding Sikaflex Crack Flex Sealant
This section sets the stage by introducing the product and its properties.
What is Sikaflex Crack Flex Sealant?
- Define Sikaflex Crack Flex sealant clearly: Emphasize it’s a polyurethane-based sealant designed for flexible and durable crack repairs.
- Highlight key characteristics: flexibility, adhesion, weather resistance, paintability. Explain what makes it suitable for crack repairs compared to other sealants.
- Briefly mention common applications: Concrete, masonry, asphalt, etc.
Advantages of Using Sikaflex for Crack Repair
- Flexibility:
- Explain how flexibility helps accommodate movement and prevents re-cracking. Use an example (e.g., expansion and contraction due to temperature changes).
- Adhesion:
- Describe how Sikaflex strongly adheres to various surfaces, creating a lasting bond.
- Durability:
- Explain its resistance to weather, UV exposure, and general wear and tear.
- Ease of Application:
- Mention its user-friendliness, often available in cartridges for easy application with a caulking gun.
Preparing for the Repair: Essential Steps
This section details the necessary preparations before applying the sealant.
Assessing the Crack
- Crack Type: Different types of cracks require different approaches.
- Hairline cracks: Surface-level, often cosmetic.
- Structural cracks: Indicate underlying problems, may need professional attention.
- Moving cracks: Expand and contract, require highly flexible sealant.
- Crack Width and Depth: Important for choosing the right application method. Use a crack width gauge if possible and note the depth to determine the volume of sealant needed.
- Surface Condition:
- Check for loose debris, dirt, oil, or existing sealant. Explain why these need to be removed.
Gathering Necessary Tools and Materials
-
List of Essential Tools:
- Caulking gun: For dispensing the sealant.
- Utility knife or scraper: For removing old sealant or debris.
- Wire brush: For cleaning the crack.
- Vacuum cleaner or compressed air: For removing dust and particles.
- Masking tape: For creating clean lines.
- Smoothing tools (e.g., putty knife, finger): For achieving a smooth finish.
- Safety glasses and gloves: For personal protection.
-
Materials Required:
- Sikaflex Crack Flex sealant: Choose the correct color and type for the application.
- Backer rod (optional): For deep cracks, to control the sealant depth.
- Primer (recommended for porous surfaces): Improves adhesion.
Surface Preparation: Cleaning the Crack
This is a critical step for ensuring proper adhesion.
- Removing Debris: Explain the importance of removing loose particles, old sealant, and dirt.
- Use a utility knife or scraper to remove loose materials.
- Employ a wire brush to scrub the crack thoroughly.
- Vacuum or use compressed air to remove any remaining dust.
- Cleaning with a Solvent (If Necessary):
- If the crack is contaminated with oil or grease, use a suitable solvent cleaner.
- Ensure the solvent is compatible with the surface and the Sikaflex sealant.
- Allow the surface to dry completely before applying the sealant.
- Using a Primer (For Porous Surfaces):
- Explain why primers are important for enhancing adhesion to porous materials like concrete or brick.
- Select a primer recommended by Sikaflex for the specific surface.
- Apply the primer according to the manufacturer’s instructions, and allow it to dry completely.
Applying Sikaflex Crack Flex Sealant: Step-by-Step Guide
This is the core instructional section of the article.
Preparing the Caulking Gun and Sealant Cartridge
- Loading the Cartridge: Provide detailed instructions on how to properly load the Sikaflex cartridge into the caulking gun.
- Pull back the plunger on the caulking gun.
- Cut the tip of the sealant cartridge at a 45-degree angle.
- Puncture the inner seal of the cartridge.
- Insert the cartridge into the gun and advance the plunger until it makes contact with the cartridge.
- Selecting the Nozzle Size:
- Explain how to choose the right nozzle size based on the crack width.
- Cut the nozzle at an appropriate angle to achieve the desired bead size.
Applying the Sealant
- Consistent Bead: Explain the importance of applying a continuous and consistent bead of sealant along the crack.
- Hold the caulking gun at a consistent angle (usually around 45 degrees).
- Apply even pressure to the trigger to maintain a steady flow of sealant.
- Overlap the start and end of the bead slightly for a seamless seal.
- Using Backer Rod (For Deep Cracks):
- Explain how to install backer rod into the crack before applying the sealant.
- The backer rod should be slightly larger than the width of the crack to ensure a tight fit.
- The sealant should only bond to the sides of the crack, not the bottom, to allow for movement.
- Masking Tape (For Clean Lines):
- Apply masking tape along both sides of the crack before applying the sealant.
- This will create clean, straight lines and prevent the sealant from spreading onto unwanted areas.
- Remove the masking tape immediately after smoothing the sealant.
Smoothing and Finishing
- Tools for Smoothing: Discuss various smoothing tools, such as putty knives, spatulas, or even a gloved finger.
- Dip the smoothing tool in soapy water to prevent the sealant from sticking.
- Apply gentle pressure to smooth the sealant and remove any excess.
- Achieving a Professional Finish:
- Ensure the sealant is flush with the surrounding surface.
- Remove any excess sealant with a clean cloth or solvent.
- Inspect the repair for any gaps or imperfections and reapply sealant if necessary.
Curing and Post-Application Care
This section covers the final steps to ensure a lasting repair.
Curing Time
- Importance of Proper Curing: Explain why it’s crucial to allow the sealant to cure completely before exposing it to weather or stress.
- Curing Time Factors: Humidity, temperature, sealant type.
- Provide general curing time guidelines (refer to the product datasheet).
- Protecting the Repair During Curing:
- Prevent water exposure, avoid contact, etc.
Paintability
- When to Paint: Specify the recommended time frame for painting the sealant after application, usually after it has fully cured.
- Paint Compatibility: Mention the importance of using paints that are compatible with polyurethane sealants. Acrylic latex paints are generally suitable.
- Surface Preparation Before Painting: Clean and lightly sand the sealant surface before applying paint.
Long-Term Maintenance
- Regular Inspection: Recommend regular inspections of the repaired crack to identify any signs of damage or deterioration.
- Re-application (If Necessary): Explain when re-application of the sealant might be necessary (e.g., after several years or if the sealant becomes cracked or damaged).
- Cleaning the Sealant: Provide tips on how to clean the sealant to remove dirt and debris, using mild soap and water.
Sikaflex Crack Fix: Your Questions Answered
Got questions about using Sikaflex for crack repairs? Here are some common inquiries and our expert answers to help you achieve lasting results.
What types of cracks is Sikaflex best suited for repairing?
Sikaflex crack flex sealant is ideal for non-structural cracks in concrete, masonry, and stucco. It’s flexible enough to accommodate minor movement, preventing the crack from reappearing quickly. It’s best for cracks that are not excessively wide or deep.
How long does Sikaflex crack flex sealant take to fully cure?
Cure time depends on temperature and humidity, but generally, Sikaflex crack flex sealant takes around 24-72 hours to fully cure. A thin skin will form relatively quickly, but complete curing ensures the sealant reaches its maximum strength and flexibility.
Do I need to prime the surface before applying Sikaflex crack flex sealant?
Priming is generally recommended for optimal adhesion, especially on porous surfaces like concrete. Using a Sikaflex primer will help the sikaflex crack flex sealant bond more effectively, leading to a longer-lasting repair.
Can Sikaflex crack flex sealant be painted over?
Yes, once fully cured, Sikaflex crack flex sealant can be painted over with most common paints. Ensure the sealant is clean and dry before painting for best results. This allows you to seamlessly blend the repair with the surrounding surface.
So, next time you’re faced with a crack, remember these tips about sikaflex crack flex sealant. With a little practice, you’ll be sealing like a pro!