Getting ready for schlage door knob removal can seem tricky, but it doesn’t have to be. First, you’ll need the right tools, like a screwdriver and potentially some pliers. The design of Schlage knobs often includes hidden mechanisms, which this guide will help you navigate. Remember, understanding the locking mechanism before you start is key to avoiding damage. Following these steps, even if you’re not a professional handyman, makes schlage door knob removal easy to manage.
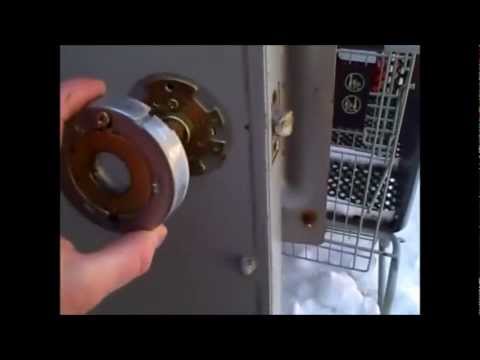
Image taken from the YouTube channel FIX IT Home Improvement Channel , from the video titled How to Remove a Commercial Lock – Replace a Security Lock – Schlage Lock .
Removing Your Schlage Door Knob the Right Way
Schlage door hardware is synonymous with quality and security in homes across the country. As a trusted brand, Schlage offers a variety of door knobs designed for different purposes.
Whether you’re upgrading your home’s aesthetic, replacing a damaged knob, or simply re-keying a lock, knowing how to properly remove a Schlage door knob is an essential skill.
This guide provides a straightforward, step-by-step approach to Schlage door knob removal. We’ll walk you through the process.
The "Do THIS, Not THAT!" Philosophy
This guide emphasizes the right way to remove a Schlage door knob. We will highlight both correct and incorrect methods, ensuring a smooth, efficient, and damage-free process.
The key to a successful removal lies in understanding the components of your door knob and using the appropriate techniques. This prevents damage to your door or the hardware itself.
Why Proper Technique Matters
Attempting to remove a door knob without the correct knowledge can lead to several issues:
- Stripped screws, making future removal even more difficult.
- Damage to the door itself, requiring costly repairs.
- Broken or unusable hardware, forcing you to buy replacements.
By following this guide, you’ll learn the proper techniques to avoid these pitfalls. You’ll gain the confidence to tackle this project like a seasoned professional.
Setting the Stage for Success
This article serves as your comprehensive guide to removing a Schlage door knob the right way. You’ll learn how to identify the different parts, use the correct tools, and avoid common mistakes.
Follow the steps carefully, and you’ll be able to remove your Schlage door knob safely and efficiently.
Know Your Knob: Understanding Schlage Door Knob Types & Components
Before you even think about reaching for a screwdriver, it’s crucial to understand exactly what kind of Schlage door knob you’re dealing with. Different types have different mechanisms, and therefore, require slightly different removal techniques. Ignoring this critical step can lead to frustration and, worse, damage.
Different Types of Door Knobs and Their Impact on Removal
Schlage, like other reputable manufacturers, offers door knobs designed for specific uses, each with subtle variations in their construction and how they are affixed to the door. Knowing the difference is not just about knowing what to call them; it’s about choosing the right approach.
-
Interior Doorknobs (Passage & Privacy): Typically simpler in design, these knobs are for interior doors. Passage knobs don’t lock, while privacy knobs have a simple locking mechanism (often a push-button). Their removal is usually straightforward, involving a set screw and possibly a retaining clip.
-
Exterior Doorknobs (Entry): Designed for exterior doors, these incorporate a keyed lock cylinder for security. Removing these might involve additional steps to detach the cylinder.
The key takeaway? An entry knob’s removal will be more complex than a passage knob’s.
Identifying Key Components
Understanding the anatomy of your Schlage door knob is paramount. Familiarize yourself with these key components:
The Doorknob Rose (or Rosette)
This is the decorative plate that sits flush against the door surface, concealing the mounting hardware. Roses can be circular or rectangular, and understanding how they are attached (snap-on, screw-on) is crucial for removal.
The Spindle
The spindle is the metal rod that connects the two door knobs, allowing them to operate the latch. It runs through the door. After loosening the set screw, the spindle needs to slide out smoothly.
The Set Screw and Its Location
Often the most important part to identify! This small screw, usually located on the neck of the doorknob (where it meets the rose), secures the knob to the spindle. You’ll need an Allen wrench or hex key to loosen it. Its exact location can vary slightly between Schlage models.
The Lock Cylinder (if applicable)
Found on entry knobs, the lock cylinder is where you insert your key. Removing the cylinder might require specific tools and a separate set of steps.
Inspecting the Door and Hardware for Pre-Existing Damage
Before you even begin, take a close look. Is the door warped or cracked around the knob? Are any screws already stripped? Is the rose damaged?
Documenting any existing damage with photos is always a good idea, especially if you’re renting or planning to make a warranty claim. Addressing existing issues before attempting removal can prevent further complications. A warped door, for instance, might make knob removal more difficult, requiring gentle maneuvering to avoid further stress on the door frame.
Gather Your Tools: What You Need (and What to Avoid)
Once you’ve identified your Schlage door knob type and familiarized yourself with its components, it’s time to assemble your arsenal. Having the right tools—and knowing which ones to avoid—is crucial for a smooth and damage-free removal process. Using the wrong tool can lead to stripped screws, scratched finishes, and a whole lot of unnecessary frustration.
The Essential Screwdriver: Choosing the Right Type and Size
The humble screwdriver is often the first tool we reach for, but it’s important to choose wisely. For most Schlage door knobs, you’ll likely encounter either Phillips head or flathead screws.
Using the wrong size screwdriver is a surefire way to strip the screw head. A stripped screw can quickly turn a simple task into a major headache.
Make sure the screwdriver perfectly fits the screw head. Too small, and it will slip and damage the screw. Too large, and it won’t engage properly. It’s a good idea to have a set of screwdrivers in various sizes on hand.
The Importance of an Allen Wrench/Hex Key
The set screw, often located on the side of the doorknob near the base, is usually secured with an Allen wrench (also known as a hex key). This small screw is what holds the doorknob onto the spindle.
Finding the correct size Allen wrench is absolutely critical.
Using one that’s too small will round out the screw head, making it impossible to loosen. Again, a set of Allen wrenches is invaluable here. Test different sizes until you find one that fits snugly. If you’re unsure, start with a smaller size and gradually increase until you find the perfect fit.
Why You Probably DON’T Need a Hammer
Let’s be clear: a hammer is rarely, if ever, necessary for removing a Schlage door knob. In fact, using a hammer is a recipe for disaster.
Applying excessive force can damage the door, the knob, or both.
If a component is stuck, resist the urge to reach for a hammer. Instead, try applying penetrating oil or lubricant and gently wiggling the part free. Patience and finesse are key.
Dealing with a Stripped Screw
Even with the right tools, stripped screws can happen. Don’t panic! There are a few tricks you can try:
-
Rubber Band Trick: Place a wide rubber band over the stripped screw head, then insert the screwdriver. The rubber band can fill the gaps and provide extra grip.
-
Stripped Screw Extractor: These handy tools are designed specifically for removing damaged screws. They typically require drilling a small hole in the screw head and then using the extractor to grip and remove the screw. They can be found at most hardware stores.
Step-by-Step: The Right Way to Remove a Schlage Door Knob ("DO THIS")
With the proper tools assembled, it’s time to get to work. Follow these detailed steps to remove your Schlage door knob safely and efficiently. Patience and precision are key. Avoid rushing, and always double-check your work to prevent damage.
Step 1: Locating and Loosening the Set Screw
The first, and often most crucial, step is to locate and loosen the set screw. This tiny screw, usually found on the neck of the doorknob where it meets the door, is what secures the knob to the spindle.
Using the Allen Wrench/Hex Key
Insert the Allen wrench (hex key) into the set screw. Ensure it fits snugly. If it feels loose, try the next size up. Applying pressure to a loose Allen wrench can easily strip the screw head.
Once you have a good fit, turn the wrench counterclockwise to loosen the screw. Don’t remove the screw completely at this point. Just loosen it enough so that the doorknob can slide off the spindle.
What to Do if the Set Screw is Tight or Stripped
Sometimes, the set screw can be incredibly tight due to rust or paint buildup. Do not force it!
Try applying a penetrating oil (like WD-40) to the screw and let it sit for 15-20 minutes. This can help loosen any corrosion.
If the set screw is already stripped, things get a bit trickier. A specialized stripped screw extractor might be necessary. These tools are designed to grip the damaged screw head and allow you to turn it.
As mentioned earlier, another trick is to try placing a rubber band between the Allen wrench and the screw head to provide extra grip.
Step 2: Removing the Doorknob
With the set screw loosened, you can now remove the doorknob itself.
Gently Pulling the Door Knob and Spindle Out
Grasp the doorknob firmly and gently pull it straight out from the door. It should slide off the spindle fairly easily. If it’s stuck, double-check that the set screw is sufficiently loosened. Avoid excessive force.
The spindle, the square or rectangular metal bar that connects the two doorknobs, may come out with the doorknob, or it may remain in the door. If it comes out, set it aside.
Removing the Doorknob Rose (or Rosette)
The doorknob rose (or rosette) is the decorative plate that sits flush against the door surface, concealing the mounting hardware.
Some roses simply snap onto the door and can be pried off gently with a flathead screwdriver. Be careful not to scratch the door finish.
Other roses are held in place by screws. Locate these screws (they may be hidden) and remove them. Once the screws are removed, the rose should come off easily.
Step 3: Accessing the Lock Cylinder (If Applicable)
This step applies only to exterior door knobs or those with a locking mechanism.
Removing Any Retaining Hardware
Look for any retaining clips, pins, or screws that hold the lock cylinder in place. These may be located on the inside of the door or on the edge of the door where the latch is located.
Remove any visible hardware that secures the cylinder.
Safely Extracting the Lock Cylinder
Once the retaining hardware is removed, gently push or pull the lock cylinder out of the door. It should slide out relatively easily.
If it’s stuck, double-check that you’ve removed all retaining hardware. Avoid forcing the cylinder, as this could damage the locking mechanism. Store the lock cylinder in a safe place.
Following the right steps is crucial for a smooth doorknob removal. However, knowing what not to do is equally important. Let’s explore some common pitfalls and how to avoid them.
Don’t Do This! Common Mistakes to Avoid ("NOT THAT")
Removing a Schlage door knob seems straightforward, but a few easily avoidable mistakes can lead to damaged doors, stripped screws, and a whole lot of frustration. Understanding these pitfalls will save you time, money, and a headache.
The Perils of Excessive Force
Forcing a stubborn doorknob is a recipe for disaster. Resist the urge to yank, twist, or otherwise strong-arm the hardware.
Applying excessive force can damage the door frame, bend the spindle, or even break the doorknob itself. Patience is key. If a knob is stuck, revisit the set screw, apply penetrating oil, or consult the troubleshooting section for more targeted solutions.
The Screwdriver Slip-Up: Size Matters
Using the wrong size screwdriver is a classic mistake that often ends in stripped screws. A stripped screw is not only difficult to remove, but it can also damage the surrounding hardware.
Always ensure your screwdriver bit fits snugly into the screw head. If it wobbles or feels loose, select a different size. Using the correct size will provide optimal grip and prevent slippage, saving you from a world of frustration.
Hammer Time? Absolutely Not!
We cannot stress this enough: using a hammer to remove a door knob is generally a bad idea. Unless you are dealing with extreme circumstances (and even then, proceed with extreme caution), a hammer is overkill.
Hammers can easily dent the door, damage the surrounding trim, or even shatter the doorknob. The goal is to disassemble, not demolish. There are much safer and more effective methods for removing stubborn knobs, as outlined in the previous sections.
Lost in Translation: The Case of the Missing Set Screw
The set screw may be tiny, but it is a critical component. Losing it during the removal process can complicate reinstallation or render the old doorknob useless.
Pay close attention to the set screw as you loosen it. Consider placing a small dish or container nearby to hold the screw as you remove it, preventing it from rolling away and getting lost in the abyss.
After Removal: What To Do Next
Removing the old Schlage door knob is just the first step. Once it’s off, it’s essential to take a few crucial actions to ensure the integrity of your door and prepare for what comes next, whether it’s installing a new knob or simply storing the old one. Neglecting these steps can lead to future problems, so let’s delve into what you should do immediately after the removal.
Inspecting for Damage: A Post-Removal Audit
The immediate aftermath of door knob removal presents the perfect opportunity to thoroughly inspect the door and its surrounding frame for any signs of damage. Don’t skip this!
Look closely for:
- Splintering or cracks around the bore hole where the knob was installed.
- Dents or scratches on the door surface from tools used during removal.
- Damage to the door frame where the strike plate is located.
Addressing these issues promptly can prevent them from escalating into more significant, costly repairs down the line. Small cracks can be filled with wood filler, while scratches can be touched up with paint. If you find substantial damage, consider consulting a professional carpenter for advice.
Preparing for New Installation: A Clean Slate
Whether you’re installing a brand-new Schlage door knob or a different model, prepping the area is vital for a smooth installation.
Cleaning the Bore Hole
Use a clean cloth to wipe away any dust, debris, or old lubricant from inside the bore hole. This ensures that the new knob sits flush against the door and operates smoothly.
Checking Alignment
Ensure that the bore hole is properly aligned with the strike plate on the door frame. Misalignment can cause the door to stick or prevent the latch from engaging correctly. If needed, adjust the strike plate or enlarge the bore hole slightly using a drill (exercise extreme caution and measure twice before drilling!).
Considering Reinforcement
For added security and stability, particularly on exterior doors, consider installing a reinforcement plate around the bore hole. These plates provide extra support and prevent the door from being easily kicked in.
Storing the Old Door Knob: Keep it Organized
Don’t just toss the old door knob into a junk drawer! Proper storage ensures that you can reuse it later, if needed, or easily identify it if you decide to sell or donate it.
Cleaning and Lubricating
Before storing, clean the door knob with a mild detergent and water, then dry it thoroughly. Apply a small amount of lubricant to the moving parts, such as the spindle and latch mechanism, to prevent corrosion.
Labeling is Key
Place the door knob and all its components (screws, set screw, strike plate, etc.) into a sealable plastic bag. Clearly label the bag with the door knob’s location (e.g., "Front Door," "Bedroom 1") and any other relevant information (e.g., "Brushed Nickel Finish").
Safe and Sound
Store the bagged door knob in a dry, secure location, such as a toolbox, storage bin, or cabinet. Avoid storing it in areas with extreme temperatures or humidity, as this can damage the finish or internal components. Keeping all the parts together and well-labeled will save you time and frustration if you ever need to reinstall the knob or use its components for another project.
Troubleshooting: Solving Common Problems
Even with the most careful approach, removing a Schlage door knob can sometimes present unexpected challenges. A stuck knob, a stubbornly stripped screw, or the need to replace a missing part can quickly derail your project. Let’s explore solutions to these common problems.
The Stubborn Knob: When Things Don’t Want to Budge
Sometimes, despite loosening the set screw, the door knob refuses to come off. Years of paint, grime, or even minor corrosion can create enough friction to hold it firmly in place.
Gentle persuasion is key here. Avoid the temptation to use excessive force, which could damage the door or the knob itself.
Solutions for a Stuck Door Knob
-
Apply penetrating oil: Spray a small amount of penetrating oil (like WD-40) around the base of the knob where it meets the rose. Let it sit for 15-20 minutes to seep into the crevices and loosen any binding agents.
-
Gentle tapping: Use a rubber mallet to gently tap around the rose. The vibrations can help break the seal without causing damage. Be sure to tap evenly around the circumference, not just in one spot.
-
Wiggling and pulling: After applying oil and tapping, try gently wiggling the knob back and forth while simultaneously pulling it away from the door. Avoid jerking motions; a steady, consistent pull is more effective.
-
Heat Application: In some cases, applying gentle heat with a hairdryer can help loosen stubborn grime and paint. Be careful not to overheat the surrounding area, as excessive heat can damage the door’s finish.
If none of these methods work immediately, repeat the process. Patience and persistence are essential.
The Stripped Screw Saga: Extracting the Unextractable
A stripped screw head is a common frustration, rendering your screwdriver useless. Applying too much force, using the wrong size screwdriver, or dealing with corroded screws are frequent culprits.
Dealing with a Stripped Set Screw or Rose Screw
-
Rubber Band Trick: Place a wide rubber band over the stripped screw head. Then, insert your screwdriver and apply firm, even pressure while turning. The rubber band can fill the gap and provide enough grip to turn the screw.
-
Stripped Screw Extractor: A stripped screw extractor is a specialized tool designed to bite into the damaged screw head and allow you to remove it. Follow the manufacturer’s instructions carefully.
-
Pliers (for Set Screws): If enough of the set screw protrudes, carefully grip it with pliers and turn.
-
Screw Removal Pliers: These specialized pliers are designed with jaws that can tightly grip the head of a screw, even if it’s stripped, rounded, or damaged.
-
Creating a New Slot: If none of the above methods work, use a rotary tool with a cutting disc to carefully cut a new slot into the screw head. Then, use a flathead screwdriver to turn the screw. Be extremely cautious to avoid damaging the surrounding hardware or door.
Prevention is key. Always use the correct size and type of screwdriver, apply firm and even pressure, and avoid over-tightening screws.
Finding Replacement Parts: Restoring Functionality
Sometimes, during removal, small parts like the set screw can get lost, or components may be damaged beyond repair. Knowing where to find replacements is crucial.
Sources for Schlage Door Knob Replacement Parts
-
Schlage Website: Start with the official Schlage website. They often sell replacement parts directly.
-
Local Hardware Stores: Major hardware stores typically stock a range of door hardware components, including set screws, spindles, and roses.
-
Online Retailers: Online retailers like Amazon, eBay, and specialized hardware sites offer a vast selection of Schlage door knob parts.
-
Locksmiths: Local locksmiths often carry replacement parts and can provide expert advice.
-
Schlage Customer Support: Contact Schlage customer support directly. They may be able to assist with finding specific parts or offer guidance on compatible alternatives.
When searching for replacement parts, be as specific as possible. Note the model number of your door knob and the dimensions of the required part. A clear photo can also be helpful when searching online or consulting with a hardware professional.
Frequently Asked Questions: Schlage Door Knob Removal
Here are some common questions people have when tackling Schlage door knob removal. Hopefully, this helps clear up any confusion and makes the process even easier.
What if I can’t find the small slot or hole to depress the pin?
Sometimes the access point can be tricky to locate. Double-check the entire knob surface and the escutcheon (the plate behind the knob) for a small slot or hole. You might need a flashlight to see it clearly. Remember, this is the key to starting the Schlage door knob removal process.
What tool is best for pressing the retaining pin?
A small, sturdy tool like a paperclip, a small Allen wrench, or even a dedicated door knob removal tool works best. The key is to find something that fits comfortably in the slot and is strong enough to depress the pin. Be gentle; excessive force can damage the mechanism.
My Schlage door knob is old and seems stuck. What should I do?
If your Schlage door knob is resisting removal, try applying a penetrating oil (like WD-40) around the base of the knob and the escutcheon. Let it sit for a few minutes to loosen any corrosion. Then try depressing the pin and pulling the knob off again.
Do I need any special tools to reinstall the Schlage door knob after removal?
Generally, no special tools are required to reinstall a Schlage door knob. Simply reinsert the spindle, align the knobs on both sides of the door, and tighten any screws that may be present. Ensure everything is properly aligned for smooth operation after completing your Schlage door knob removal and reinstallation.
Alright, you’ve tackled the schlage door knob removal! Hopefully, this made the job way less stressful. Now go enjoy that new hardware or whatever project you’re working on!