Is your home suffering from faded and discolored plastic shutters? Restore plastic shutters yourself and dramatically enhance your curb appeal. Vinyl siding, often complemented by power washers for cleaning, can look fantastic next to newly restored shutters. Following this DIY guide, you’ll achieve professional results without hiring a costly handyman service; proper preparation is crucial to getting the right paint to adhere well and withstand weather for the longest duration, with minimal effort.
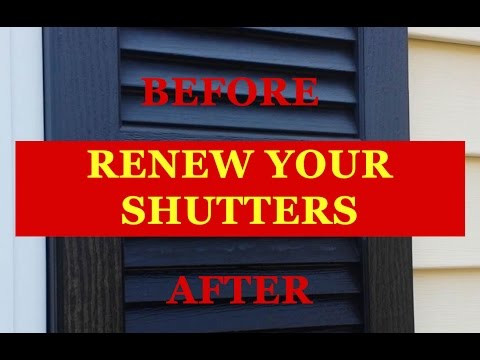
Image taken from the YouTube channel Greg Marshall , from the video titled Low Cost Renew Faded Vinyl Shutters Rejuvenate Shutter Renu Restore No Painting Vinyl Shutter Saver .
Crafting the Perfect "Restore Plastic Shutters" Article Layout
The goal is to guide readers through the process of restoring their plastic shutters effectively. A well-structured article focusing on the keyword "restore plastic shutters" will ensure a positive user experience and help them successfully complete the project. Here’s a breakdown of the ideal article layout:
1. Introduction: Why Restore Plastic Shutters?
- Hook: Start with a relatable scenario. E.g., "Are your plastic shutters looking dull and faded? Don’t replace them just yet! You can restore them to their former glory with a few simple steps."
- Problem Statement: Briefly highlight the common issues with plastic shutters – fading, discoloration, dirt buildup, and potential damage.
- Solution Teaser: Introduce the idea that restoring plastic shutters is a cost-effective and manageable DIY project.
- Benefit Overview: Outline the benefits of restoration vs. replacement (e.g., saves money, environmentally friendly, enhances curb appeal).
- Keyword Integration: Naturally incorporate "restore plastic shutters" within the introduction.
2. Preparing for the Restoration: Gathering Your Supplies
-
Importance of Preparation: Emphasize that proper preparation is crucial for achieving the best results when you restore plastic shutters.
-
Essential Supplies List: Provide a comprehensive, easy-to-follow list of necessary materials. Consider a table format for clarity:
Item Purpose Notes Cleaning Solution Removing dirt, grime, and mildew Mild dish soap, specialized plastic cleaner, or pressure washer Soft-Bristled Brush Scrubbing shutters without scratching Avoid abrasive brushes that can damage the plastic Buckets For mixing cleaning solutions Use multiple buckets for clean and dirty water Garden Hose Rinsing shutters thoroughly Adjustable nozzle for different spray patterns Painter’s Tape Protecting surrounding areas Masking windows, trim, or siding Primer (Optional) Improving paint adhesion Specially formulated for plastic Exterior Paint Restoring color and protecting shutters Choose a paint designed for outdoor plastic applications Paintbrushes/Sprayer Applying paint evenly Consider the size and style of your shutters Drop Cloths Protecting ground and surfaces Prevent paint spills and splatters Safety Glasses Protecting eyes from splashes Essential when using cleaning solutions or spraying paint Gloves Protecting hands from chemicals Choose gloves resistant to the cleaning solutions and paint Screwdriver Removing shutters (if necessary) Appropriate size for your shutter screws -
Supplier Recommendations: Suggest where readers can easily find these supplies (e.g., local hardware store, online retailers).
3. Cleaning Your Plastic Shutters: A Step-by-Step Guide
-
Safety First: Remind readers to wear safety glasses and gloves throughout the cleaning process.
-
Initial Inspection: Instruct readers to check for any significant damage, such as cracks or breaks. Advise on when repair might be necessary before proceeding.
-
Step-by-Step Cleaning Instructions:
- Rinse: Use a garden hose to rinse off loose dirt and debris from the shutters.
- Prepare Cleaning Solution: Mix a mild cleaning solution in a bucket of warm water (e.g., dish soap and water).
- Scrub: Dip a soft-bristled brush into the cleaning solution and scrub the shutters thoroughly, paying attention to crevices and hard-to-reach areas.
- Rinse Again: Rinse the shutters thoroughly with the garden hose until all traces of the cleaning solution are gone.
- Dry: Allow the shutters to dry completely before proceeding to the next step. You can use a clean cloth to speed up the drying process.
-
Troubleshooting: Address common cleaning challenges (e.g., removing mildew, dealing with stubborn stains). Provide specific solutions and products.
3.1 Dealing with Mildew
- Mildew Solution: Mix a solution of bleach and water (1 part bleach to 3 parts water).
- Application: Apply the solution to the affected areas and let it sit for a few minutes.
- Scrub and Rinse: Scrub gently with a soft-bristled brush and rinse thoroughly. Always use caution when working with bleach, and ensure adequate ventilation.
4. Painting Your Plastic Shutters: Bringing Back the Color
-
When to Paint: Explain the importance of painting for color restoration and protection from UV damage.
-
Choosing the Right Paint: Emphasize the need for paint specifically designed for plastic, highlighting its ability to adhere and flex without cracking.
-
Preparing the Shutters for Painting:
- Sanding (Optional): Lightly sand the surface to create a better grip for the paint. Use fine-grit sandpaper.
- Priming (Optional but Recommended): Apply a plastic primer to ensure proper paint adhesion. Let the primer dry completely before painting.
-
Painting Techniques:
- Application Method: Explain both brush and spray painting techniques.
- Brush Painting: Use smooth, even strokes, following the direction of the shutter slats.
- Spray Painting: Hold the spray can 6-8 inches away from the surface and apply thin, even coats.
- Number of Coats: Apply at least two coats of paint, allowing each coat to dry completely before applying the next. Refer to the paint manufacturer’s instructions for drying times.
4.1 Spray Painting Tips
- Even Coverage: Overlap each pass slightly to ensure complete coverage.
- Preventing Runs: Avoid applying too much paint in one area to prevent drips and runs.
- Practice: Practice on a scrap piece of plastic before painting the shutters.
5. Reinstalling Your Restored Shutters
- Ensure Dryness: Verify that the paint is completely dry before reinstalling the shutters.
- Reinstallation Process: Provide clear, step-by-step instructions on how to reattach the shutters to the house.
- Hardware: Suggest replacing any worn or damaged screws or hardware.
6. Maintaining Your Restored Shutters
- Regular Cleaning: Advise on regular cleaning to prevent dirt buildup and maintain the shutters’ appearance.
- Inspection: Recommend periodic inspections for any signs of damage or wear.
- Touch-Ups: Suggest touching up any chipped or faded paint as needed.
FAQs: Restoring Plastic Shutters
This FAQ section answers common questions about restoring your plastic shutters using our DIY guide.
How often should I restore my plastic shutters?
Ideally, you should inspect your plastic shutters annually. If you notice fading, chalking, or staining, it’s time to restore them. Regular restoration prevents further damage and extends the life of your shutters.
What type of paint is best for restoring plastic shutters?
Exterior-grade acrylic latex paint specifically designed for plastic is the best choice. This type of paint adheres well to plastic, is weather-resistant, and helps restore plastic shutters to their original appearance. Always check the paint can for suitability.
Can I skip the cleaning step before painting to save time?
No, cleaning is crucial for properly restoring plastic shutters! Dirt, mildew, and debris prevent the paint from adhering correctly, leading to peeling and a poor finish. A thorough cleaning ensures optimal paint adhesion and a long-lasting result.
What if my plastic shutters are severely faded or cracked?
While our guide can help with restoration, severely damaged plastic shutters may be beyond repair. Consider replacing them if the cracks are extensive or the plastic is brittle. Attempting to restore severely degraded shutters may not yield satisfactory results.
So, there you have it! You’re now equipped to restore plastic shutters like a pro. Give it a try and let me know how it goes. Happy restoring!