Maintaining proper ventilation in spaces like the bathroom prevents moisture buildup and prolongs the life of appliances. Understanding how to remove broan bathroom fan cover with light is key to cleaning or replacing the unit without causing damage. Often, a simple twist or gentle pull is all it takes. Be sure to check your Broan model number or refer to the manufacturer’s instructions for specific steps to ensure a smooth process.
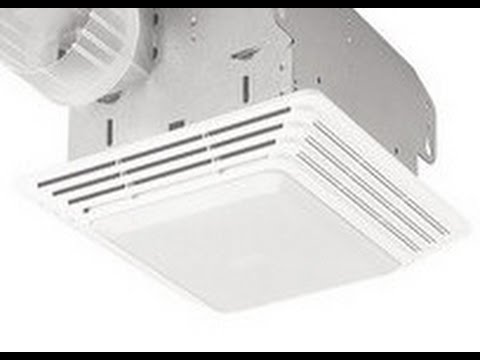
Image taken from the YouTube channel joseph wolf , from the video titled How to clean & replace light: Broan Model: 678 Exhaust Fan .
Broan bathroom fans are a ubiquitous fixture in countless homes, quietly working to manage humidity and improve air quality. These unassuming devices often go unnoticed until the need arises for a little attention.
Whether it’s a routine cleaning, essential maintenance, or a simple light bulb replacement, there comes a time when you’ll need to remove the fan cover.
Understanding how to safely and effectively remove and re-install the cover is crucial for maintaining your fan’s performance and longevity.
Why Remove the Fan Cover?
Several common scenarios necessitate removing the Broan fan cover:
-
Cleaning: Dust and debris accumulate over time, reducing the fan’s efficiency and potentially impacting indoor air quality. Regular cleaning is essential.
-
Maintenance: Inspecting the fan motor, blades, and wiring for any signs of wear or damage ensures optimal operation and prevents potential hazards.
-
Light Bulb Replacement: Many Broan bathroom fans include a light fixture, and eventually, the bulb will need replacing. Accessing the bulb requires removing the cover.
Electrical Safety: A Non-Negotiable Priority
Working with any electrical appliance, including a bathroom fan, requires strict adherence to safety protocols.
Never attempt to remove the fan cover without first disconnecting the power supply at the circuit breaker. This is absolutely critical to prevent electric shock.
We will cover specific safety checks in the next section, but it’s worth repeating: Safety is paramount.
Your Guide to Broan Fan Cover Removal (with Light)
This article provides a comprehensive, step-by-step guide to safely and effectively removing a Broan bathroom fan cover with a light.
Our goal is to empower you with the knowledge and confidence to tackle this task yourself, ensuring both your safety and the proper care of your ventilation system.
Safety First: Preparing for Broan Fan Cover Removal
With a clear understanding of why you might need to remove your Broan fan cover, it’s now time to shift our attention to the most crucial aspect of this task: safety. Working with electricity always demands respect and diligence. A misstep can lead to serious injury. Therefore, meticulous preparation is not just recommended; it’s essential.
Electrical Safety: Your Non-Negotiable Starting Point
Disconnecting the Power: A Matter of Life and Death
The very first step, before even thinking about touching the fan, is to completely disconnect the power supply. This isn’t about flipping a switch on the wall. You need to go to your home’s electrical panel, the circuit breaker box.
Identify the breaker that controls the bathroom fan’s circuit. If you’re unsure, a process of elimination might be necessary (test the lights and outlets in the bathroom after switching off each breaker). Once identified, firmly switch the breaker to the "OFF" position.
Important Note: Never assume the power is off just because a switch is flipped. Always verify!
Verifying Power is Off: Trust, But Verify
After switching off the breaker, the next step is crucial: verify that the power is indeed off. Don’t rely on the breaker alone. Electrical components can fail. This is where a non-contact voltage tester comes in handy.
This tool, readily available at hardware stores, can detect the presence of voltage without direct contact. Hold the tester near the fan’s wiring (without touching it directly, of course). If the tester indicates the presence of voltage, do not proceed. Double-check the correct breaker is off, or consult a qualified electrician.
Your safety is paramount. Never skip this verification step.
Gathering Your Tools: Setting Yourself Up for Success
Having the right tools at your disposal will not only make the job easier but also safer. Here’s a checklist of essential tools to gather before you start:
-
Screwdrivers: A variety of screwdrivers (both Phillips head and flathead) may be needed, depending on your fan model.
-
Ladder or Step Stool: Ensure it’s sturdy and provides safe access to the fan. Avoid balancing on unstable surfaces.
-
Safety Glasses: Protect your eyes from dust and debris that may fall when the cover is removed.
-
Non-Contact Voltage Tester: As previously discussed, this is crucial for verifying the power is off.
-
Work Gloves: Provides a better grip and protects your hands.
Locate Your Broan Bathroom Fan Model Number: Why It Matters
Finding your fan’s model number is a small step that can save you a lot of frustration.
Where to Find the Model Number
The model number is typically printed on a sticker located inside the fan housing. This means you might need to carefully peek inside, perhaps using a mirror and flashlight, before removing the cover. Look for a sticker with "Model Number" or "Type" clearly labeled.
Why the Model Number is Your Friend
Knowing your model number is beneficial for several reasons:
- Specific Instructions: Broan offers model-specific instructions and diagrams online. Knowing your model allows you to access the most accurate and helpful information.
- Replacement Parts: If you need to replace any parts, such as the light bulb or even the entire fan motor, the model number is essential for ordering the correct components.
- Troubleshooting: If you encounter any issues during or after the process, the model number will help you find relevant troubleshooting guides and support resources.
Taking the time to locate and record your Broan bathroom fan’s model number is a worthwhile investment that can simplify the entire process.
Removing the Broan Fan Cover: A Step-by-Step Guide
With safety protocols firmly in place, we can now delve into the practicalities of removing your Broan fan cover. This process, while seemingly straightforward, demands a keen understanding of the various attachment mechanisms employed by Broan across its range of models.
The General Removal Process: A Universal Starting Point
Regardless of the specific attachment method, the initial steps for removing a Broan fan cover remain largely consistent. First, position yourself comfortably and safely beneath the fan. A sturdy stepladder or step stool is essential to avoid straining or losing balance.
Ensure your footing is secure before proceeding.
Next, visually inspect the fan cover to identify the type of attachment mechanism in use. Look for springs, screws, or clips. Understanding what you’re dealing with before you start prying is crucial.
Model Variations: Why One Size Doesn’t Fit All
It’s important to acknowledge that Broan manufactures a wide array of bathroom fan models, and the precise method for removing the cover can vary slightly from model to model. Don’t assume that a technique that worked on one fan will automatically apply to another.
Consulting your fan’s specific model number (as discussed earlier) is always a good idea. Though it can be cumbersome, it will yield the most specific and accurate information regarding cover removal.
Decoding the Attachment Mechanisms
Broan uses three primary methods for securing fan covers: springs, screws, and clips. Let’s examine each in detail:
Springs: The Tension Tamer
Spring-mounted covers are among the most common. These covers are held in place by two or more wire springs that insert into slots on either side of the fan housing.
To remove this type of cover, gently push the cover upwards, towards the fan housing. This action should relieve the tension on the springs, allowing you to carefully disengage them from their slots.
It’s often easiest to release one spring at a time.
Screws: The Secure Fastener
Some Broan fan covers are secured with screws, typically located on the sides or corners of the cover.
Visually inspect the cover for any visible screws. Use an appropriately sized screwdriver (usually a Phillips head) to carefully remove them.
Store the screws in a safe place to prevent them from getting lost.
Clips: The Subtle Snapper
Clip-on covers utilize small, plastic clips that snap into place within the fan housing.
These clips can be tricky to disengage. Apply gentle, even pressure to the cover near the clip locations.
You may need to use a small, flat-head screwdriver to carefully pry the clips loose. Avoid excessive force, as the plastic clips can be brittle and prone to breaking.
Detailed Instructions with Visual Aids
[Note: Visual aids – photos and diagrams – would be inserted here, corresponding to each of the attachment mechanisms described above. These visuals would provide clear, step-by-step guidance for each removal type.]
For example, under "Springs," a photo sequence would show:
- A close-up of the spring mechanism.
- Hands gently pushing the cover upwards.
- A spring being disengaged from its slot.
- The cover being carefully lowered.
Similarly, for "Screws" and "Clips," photos or diagrams would illustrate the location of the fasteners and the proper techniques for removal. This visual reinforcement is crucial for clarity and user confidence.
Cleaning and Maintaining Your Broan Fan After Cover Removal
With the fan cover safely removed, you’ve gained access to the inner workings of your Broan bathroom fan. This is the perfect opportunity to perform essential cleaning and maintenance tasks that will extend the life of your fan and ensure optimal performance. It’s not just about aesthetics; a clean and well-maintained fan operates more efficiently and quietly, preventing potential problems down the road.
Why Cleaning Matters
Dust and debris accumulate within the fan housing over time, impacting its functionality in several ways.
Firstly, accumulated dust obstructs airflow, forcing the motor to work harder to exhaust air. This increased strain can lead to premature motor failure and reduced ventilation effectiveness.
Secondly, dust buildup can contribute to increased noise levels. An imbalanced or struggling fan motor is often a noisy one.
Finally, and perhaps most importantly, dust accumulation can pose a fire hazard, especially around the motor and electrical components. A routine cleaning removes these risks.
Maintenance for Longevity
Regular maintenance goes beyond simple cleaning. It involves inspecting the fan’s components for signs of wear and tear. Early detection of issues allows you to address them before they escalate into major problems, saving you time and money in the long run.
Dusting the Fan Motor and Blades: A Detailed Approach
Before you begin, ensure the power remains disconnected at the circuit breaker. Never attempt to clean the fan while it’s still powered on.
Use a soft brush attachment on your vacuum cleaner to gently remove dust from the fan motor and blades. For hard-to-reach areas, a can of compressed air can be helpful, but be mindful of where the dust is being blown – aim to extract it with the vacuum simultaneously.
Avoid using water or liquid cleaners directly on the motor or electrical components. Dampness can cause electrical shorts and damage the fan.
For the fan blades, you can use a slightly damp cloth (ensure it’s wrung out thoroughly) to wipe away any stubborn grime.
Inspecting for Damage and Wear
Carefully examine the wiring for any signs of fraying, cracking, or loose connections. If you spot any damage, consult a qualified electrician for repair or replacement. Do not attempt to repair electrical wiring yourself unless you are a trained professional.
Check the fan blades for cracks, chips, or imbalances. Even minor damage can cause the fan to vibrate excessively, leading to noise and potential motor damage.
Inspect the fan housing for any signs of rust or corrosion. Address any rust spots promptly to prevent further damage.
Bulb Replacement: Illuminating the Situation
If your Broan fan includes a light, now is an opportune moment to replace the bulb. Refer to your fan’s manual or the bulb itself to determine the correct replacement type and wattage.
Always use the specified bulb type to avoid overheating and potential fire hazards.
Before replacing the bulb, allow the old bulb to cool completely. Use gloves or a cloth to handle the new bulb to avoid leaving fingerprints, which can shorten its lifespan.
When installing the new bulb, ensure it’s securely screwed in, but avoid over-tightening.
Cleaning and maintenance complete, the final step involves carefully re-installing the Broan fan cover. Proper re-installation is crucial not only for aesthetics but also for the fan’s functionality and your safety. A loose or improperly fitted cover can cause vibration, noise, and even pose a safety hazard.
Re-installing the Broan Fan Cover: A Secure Fit
Re-installing the Broan fan cover might seem straightforward, but attention to detail is key to ensure a secure fit and optimal performance. This section provides a step-by-step guide, emphasizing the importance of double-checking your work and verifying functionality.
Step-by-Step Re-Attachment Guide
The specific steps for re-attaching the cover depend on the type of attachment mechanism your Broan fan uses. Always refer to your fan’s model number and any available documentation for the most accurate instructions.
Regardless of the specific method, the general principle remains the same: align the cover properly and secure it firmly.
Re-Attaching Covers with Springs
- Alignment: Carefully align the cover with the fan housing. The cover should fit snugly against the ceiling.
- Spring Engagement: Gently push the cover upwards, aligning the spring clips with their corresponding slots or openings in the fan housing.
- Secure the Springs: Ensure that each spring clip engages securely. You should hear a distinct "click" or feel the spring lock into place.
- Gentle Tug Test: Give the cover a gentle tug to confirm that it’s securely attached. Do not force it. If it feels loose, re-check the spring engagement.
Re-Attaching Covers with Screws
- Alignment: Align the cover with the fan housing, matching the screw holes.
- Screw Insertion: Insert the screws through the cover and into the corresponding holes in the fan housing.
- Tightening: Tighten the screws until the cover is snug against the ceiling. Avoid over-tightening, as this can damage the cover or the housing.
- Check for Gaps: Ensure there are no gaps between the cover and the ceiling. All screws must be correctly and safely tightened.
Re-Attaching Covers with Clips
- Alignment: Position the cover so that the clips line up with their corresponding slots or recesses in the fan housing.
- Clip Engagement: Gently push the cover into place, engaging the clips. You may need to apply slight pressure to each clip to ensure it snaps into place.
- Audible Confirmation: Listen for a clicking sound as each clip engages.
- Visual Inspection: Visually inspect all clips to confirm that they are properly engaged and that the cover is flush with the ceiling.
Double-Checking the Installation
Once you’ve re-attached the cover, don’t skip this crucial step. Thoroughly inspect the installation to ensure everything is secure.
- Verify Clip/Screw/Spring Engagement: Run your fingers along the edges of the cover to ensure that all clips, screws, or springs are properly engaged.
- Look for Gaps: Check for any gaps between the cover and the ceiling. Gaps can indicate an improper fit and may allow dust or moisture to enter the fan housing.
- Gentle Tug Test: Gently tug on the cover to confirm that it’s securely attached.
Restoring Power and Testing Functionality
With the cover securely in place, it’s time to restore power to the fan and test its functionality.
- Return to the Breaker Box: Go back to your electrical panel (breaker box).
- Turn the Power Back On: Flip the breaker switch back to the "ON" position, restoring power to the bathroom fan circuit.
- Testing the Fan: Turn on the bathroom fan switch and listen for the fan to start. Ensure the fan operates smoothly and quietly. Note any unusual noises or vibrations.
- Testing the Light (If Applicable): If your Broan fan includes a light, turn on the light switch to verify that the bulb is working. If the light doesn’t turn on, double-check the bulb installation and ensure it’s the correct type. Never install an incorrect bulb type!
Cleaning and maintenance complete, the final step involves carefully re-installing the Broan fan cover. Proper re-installation is crucial not only for aesthetics but also for the fan’s functionality and your safety. A loose or improperly fitted cover can cause vibration, noise, and even pose a safety hazard. Now, even with the best preparation, you might encounter a few snags along the way. Let’s troubleshoot some common Broan fan issues.
Troubleshooting Common Broan Fan Issues
Even with careful preparation, you might encounter unexpected challenges during or after Broan bathroom fan cover removal and re-installation. Don’t worry; many of these issues are easily resolved with a bit of know-how. Let’s explore some common problems and their solutions.
Cover Refuses to Budge: Stuck Cover Solutions
A stuck fan cover is a frustrating but common issue. Before resorting to force, which can damage the cover or the fan housing, consider these troubleshooting steps:
-
Check for Hidden Screws: Even if you’re familiar with your fan model, double-check for any hidden screws that might be securing the cover. Some models have screws concealed under a thin layer of paint or behind a decorative trim.
-
Gentle Prying: If the cover seems stuck due to paint or debris, use a thin, flexible putty knife or plastic trim removal tool to gently pry around the edges. Work slowly and carefully, applying even pressure to avoid cracking the cover.
-
Lubrication: A small amount of lubricant, such as WD-40 or silicone spray, can help loosen a stuck cover. Apply the lubricant sparingly to the edges of the cover where it meets the fan housing. Allow it to sit for a few minutes before attempting to remove the cover again.
-
Warmth: Gentle heat from a hairdryer can sometimes help to soften old paint or adhesive that might be holding the cover in place. Be cautious not to overheat the plastic cover.
Light Woes: Diagnosing Lighting Problems After Re-installation
A non-functional light after re-installing the fan cover is another common issue. Here’s how to troubleshoot:
-
Bulb Check: This might seem obvious, but start with the simplest solution. Ensure the bulb is correctly seated in the socket and that it’s not burnt out. Try a new bulb to rule out a faulty one.
-
Wiring Connections: Double-check all wiring connections to the light fixture. Make sure the wires are securely connected and that there are no loose strands. If you disconnected any wires during the removal process, ensure they are reconnected correctly according to your fan’s wiring diagram or any photos you took before disassembly.
-
Socket Inspection: Inspect the light socket for any signs of corrosion or damage. Clean the socket with a cotton swab and electrical contact cleaner if necessary. If the socket is severely damaged, it may need to be replaced.
-
Switch Functionality: If the fan and light are controlled by separate switches, verify that the light switch is functioning correctly. Use a multimeter to test the switch for continuity.
Unfamiliar Fan Noises: Tracking Down the Source
Unusual noises emanating from your Broan fan after cover re-installation can be concerning. Here’s how to investigate:
-
Obstruction Check: The most common cause of fan noise is an obstruction. With the fan cover removed and the power OFF, carefully inspect the fan blades for any debris, such as dust bunnies, cobwebs, or small objects that may have fallen into the housing.
-
Loose Components: Check for any loose screws, bolts, or other components that could be vibrating. Tighten any loose fasteners you find.
-
Motor Issues: If the noise persists after checking for obstructions and loose components, the problem may be with the fan motor itself. Listen closely to the motor to determine if the noise is coming from within. Motor issues can range from worn bearings to internal damage and may require professional repair or fan replacement.
-
Improper Installation: Ensure that the fan housing is securely mounted to the ceiling joists. If the housing is loose, it can vibrate and cause noise.
By systematically addressing these common issues, you can often resolve problems with your Broan bathroom fan yourself. However, if you’re uncomfortable working with electricity or if the problem persists, it’s always best to consult a qualified electrician for assistance.
FAQs: Removing Your Broan Fan Cover with Light
Here are some common questions about removing the cover of your Broan bathroom fan with a light fixture. We hope these clarify the process.
Why does my Broan fan cover seem so difficult to remove?
Broan fan covers, especially those with integrated lights, often have tight spring clips holding them in place. These clips can be stiffer than expected. Understanding the clip mechanism is key to how to remove broan bathroom fan cover with light safely.
What tools do I need to remove a Broan bathroom fan cover with light?
Typically, you won’t need any tools. However, a step ladder to reach the fan comfortably and a pair of gloves for a better grip are recommended. Avoid using screwdrivers or other tools to pry it open, as this could damage the cover.
What’s the best way to release the spring clips on a Broan fan cover?
Gently push the cover towards the fan unit, then try to locate the clips. Slightly squeeze or push the cover near the clip while pulling down. Often, the cover needs to be wiggled while applying pressure to release the clips. This is the essence of how to remove broan bathroom fan cover with light.
What if my Broan fan cover has a light bulb inside – will it come out with the cover?
Usually, yes. The light bulb is typically attached to the cover itself. Just be sure to support the cover as you remove it to prevent the bulb from falling. When re-installing, make sure the bulb is securely seated to avoid flickering or premature burnout. Always disconnect power before changing bulbs.
Alright, you’ve got the lowdown on how to remove Broan bathroom fan cover with light! Now go forth and conquer that dusty cover. Hopefully, it’s as easy as we’ve described. Happy tinkering!