The Broan-NuTone company, a leading manufacturer of ventilation solutions, designs its fan covers for easy removal. Understanding basic electrical safety is paramount before you begin any work, ensuring your personal well-being. Proper tools, like a screwdriver or putty knife, can significantly simplify the process. Many homeowners find themselves needing to learn how to remove Broan fan cover for cleaning or replacement, a task often requiring minimal effort when approached correctly.
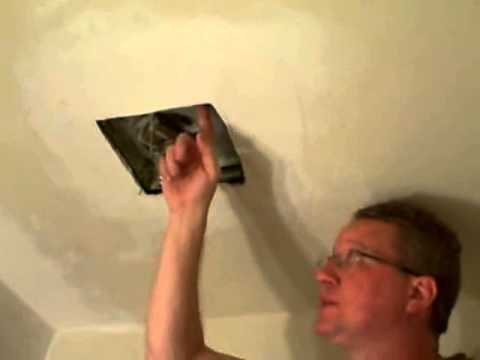
Image taken from the YouTube channel FIX IT Home Improvement Channel , from the video titled Replace a Bathroom Fan – Broan Fan .
Breathe Easy with a Clean Broan Fan Cover
Broan ventilation fans are unsung heroes in our homes, quietly working to remove humidity, odors, and airborne pollutants. These fans are especially crucial in bathrooms and kitchens, where moisture and cooking byproducts can quickly degrade air quality. But like any appliance, a Broan fan requires regular maintenance to perform at its best.
A key aspect of this maintenance is cleaning or, when necessary, replacing the fan cover. Neglecting this seemingly simple task can lead to a host of problems, from reduced fan efficiency to the circulation of dust and allergens.
Why Broan Ventilation Fans Matter
Broan has established itself as a leading name in residential ventilation. Their fans are designed to improve indoor air quality by:
-
Removing excess moisture, preventing mold and mildew growth.
-
Ventilating odors and pollutants from cooking, cleaning, and personal care products.
-
Reducing the concentration of airborne particles, such as dust and allergens.
These benefits contribute to a healthier and more comfortable living environment. Regular maintenance is essential to ensuring these fans continue to deliver optimal performance.
The Case for a Clean (or New) Fan Cover
The fan cover plays a crucial role in protecting the fan motor and directing airflow. Over time, it inevitably accumulates dust, grime, and even mold.
This buildup can:
-
Restrict airflow, forcing the fan to work harder and reducing its efficiency.
-
Create a breeding ground for allergens and bacteria, which can then be circulated back into the room.
-
Cause the fan motor to overheat, potentially leading to premature failure.
Removing the cover for cleaning or replacement addresses these issues. A clean cover allows for unrestricted airflow, reduces the risk of circulating harmful particles, and helps to extend the lifespan of your Broan ventilation fan.
A Simple Process for a Big Impact
Removing and reinstalling a Broan fan cover might seem daunting, but it’s a straightforward process that most homeowners can handle themselves. The following steps provide a quick overview of what’s involved:
-
Safety first: Always disconnect the power to the fan at the circuit breaker before starting any work.
-
Identify your cover type: Broan fans use different attachment methods, such as screws or clips.
-
Remove the cover: Follow the appropriate steps for your cover type.
-
Clean or replace the cover: Remove any accumulated dust and grime, or replace if the cover is damaged or excessively worn.
-
Reinstall the cover: Securely reattach the cover to the fan housing.
By following these simple steps, you can ensure that your Broan ventilation fan continues to provide clean, healthy air for years to come.
Safety First: Power Down for a Safe Removal
Before you even think about touching your Broan fan cover, let’s talk about something absolutely crucial: electrical safety. Working with any electrical appliance, even one seemingly as innocuous as a bathroom fan, demands respect and caution. Electricity doesn’t discriminate, and a moment’s carelessness can lead to a dangerous, even life-threatening, shock.
Your safety is paramount. This section details how to safely disconnect power to your Broan fan, ensuring a risk-free environment for cleaning or replacement.
Cutting the Power: Your First Line of Defense
The most critical step is to completely disconnect the power supply to the fan. This is non-negotiable. Do not attempt any work on the fan without first ensuring the electricity is turned off.
Here’s how to do it safely:
-
Locate the Correct Circuit Breaker: Head to your home’s electrical panel (breaker box). You’ll need to identify the circuit breaker that controls the power to your Broan fan. If you’re unsure, consult your home’s electrical diagram or try switching off breakers one by one, testing the fan after each to see if it loses power.
-
Switch the Breaker to the "Off" Position: Once you’ve found the correct breaker, firmly switch it to the "Off" position. This should immediately cut the power supply to the fan.
-
Gather Your Tools: Before proceeding, gather the tools you will need. At a minimum, you’ll require a sturdy ladder or step stool to safely reach the fan. Also, keep a variety of screwdrivers (Phillips head and flathead) on hand, as different Broan fan models use different types of screws.
The Ultimate Test: Verifying Power is Off
Turning off the breaker should cut the power. However, never assume. Breakers can fail, or circuits might be mislabeled.
This is where a non-contact voltage tester becomes your best friend.
-
Acquire a Non-Contact Voltage Tester: These testers are readily available at hardware stores and are an invaluable tool for any homeowner.
-
Test the Fan Wires: With the breaker supposedly off, carefully hold the tip of the voltage tester near the wires connected to the fan (without touching them directly, of course!).
-
Look for an Indication: If the tester lights up or emits a sound, even with the breaker off, it indicates that electricity is still present. Do not proceed! There is a problem with your electrical system that needs to be addressed by a qualified electrician before you continue.
Double-Check for Peace of Mind
If the non-contact voltage tester indicates no voltage, congratulations! You’ve successfully isolated the power to the fan and can proceed with the next steps.
However, for ultimate peace of mind, test again.
A second confirmation never hurts, and it reinforces the critical importance of electrical safety.
After ensuring your safety by cutting the power, you might be tempted to just start yanking on the fan cover. However, before you reach for a screwdriver or start applying force, it’s crucial to understand that not all Broan fan covers are created equal. Each model boasts its own unique attachment method, and recognizing yours is the first step toward a smooth and damage-free removal.
Identifying Your Broan Fan Cover: A Key First Step
Broan has been a leader in ventilation for decades, and that means a diverse range of fan models, each with its own quirks. Trying to remove a cover without understanding its attachment mechanism is like trying to unlock a door with the wrong key – you’ll likely end up frustrated, and potentially cause damage to the cover, the fan housing, or even yourself.
Attachment Methods Vary by Model
The key takeaway here is simple: Broan fan covers attach in different ways. A one-size-fits-all approach simply won’t work. Manufacturers, including Broan, design these mechanisms based on factors like fan size, airflow, and aesthetic considerations. Understanding this variability is crucial for a successful removal.
Common Types of Broan Fan Cover Attachments
While the specific designs may vary slightly from model to model, the majority of Broan fan covers fall into one of two primary categories: those secured with screws, and those held in place by clips or springs.
Covers Secured with Screws
These covers are generally the most straightforward to identify. Look closely around the perimeter of the fan cover.
You should see several screws, usually Phillips head, attaching the cover to the fan housing.
The number of screws can vary, but they’re typically evenly spaced to distribute the holding force.
Covers Secured with Clips or Springs
Covers without visible screws usually employ clips or springs to stay in place. These mechanisms are often hidden from plain sight, located along the sides or corners of the cover.
The way these clips or springs release can vary. Some require a gentle push, others a slight pull, and some even need to be squeezed to disengage.
Visual Identification is Key
Whenever possible, take a moment to visually inspect your fan cover closely. Compare what you see to online images or diagrams of different Broan fan models. Broan’s website or online parts retailers often have exploded views of their fans that can be very helpful.
A little detective work upfront can save you a lot of trouble – and potential damage – later on.
Removing the Fan Cover: A Step-by-Step Guide
Now that you’ve identified your fan cover type, it’s time to get it off safely. This section provides detailed, step-by-step instructions for removing Broan fan covers, whether they’re secured by screws or clips/springs. Remember to take your time and be gentle to avoid damaging the cover or the fan housing.
Removing Covers Secured with Screws
Covers attached with screws are generally the easiest to remove, but a careful approach is still essential.
Locate the Screws
Begin by visually inspecting the perimeter of the fan cover. The screws are typically visible and located around the edges, often recessed slightly.
Choose the Right Screwdriver
Select an appropriately sized screwdriver that fits snugly into the screw head. Using the wrong size can strip the screw, making removal difficult. Common types include Phillips head and flathead screwdrivers.
Carefully Remove the Screws
With the correct screwdriver in hand, carefully unscrew each screw. Apply steady pressure and turn slowly. Avoid forcing the screws, as this could damage them or the surrounding plastic.
Pro-Tip: Store the screws in a safe place so you don’t lose them during cleaning!
Gently Lower the Cover
Once all the screws are removed, gently lower the Broan fan cover. Be mindful of any attached components, such as light fixtures or wiring. If you encounter resistance, double-check that you have removed all the screws.
It’s possible that years of dust and grime might cause the cover to stick slightly to the fan housing, but gentle maneuvering should loosen it.
Removing Covers Secured with Clips or Springs
Covers held in place by clips or springs require a bit more finesse, as the release mechanisms can vary.
Identify the Location of the Clips/Springs
Carefully examine the sides and corners of the fan cover. The clips or springs are usually located along these edges.
Understand the Release Mechanism
Different clip and spring designs utilize different release mechanisms. Common types include:
- Push-in clips: These require you to push the clip inwards to release the cover.
- Pull-down clips: These require you to pull the clip downwards or outwards to disengage it.
- Squeeze clips: These require you to squeeze the clip to release the cover.
Take a close look at the clips to determine how they are designed to be released. If unsure, refer to your fan’s manual, if available.
Carefully Detach the Cover
Working one clip or spring at a time, carefully detach the Broan fan cover. As you release each clip/spring, support the cover with your free hand to prevent it from falling.
Apply gentle pressure in the direction needed to release the clip, and avoid excessive force, which could break the clips. With all clips released, the cover should detach easily.
Cleaning or Replacing the Fan Cover: Breathe Easier
With the Broan fan cover now safely removed, you have a golden opportunity to improve the air quality in your home. A simple cleaning can often make a significant difference, but sometimes, replacement is the more sensible option. Let’s explore both avenues to ensure your ventilation fan operates at its peak performance.
The Case for Cleaning: Restoring Freshness
Most Broan fan covers accumulate a surprising amount of dust, grease, and grime over time. This buildup not only diminishes the aesthetic appeal but also restricts airflow, forcing the fan motor to work harder and reducing its efficiency.
Fortunately, cleaning the cover is a straightforward process that can yield impressive results.
Choosing Your Cleaning Arsenal
For most fan covers, a simple solution of warm water and dish soap is remarkably effective.
However, if you’re dealing with stubborn grease or sticky residue, a mild degreaser might be necessary. Always test any cleaning solution in an inconspicuous area of the cover first to ensure it doesn’t cause discoloration or damage.
The Scrub-a-Dub Process
- Fill a sink or basin with your chosen cleaning solution.
- Submerge the fan cover and let it soak for a few minutes to loosen the accumulated grime.
- Use a soft-bristled brush or sponge to gently scrub the entire surface of the cover, paying particular attention to areas with heavy buildup.
- Rinse the cover thoroughly with clean water to remove all traces of soap or degreaser.
The Importance of Thorough Drying
This is a crucial step often overlooked. Never reinstall a damp fan cover. Moisture can promote mold growth and potentially damage the fan motor.
Use a clean towel to dry the cover thoroughly, or allow it to air dry completely before reattaching it to the fan housing.
When to Replace: Recognizing the Signs
While cleaning can rejuvenate many fan covers, there are situations where replacement is the more practical and cost-effective solution.
Damage Beyond Repair
Cracks, breaks, or significant warping are clear indicators that a replacement cover is needed. A damaged cover compromises the fan’s performance and can even pose a safety hazard.
Excessive Wear and Discoloration
Even with regular cleaning, some fan covers may become heavily discolored or show signs of significant wear over time. If the plastic has become brittle or the finish is peeling, replacement is generally recommended.
Seeking an Upgrade
Perhaps you’re renovating your bathroom or simply want to update the look of your existing fan. Replacing the cover is an easy way to achieve a fresh, modern aesthetic without replacing the entire fan unit.
Finding the Perfect Replacement
If you’ve determined that replacement is the best course of action, finding the right Broan fan cover is essential.
Deciphering the Model Number
The first step is to identify the model number of your Broan ventilation fan. This information is typically printed on a label located inside the fan housing. Knowing the model number ensures you purchase a compatible replacement cover.
Online Retailers: A Vast Selection
Online retailers like Amazon, eBay, and specialized appliance parts websites offer a wide variety of Broan fan covers. Be sure to carefully review the product description and compatibility information before making a purchase.
Local Hardware Stores: Immediate Gratification
Many local hardware stores and home improvement centers carry a selection of Broan fan covers. This option allows you to physically inspect the cover before buying it and provides immediate access to a replacement.
Regardless of where you choose to purchase your replacement cover, always double-check the model number and dimensions to ensure a perfect fit.
Cleaning or replacing your Broan fan cover is a significant step toward better air quality. But the job isn’t complete until the cover is securely back in place, ready to perform its essential function.
Reinstalling the Broan Fan Cover: Securing it Back in Place
Now comes the satisfying part: reattaching the Broan fan cover. This is where your careful removal process pays off. By retracing your steps, you can ensure a snug and secure fit, restoring your ventilation fan to its full functionality.
The Importance of Proper Reinstallation
A properly reinstalled fan cover is crucial for several reasons:
- It prevents the fan from vibrating or making excessive noise.
- It ensures proper airflow and ventilation.
- It protects the fan motor from dust and debris.
- It maintains the aesthetic appeal of your bathroom or kitchen.
Aligning and Attaching the Cover
Begin by carefully aligning the cover with the fan housing. Take your time to ensure it sits flush against the ceiling or wall.
For screw-secured models, line up the screw holes on the cover with those on the housing.
For clip/spring-secured models, identify the corresponding slots or grooves where the clips or springs will engage.
Securing with Screws
If your Broan fan cover uses screws, use the same screws you removed earlier.
Avoid over-tightening the screws, as this could damage the cover or the fan housing.
Tighten them just enough to hold the cover securely in place.
Engaging Clips or Springs
For covers secured with clips or springs, gently push or squeeze the cover until each clip or spring clicks into place.
Ensure that each fastener is fully engaged and that the cover is held firmly against the ceiling or wall.
A loose or improperly attached clip can cause rattling or vibration.
The Final Check: Ensuring a Secure Fit
Once the cover is reattached, give it a gentle push or pull to ensure it is securely fastened.
There should be no movement or wobbling. All screws or clips should be firmly engaged.
If you notice any issues, double-check the alignment and re-tighten the screws or re-engage the clips as needed.
A well-secured Broan fan cover is a sign of a job well done, providing you with reliable ventilation and improved air quality for years to come.
Reinstalling the Broan fan cover completes the task, but while you have access to the fan housing, take a moment for a quick inspection. This simple step can significantly contribute to the longevity and efficiency of your ventilation system.
A Quick Inspection: Checking the Fan Motor While You’re There
With the fan cover removed, you have a clear view of the fan motor, the heart of your ventilation system. Take this opportunity to visually inspect it for any accumulated dust, debris, or other potential issues. A little preventative maintenance now can save you bigger headaches down the road.
Why Inspect the Fan Motor?
Dust and debris are the enemies of any motor. Over time, they can accumulate on the motor windings, fan blades, and within the motor housing itself.
This buildup acts as an insulator, trapping heat and causing the motor to work harder to maintain its speed.
The increased strain can lead to premature wear and tear, reduced efficiency, and ultimately, motor failure.
Regular inspection and cleaning can prevent these problems, extending the life of your Broan fan and ensuring optimal performance.
What to Look For
During your inspection, pay close attention to the following:
- Dust Accumulation: Check for layers of dust on the motor housing, fan blades, and any visible internal components.
- Debris Buildup: Look for lint, hair, insects, or other debris that may have become lodged in the fan or around the motor.
- Unusual Noises: Take note of any unusual sounds, such as squealing, grinding, or rattling, which could indicate a problem with the motor bearings or other components.
- Visible Damage: Inspect the motor for any signs of physical damage, such as cracks, broken wires, or loose connections.
Cleaning the Fan Motor: A Gentle Approach
If you find dust or debris during your inspection, carefully clean the motor using a soft brush or a vacuum cleaner with a brush attachment.
The goal is to remove the buildup without dislodging any components or damaging the motor.
-
Using a Brush: Gently brush away the dust and debris from the motor housing, fan blades, and any accessible internal parts.
-
Using a Vacuum: Use the brush attachment to vacuum away the loosened dust and debris.
Be sure to use a low suction setting to avoid damaging any delicate components.
-
Stubborn Dust: For dust that is difficult to remove with a brush or vacuum, try using a can of compressed air.
Use short bursts of air to dislodge the dust, being careful not to force it deeper into the motor.
Caution: Avoid Liquids!
It is crucial to avoid using any liquids when cleaning the fan motor. Water or other liquids can damage the motor windings and cause electrical shorts.
Even small amounts of moisture can lead to corrosion and premature failure.
Stick to dry cleaning methods only.
When to Call a Professional
While basic cleaning is generally safe and straightforward, there are times when it’s best to consult a qualified electrician or HVAC technician.
If you notice any of the following, it’s time to call in the pros:
- Significant Damage: If the motor is visibly damaged, such as cracked or broken components.
- Electrical Issues: If you suspect any electrical problems, such as frayed wires or loose connections.
- Unusual Noises Persist: If the fan continues to make unusual noises after cleaning.
- Lack of Experience: If you are uncomfortable working with electrical components or are unsure about any aspect of the cleaning process.
By taking a few minutes to inspect and clean your Broan fan motor, you can help ensure its continued performance and extend its lifespan. Remember to prioritize safety, use gentle cleaning methods, and consult a professional when needed.
FAQs: Removing Your Broan Fan Cover
Here are some common questions about removing your Broan fan cover to help you with the process.
What tools do I need to remove a Broan fan cover?
Generally, you won’t need any tools. Most Broan fan covers are designed to be removed by hand. However, a small step stool might be helpful to reach the fan, and gloves can keep your hands clean.
How do I know which way to push or pull the Broan fan cover to remove it?
Look closely at the cover. Most have small tabs or springs. Gently push the cover in the direction indicated by any arrows or release points you see. If unsure, try a slight push upwards and then a gentle pull outwards. Understanding how to remove a Broan fan cover starts with identifying the release mechanism.
What if my Broan fan cover seems stuck?
Avoid excessive force. Check for any visible debris or paint buildup that might be preventing the cover from releasing. Gently clean around the edges of the cover and try again. You may have to wiggle the cover gently. Making sure how to remove broan fan cover doesn’t cause any damage.
Can I damage the fan or cover while trying to remove it?
Yes, applying too much force can damage the fan motor or break the cover clips. Be gentle and patient. If you are struggling, consult the Broan fan’s manual or consider contacting a qualified electrician for assistance on how to remove a Broan fan cover safely.
So, that’s pretty much it! Now you know how to remove Broan fan cover. Go give it a try – you got this!