The Oatey brand, a reputable manufacturer of plumbing products, often integrates their drains, especially the oatey caspers shower drain, with a strainer system for debris capture. Consequently, the most common issue often involves hair clogs, which can be addressed with tools like a drain snake. This guide provides practical solutions to these Oatey Caspers shower drain problems, offering effective troubleshooting steps, and detailing best practices in a quick, easy-to-follow format.
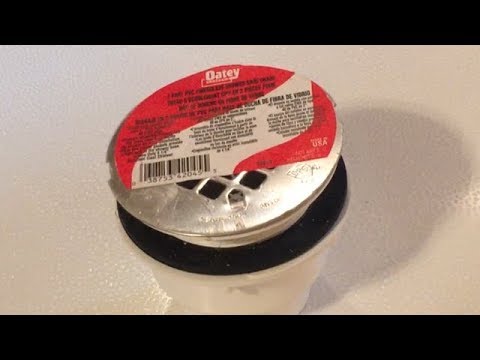
Image taken from the YouTube channel funbro1 , from the video titled How to install an Oatey Shower Drain .
Solving Your Oatey Caspers Shower Drain Issues: A 60-Second Guide
This guide provides fast and effective solutions to common problems experienced with Oatey Caspers shower drains. If you’re facing slow drainage, leaks, or unpleasant odors, read on for quick fixes. The primary focus is addressing issues specific to the oatey caspers shower drain model.
Identifying Common Oatey Caspers Shower Drain Problems
Before attempting a fix, it’s important to understand what might be causing the problem. Here are the most frequent issues:
- Slow Drainage: This is often caused by hair, soap scum, or other debris clogging the drain.
- Leaks: Leaks can occur at the drain flange, where it connects to the shower pan, or at the pipe connections beneath the shower.
- Unpleasant Odors: These often emanate from stagnant water and bacterial buildup within the drain.
- Loose Drain Flange: A wobbly drain cover indicates a potentially loose or damaged drain flange.
Essential Tools and Materials
Having the right tools makes the job significantly easier and faster. Here’s a basic checklist:
- Screwdriver (Phillips and Flathead): For removing and tightening screws.
- Pliers: For gripping and maneuvering small parts.
- Drain Snake or Hook: To remove clogs.
- Plumber’s Putty or Silicone Caulk: For sealing leaks.
- Clean Rags or Paper Towels: For cleaning and wiping up spills.
- Bucket: To catch any water when disassembling the drain.
- Gloves: To protect your hands.
Quick Fixes for Common Problems
Addressing Slow Drainage
This is often the easiest problem to fix.
- Remove the Drain Cover: Use a screwdriver to remove the drain cover.
- Inspect for Visible Debris: Look for hair, soap scum, and other debris obstructing the drain opening.
- Use a Drain Snake or Hook: Carefully insert the drain snake or hook into the drain and twist to grab any debris.
- Remove the Debris: Pull out the snake or hook, removing the collected debris. Repeat this process until no more debris is extracted.
- Flush with Hot Water: After removing the visible debris, flush the drain with hot water for several minutes to clear any remaining residue.
Resolving Leaks Around the Drain Flange
Leaks can lead to water damage, so addressing them promptly is important.
- Dry the Area Thoroughly: Use a clean rag to dry the area around the drain flange completely.
- Inspect for Cracks or Gaps: Carefully examine the flange and the surrounding shower pan for any cracks or gaps.
- Apply Plumber’s Putty or Silicone Caulk: If you find gaps, apply a bead of plumber’s putty or silicone caulk around the flange, pressing it firmly into the gap.
- Smooth the Seal: Use your finger to smooth the putty or caulk, creating a watertight seal.
- Allow to Cure: Allow the sealant to cure according to the manufacturer’s instructions before using the shower.
Alternative: If the existing sealant is old or cracked, remove it first using a putty knife before applying new sealant.
Eliminating Unpleasant Odors
Odors typically indicate a build-up of bacteria.
- Flush with Hot Water and Baking Soda: Pour one cup of baking soda down the drain, followed by a generous amount of hot water.
- Let it Sit: Allow the mixture to sit in the drain for at least 30 minutes.
- Flush Again: Flush the drain again with hot water.
- Consider Enzyme Drain Cleaner: If the odor persists, consider using an enzyme-based drain cleaner. Avoid harsh chemical drain cleaners, as they can damage your pipes.
Tightening a Loose Drain Flange
A loose drain flange indicates a potential problem with the mounting or drain assembly itself.
- Inspect the Screws: Examine the screws holding the drain flange in place. Are they loose, stripped, or corroded?
- Tighten or Replace Screws: If the screws are loose, try tightening them. If they are stripped or corroded, replace them with new screws of the same size and type.
- Inspect the Drain Assembly: If tightening the screws doesn’t resolve the issue, the drain assembly might be damaged or improperly installed. This may require further investigation or professional help.
When to Call a Plumber
While these quick fixes can address many common Oatey Caspers shower drain problems, some situations require professional assistance.
- Persistent Leaks: If you can’t stop a leak after attempting the above steps.
- Damaged Drain Assembly: If the drain assembly is visibly broken or corroded.
- Recurring Clogs: If you experience frequent clogs despite regular cleaning.
- Unfamiliar Plumbing: If you are uncomfortable working with plumbing or uncertain about the problem.
Oatey Caspers Drain Problems FAQ: Your 60s Guide Clarified
These frequently asked questions help clarify common issues and solutions related to Oatey Caspers shower drains, especially those from the 1960s.
What makes Oatey Caspers shower drains from the 60s prone to problems?
Older Oatey Caspers shower drains often used materials that degrade over time, like rubber seals that can crack and crumble. This can lead to leaks and clogs. Plus, the original installation methods might not meet modern plumbing standards.
How do I identify if I have an Oatey Caspers shower drain?
Look for markings on the drain flange or strainer. Older Oatey Caspers drains often have a distinct, simple design typical of the 1960s. If you’re unsure, compare your drain’s appearance to vintage plumbing catalogs or online images. A plumber can also help you identify it.
Can I replace just the strainer or part of an old Oatey Caspers drain?
Sometimes, but it’s often more effective to replace the entire Oatey Caspers shower drain assembly. Finding compatible replacement parts for these older models can be difficult and may only offer a temporary fix. A full replacement provides a more reliable and lasting solution.
What are my best options for replacing an Oatey Caspers drain?
Consider a modern PVC or ABS drain assembly that fits your existing plumbing setup. There are retrofit options designed to replace older drains without requiring extensive demolition. Consult a plumber to determine the best and most code-compliant solution for your specific Oatey Caspers shower drain situation.
Alright, that’s a wrap on fixing those oatey caspers shower drain headaches! Hope this helped you get everything flowing smoothly again. Happy showering!