Achieving a professional finish with glass block projects often hinges on the details. Glass blocks spacers are those small but critical components that ensure uniform grout lines and structural integrity. Consider Mortar Mix, the type and consistency of which impacts the effectiveness of glass block spacers. Proper alignment, achievable with tools like a Level, relies on the consistent spacing provided by these small tools. Explore diverse types of Glass Block Patterns for the correct glass blocks spacers to accommodate grout line requirements. Learn how Installation Techniques utilize glass blocks spacers for structurally sound builds.
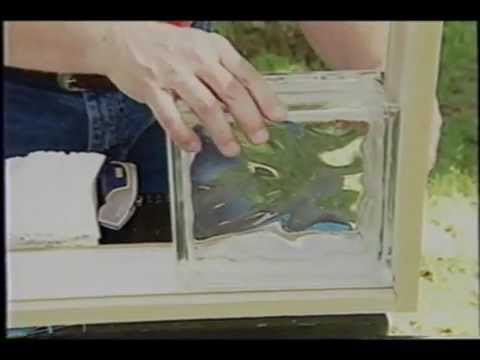
Image taken from the YouTube channel Ask the Builder , from the video titled Glass Block .
Glass Block Spacers: A Simple Guide to Flawless Installation
Installing glass blocks can transform a space with unique style and natural light. To achieve a professional-looking and structurally sound result, using glass block spacers is essential. This guide breaks down everything you need to know about using glass block spacers for a flawless installation.
Understanding Glass Block Spacers
Glass block spacers are small, usually plastic, pieces designed to maintain consistent spacing between glass blocks during installation. They play a crucial role in ensuring even mortar joints and proper structural integrity.
Why Use Glass Block Spacers?
Here’s a breakdown of why using these seemingly simple tools is so important:
- Uniform Spacing: They guarantee consistent grout lines, enhancing the visual appeal of your finished project. Uneven grout lines can detract from the overall look and indicate a less professional installation.
- Structural Support: They provide a framework for the mortar to properly bond to the glass blocks, creating a stronger and more stable wall or panel. This is especially important for larger installations.
- Even Weight Distribution: Spacers help distribute the weight of the glass blocks evenly, preventing stress points and potential cracking.
- Simplified Installation: They make the installation process easier and more efficient, especially for beginners.
Types of Glass Block Spacers
While the primary function is the same, glass block spacers come in various shapes and sizes to suit different glass block dimensions and aesthetic preferences. The most common types include:
- Cross Spacers: These are "plus" shaped and are placed at the corners of each block.
- T-Spacers: These are "T" shaped and are used along the edges where blocks meet in a straight line.
- Edge Spacers: Designed specifically for the outer edges of a glass block panel or wall.
- Corner Spacers: Intended for use in the corners of a glass block installation.
Choosing the correct spacer type depends on your glass block size, the desired grout line width, and the specific configuration of your project. Always refer to the manufacturer’s instructions for recommendations.
Preparing for Installation
Proper preparation is key to a successful glass block installation.
Gathering Your Materials
Before you begin, ensure you have all the necessary materials:
- Glass Blocks: Select the style, size, and quantity of glass blocks needed for your project.
- Glass Block Spacers: Choose the appropriate type and quantity of spacers based on your block size and design.
- Mortar Mix: Use a high-quality mortar specifically designed for glass block installation. This type of mortar often has additives to improve adhesion and flexibility.
- Mixing Tools: A mixing tub, trowel, and margin trowel are essential for preparing and applying the mortar.
- Level: A level is crucial for ensuring the glass block wall is straight and plumb.
- Rubber Mallet: Useful for gently tapping blocks into place.
- Safety Glasses and Gloves: Protect your eyes and hands during the installation process.
- Clean-up Supplies: Sponges, clean water, and rags for wiping away excess mortar.
Preparing the Surface
The surface where you’ll be installing the glass blocks needs to be clean, level, and structurally sound.
- Cleaning: Remove any debris, dirt, or existing mortar from the surface.
- Leveling: Ensure the base is perfectly level. Use shims if necessary to correct any unevenness.
- Waterproofing (if applicable): If installing in a shower or wet area, apply a waterproof membrane to the substrate before installing the glass blocks.
The Installation Process: A Step-by-Step Guide
Follow these steps for a smooth and accurate glass block installation:
- Mixing the Mortar: Carefully follow the manufacturer’s instructions for mixing the mortar. Aim for a thick, workable consistency similar to peanut butter.
- Applying the First Layer: Apply a generous bed of mortar to the base surface, about 1 inch thick.
- Setting the First Block: Place the first glass block onto the mortar bed. Use a level to ensure it’s perfectly aligned.
- Inserting Spacers: Immediately after placing the block, insert spacers at each corner and along the edges as required. Press them firmly into the mortar.
- Adding More Blocks: Apply mortar to the sides of the next block and carefully place it next to the first, ensuring the spacers remain in place.
- Repeating the Process: Continue adding blocks and spacers, checking the level frequently. Use a rubber mallet to gently tap blocks into alignment if needed.
- Filling the Joints: Once a section of blocks is set, use a margin trowel to fill the joints completely with mortar.
- Removing Excess Mortar: After the mortar has partially set (usually within 30-60 minutes), use a sponge and clean water to carefully remove any excess mortar from the glass block surfaces. Avoid smearing the mortar across the glass.
- Allowing to Cure: Allow the mortar to cure completely according to the manufacturer’s instructions. This typically takes several days.
- Finishing Touches: Once cured, you can apply a sealant to the joints for added protection against moisture.
Troubleshooting Common Issues
Even with careful planning, you might encounter some challenges during installation. Here are a few common issues and how to address them:
- Blocks Shifting: Ensure the mortar is the right consistency. Too wet, and the blocks will shift; too dry, and they won’t bond properly. You may need temporary bracing to keep the blocks in place while the mortar sets.
- Uneven Grout Lines: Double-check the placement of your spacers. Ensure they are fully seated and not dislodged during installation.
- Mortar Cracking: This could indicate insufficient mortar strength or excessive movement in the structure. Use a flexible mortar specifically designed for glass block.
- Cloudy Glass Blocks: This can be caused by using abrasive cleaning products. Only use a soft cloth and mild soap to clean glass blocks. Avoid ammonia-based cleaners.
By understanding the importance of glass block spacers and following these installation steps, you can achieve a stunning and durable glass block feature that will enhance your space for years to come.
FAQs About Glass Block Spacers and Installation
Here are some frequently asked questions to help you understand the proper use of glass block spacers and ensure a successful installation.
Why are glass block spacers necessary?
Glass block spacers ensure consistent spacing between each glass block during installation. This consistent spacing allows for proper mortar application and contributes to the overall structural integrity and aesthetic appeal of the glass block wall or window. Without glass block spacers, the mortar joints could be uneven, leading to potential weakness and an unprofessional look.
What size glass block spacers should I use?
The size of glass block spacers depends on the desired mortar joint width. Common sizes range from 1/4 inch to 3/8 inch. Always check the manufacturer’s recommendations for your specific glass blocks to ensure optimal performance and appearance. Larger glass blocks might require larger glass block spacers.
Can I reuse glass block spacers?
While some glass block spacers are designed for single use and are embedded in the mortar, others are reusable. Reusable spacers are typically removed after the mortar has partially set. Check the product description of your spacers to determine if they can be reused. Clean reusable glass block spacers thoroughly before each use.
Are there alternatives to traditional glass block spacers?
Yes, alternative methods exist, such as using pre-fabricated glass block panels with built-in spacing systems. However, using individual glass blocks and standard glass block spacers offers more flexibility in design and customization. Consider the size and complexity of your project when choosing your installation method.
And that’s the lowdown on glass blocks spacers! Hopefully, this guide helps you nail your next installation. Happy building!