Understanding a gas range connection is paramount for kitchen safety. Natural gas, supplied by utilities like National Fuel, requires careful management; therefore, proper installation using tools such as a pipe wrench is critical. An error in gas range connection might result in a hazardous gas leak. This guide provides essential instructions for preventing potential explosions during a gas range connection.
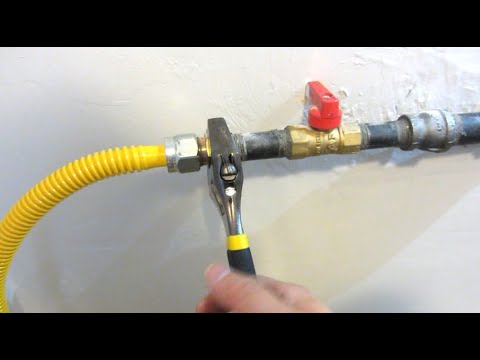
Image taken from the YouTube channel Poolarity – Life Hacks , from the video titled Gas Range Step by Step Installation | How to Install Gas Connector DIY .
Crafting the Ideal "Gas Range Connection: Avoid Explosions (Easy Guide)" Article Layout
This document outlines the ideal layout for an article titled "Gas Range Connection: Avoid Explosions (Easy Guide)", emphasizing clarity, safety, and user-friendliness. The structure focuses on providing a comprehensive, step-by-step guide that minimizes risks associated with gas range connection.
1. Introduction: Setting the Stage and Emphasizing Safety
The introduction should immediately grab the reader’s attention by highlighting the potential dangers of improper gas range connections.
- Briefly explain what a "gas range connection" is.
- Clearly state the risks involved (gas leaks, explosions, carbon monoxide poisoning).
- Emphasize the importance of following safety precautions and consulting a qualified professional if unsure.
- Outline the article’s purpose: to provide an accessible, easy-to-follow guide to safe gas range connection.
2. Understanding Your Gas Supply
This section is crucial for ensuring the user understands the type of gas connection they’re dealing with.
2.1. Types of Gas: Natural Gas vs. Propane (LP Gas)
- Explain the difference between natural gas and propane.
- Indicate why knowing the type of gas is important for choosing the correct connection fittings and regulator.
- Provide visual cues (e.g., gas bill examples showing gas type).
2.2. Identifying Your Gas Supply Line
- Describe how to locate the gas supply line in the kitchen (usually behind the existing range).
- Explain how to identify the gas shut-off valve.
- Include a photo or diagram illustrating a typical gas supply line and shut-off valve.
3. Essential Tools and Materials
A comprehensive list ensures the user has everything they need before starting the project.
- Provide a detailed list of necessary tools:
- Pipe wrenches (two sizes)
- Gas line sealant (specifically designed for gas lines)
- Leak detection solution (soap and water mixture or commercial leak detector)
- Adjustable wrench
- Screwdrivers (Phillips and flathead)
- Gloves
- Safety glasses
- Provide a list of required materials:
- New gas connector (flexible or rigid, depending on local codes and preferences)
- Gas shut-off valve (if replacing an old or faulty one)
- Pipe fittings (as needed, based on gas line and range connections)
- Explain the importance of using gas-rated materials.
-
Consider creating a table summarizing the tools and materials:
Item Description Purpose Pipe Wrenches Two different sizes Tightening and loosening gas pipes and fittings Gas Line Sealant Approved for gas lines Sealing pipe threads to prevent leaks Leak Detector Soap and water or commercial solution Checking for gas leaks after connection
4. Step-by-Step Connection Guide
This section provides the core instructions for performing the gas range connection.
4.1. Safety First: Shutting Off the Gas Supply
- Emphasize the importance of shutting off the gas supply at the shut-off valve before starting any work.
- Clearly instruct the user on how to turn off the gas supply.
- Advise opening windows and doors for ventilation.
4.2. Removing the Old Gas Range (If Applicable)
- Explain how to disconnect the existing gas connector.
- Provide step-by-step instructions with photos.
- Emphasize capping the open gas line immediately after disconnecting to prevent gas leaks.
- Illustrate how to properly cap the gas line.
4.3. Preparing the New Gas Range
- Describe how to attach any necessary fittings to the gas range inlet.
- Ensure the fittings are compatible with the gas type and connector.
4.4. Connecting the Gas Connector
- Provide detailed, step-by-step instructions on connecting the gas connector to both the gas supply line and the range.
- Emphasize proper threading and tightening of connections.
- Clearly illustrate using gas line sealant on all threaded connections.
- Provide images showing the correct and incorrect application of gas line sealant.
- If applicable, explain how to adjust the gas regulator (if needed for propane conversion).
4.5. Checking for Leaks
- Describe the process of checking for gas leaks using leak detection solution.
- Clearly instruct the user on how to apply the solution and identify leaks (bubbles forming).
- Explain what to do if a leak is detected:
- Immediately shut off the gas supply.
- Tighten the connection (if possible).
- If the leak persists, contact a qualified professional.
4.6. Turning on the Gas Supply
- Explain how to slowly and carefully turn on the gas supply at the shut-off valve.
- Reiterate the importance of checking for leaks after turning on the gas.
5. Post-Connection Checklist
This section provides a final set of steps to ensure safety and proper operation.
- Re-check all connections for leaks.
- Test the range burners to ensure they ignite properly.
- Ensure proper ventilation in the kitchen.
- Dispose of old parts and materials safely.
6. Troubleshooting Common Issues
This section addresses potential problems that may arise during or after the gas range connection.
- Gas Smell: What to do if you smell gas after connecting the range.
- Burners Not Igniting: Troubleshooting ignition problems.
- Low Flame: Addressing low gas pressure or regulator issues.
7. When to Call a Professional
This section reinforces the importance of seeking professional help when needed.
- Highlight situations where a qualified professional should be consulted:
- If you are uncomfortable performing the connection yourself.
- If you detect a gas leak that you cannot resolve.
- If you have any doubts or concerns about the gas connection.
- If you suspect a problem with the gas supply line or regulator.
- Provide resources for finding qualified gas technicians in the user’s area.
Gas Range Connection: Avoiding Explosions – FAQs
Here are some frequently asked questions to help you safely connect your gas range and avoid explosions.
What are the most common causes of gas range connection explosions?
The most common causes are leaks due to improper connections, damaged gas lines, or using the wrong type of sealant. Always check for leaks after any gas range connection.
Do I need a professional to connect my gas range?
While this guide provides instructions, if you’re not comfortable working with gas lines, it’s always best to hire a qualified and licensed professional. Improper gas range connection can be very dangerous.
How do I properly check for gas leaks after connecting my gas range?
Use a solution of soapy water and apply it to all connections. If bubbles appear, there’s a leak. Immediately turn off the gas supply and tighten the connections, or seek professional assistance.
What type of sealant should I use for my gas range connection?
Use pipe joint compound specifically designed for gas lines, also known as pipe dope. Ensure it’s approved for use with natural gas or propane, depending on your gas supply. Never use Teflon tape alone for gas range connection.
So, there you have it! Connecting your gas range doesn’t have to be scary. Just take your time, follow these steps, and you’ll be enjoying those delicious meals in no time. Stay safe and happy cooking with your proper gas range connection!