A common household issue, warped cabinet doors can be frustrating, but understanding the underlying cause, often related to humidity levels, is the first step. Many homeowners discover that simple adjustments using tools from their workshop can solve the problem. With the right approach and careful application of techniques often shared in DIY communities, anyone can learn how to fix warped cabinet door and restore their kitchen or bathroom to its former glory.
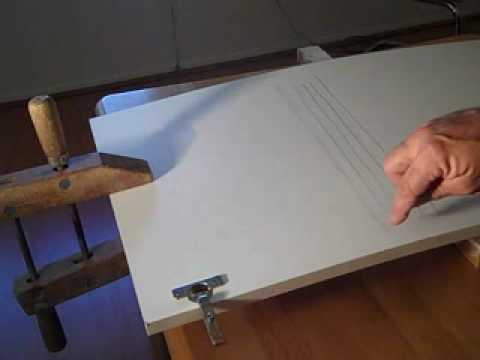
Image taken from the YouTube channel CabinetryExpert , from the video titled Fix a Warped Cabinet Door .
Warped cabinet doors: a ubiquitous problem plaguing homes across climates and construction styles. It’s a frustration familiar to many homeowners. This seemingly minor issue can escalate from a cosmetic nuisance to a significant functional impairment. Understanding why warping occurs and addressing it promptly is essential to maintaining the integrity and value of your cabinetry.
Defining a Warped Cabinet Door
A warped cabinet door deviates from its intended flat, even plane. This can manifest in several ways:
-
Bending: A gradual curve along the length or width of the door.
-
Twisting: A more complex distortion where opposing corners of the door are no longer in the same plane.
-
Cupping: Where the edges of the door rise, creating a concave or convex shape.
The Three Primary Culprits: Humidity, Temperature, and Water
Several environmental factors contribute to the warping of cabinet doors. The most common are:
-
Humidity: Wood is a hygroscopic material, meaning it absorbs and releases moisture from the air. High humidity causes the wood to swell, while low humidity causes it to shrink. This uneven expansion and contraction can lead to warping, especially in doors that are not properly sealed.
-
Temperature Fluctuations: Sudden changes in temperature can also stress the wood, contributing to warping. Extreme heat can dry out the wood, while extreme cold can make it brittle.
-
Water Damage: Direct exposure to water, whether from leaks, spills, or condensation, is particularly damaging. Water absorption leads to swelling, which can permanently distort the wood fibers.
Visual and Functional Consequences
Warped cabinet doors present a host of problems beyond mere aesthetics:
-
Difficulty Closing: Warping often prevents doors from closing properly, leaving gaps that are unsightly and can compromise the cabinet’s ability to protect its contents.
-
Unsightly Appearance: Even minor warps can be visually distracting, detracting from the overall appearance of your kitchen or bathroom.
-
Increased Wear and Tear: Forced closure of a warped door can strain hinges and other hardware, leading to premature failure.
DIY Repair vs. Professional Intervention
Fortunately, minor warps can often be corrected with some basic DIY techniques. Applying heat and pressure can coax the wood back into its original shape. However, severe warping, extensive water damage, or structural issues may necessitate professional repair or even complete door replacement. Recognizing the limits of DIY and knowing when to call in an expert is crucial to avoiding further damage and ensuring a lasting solution.
Identifying the Culprit: Assessing the Warp and its Causes
Warped cabinet doors, besides being visually unappealing, can hinder the functionality of your cabinetry. Before diving into repairs, a careful assessment is crucial. This step allows you to understand the severity of the warp and pinpoint the underlying cause.
A thorough inspection will inform your repair strategy, saving time and preventing further damage. Let’s explore how to become a cabinet door detective.
The Visual Inspection: A First Look
Start by removing the door from its hinges for a clear view. Position the door against a well-lit backdrop to accentuate any imperfections.
Carefully scrutinize the surface. Look for:
- Bending: Is there a gentle curve along the length or width?
- Twisting: Do opposing corners sit unevenly, indicating a torsional warp?
- Cupping: Are the edges raised, forming a concave or convex shape?
Pay close attention to joints and seams. Are there any visible gaps or separations? These could signify structural weaknesses exacerbated by the warping.
Quantifying the Warp: Straight Edge and Level
While a visual inspection provides a general overview, it’s essential to quantify the warp accurately. This is where a straight edge or level comes in handy.
Hold the straight edge against various points on the door’s surface. Observe the gaps between the straight edge and the door.
A larger gap indicates a more pronounced warp.
For a twisting warp, place the straight edge diagonally across the door. If the door is severely twisted, you’ll notice significant gaps at opposite corners. Measure these gaps to gauge the extent of the twist.
Unmasking Water Damage: Stains, Swelling, and Discoloration
Water is a notorious enemy of wood. Look for telltale signs of water damage.
Pay close attention to the edges and corners, which are most susceptible to moisture absorption.
- Stains: Dark or discolored patches may indicate water penetration.
- Discoloration: A general lightening or dulling of the finish.
- Swelling: Bulging or raised areas, particularly around joints.
Feel the surface of the door. Is it damp or soft to the touch? This could indicate ongoing water damage.
Evaluating Environmental Factors: Humidity and Ventilation
The surrounding environment plays a critical role in cabinet door warping.
Assess the humidity levels in the room, especially in kitchens and bathrooms.
Poor ventilation can trap moisture, creating a breeding ground for warping. Check for adequate airflow. Are exhaust fans functioning correctly? Are windows opened regularly to circulate air?
Consider using a humidity meter to get an accurate reading of the room’s humidity level. Ideal humidity levels are between 30-50%.
Tracking Temperature Changes: A Hidden Culprit
Sudden and extreme temperature fluctuations can also contribute to warping.
Think about recent changes in the environment.
Has there been a period of extreme heat or cold? Has the cabinet door been exposed to direct sunlight for extended periods? Such temperature swings can stress the wood fibers, leading to distortion.
By carefully evaluating these factors, you’ll gain a comprehensive understanding of the cause and severity of the warp, paving the way for an effective repair strategy.
Essential Tools and Materials: Preparing for the Repair
Having diagnosed the warp and its likely cause, the next crucial step is gathering the necessary tools and materials. A well-prepared workspace ensures a smoother, more efficient, and ultimately more successful repair. This section outlines everything you’ll need, categorized by function, to tackle your warped cabinet door.
Straightening Arsenal: Taming the Warp
The core of the straightening process relies on controlled force and, sometimes, gentle heat. Here’s what you’ll need:
-
Clamps: The backbone of any straightening endeavor. Invest in a variety of sizes, including deep-reach clamps, to accommodate different door dimensions and warp locations. The deeper the reach, the more flexibility you’ll have in applying pressure precisely where it’s needed. Parallel jaw clamps are ideal for providing even pressure across a wider surface.
-
Iron: Yes, a household iron. Its gentle heat helps relax the wood fibers, making them more amenable to being straightened. Ensure it has a low setting to avoid scorching the wood. Steam functionality is unnecessary and should be avoided.
-
Damp Cloth or Towel: Essential for protecting the wood surface from direct heat when using the iron. A thin, lint-free cloth is ideal to prevent transferring fibers onto the wood.
-
Weight: Heavy objects like books, bricks, or even dumbbells can be strategically placed to apply consistent pressure and aid in the straightening process. Ensure the weight is evenly distributed to prevent creating new warps or distortions.
Gluing Essentials: Reinforcing Weak Spots (If Needed)
If the warping has caused delamination or separation of wood joints, gluing becomes a necessity.
-
Wood Glue: Choose a high-quality wood glue specifically designed for woodworking projects. Consider a glue with a longer open time (the time before it starts to set) if you anticipate a more complex gluing process.
-
Screws (Optional): For added reinforcement, especially in areas that experienced significant stress, screws can provide extra holding power. Use screws sparingly and strategically to avoid detracting from the overall appearance.
-
Screwdriver (If Using Screws): Select a screwdriver that matches the head of your chosen screws to prevent stripping or damaging the screw heads. A drill with a screwdriver bit can expedite the process, but exercise caution to avoid over-tightening.
Refinishing Resources: Restoring the Door’s Beauty (If Needed)
Straightening or gluing might leave imperfections that require refinishing to seamlessly blend the repaired area with the surrounding surface.
-
Wood Filler: Essential for filling minor imperfections, such as small cracks, dents, or screw holes. Choose a wood filler that is stainable and sandable to ensure a smooth, invisible repair.
-
Sandpaper: A variety of grits is crucial for achieving a smooth, flawless finish. Start with a coarser grit (e.g., 80-100) to remove imperfections, then gradually move to finer grits (e.g., 180-220) for smoothing. For the final sanding before applying the finish, use an extra-fine grit (e.g., 320-400).
-
Primer: Primer creates a uniform base for the paint or varnish, ensuring better adhesion and a more consistent finish. Choose a primer that is compatible with your chosen paint or varnish.
-
Paint or Varnish: Select a paint or varnish that matches the existing finish of your cabinets. Consider the durability and water resistance of the finish, especially in high-moisture environments like kitchens and bathrooms.
-
Paintbrushes or Rollers: Choose high-quality brushes or rollers appropriate for the type of finish you’re applying. Foam rollers are ideal for achieving a smooth, even finish with minimal brush strokes.
-
Painter’s Tape: Painter’s tape is invaluable for masking off areas you want to protect from paint or varnish, such as hinges, glass panels, or adjacent surfaces. Use a low-tack tape to avoid damaging the existing finish.
Having assembled your arsenal of tools, the real work begins: coaxing the warped wood back into submission. The following steps detail how to carefully apply heat and pressure, the twin pillars of this corrective process.
Straightening the Warp: Applying Heat and Pressure
This phase demands patience and a gentle touch. Avoid the temptation to rush or apply excessive force, as this can easily exacerbate the problem, leading to cracks, splits, or further distortion. Think of it as a slow, persuasive negotiation with the wood, rather than a brute-force battle.
Preparing the Door for Treatment
First, lay the door on a clean, flat, and stable surface. This could be a workbench, a large table, or even the floor, provided it’s adequately protected. Remove any hardware, such as knobs or handles, to avoid interference.
Next, thoroughly clean the surface of the door with a mild cleaner and a soft cloth to remove any dirt, grease, or grime. This ensures that the heat is evenly distributed and that the damp cloth will properly adhere to the surface.
Finally, dampen a lint-free cloth or towel with water. Wring it out thoroughly so that it’s damp, not soaking wet. Lay this cloth over the most severely warped area of the door. This damp cloth serves as a crucial barrier, protecting the wood from direct heat and preventing scorching or discoloration.
Applying Heat to Relax the Wood
With the damp cloth in place, set your household iron to its lowest heat setting. Avoid using steam, as excessive moisture can worsen the warping. Gently press the iron onto the damp cloth, moving it slowly and steadily over the affected area.
The goal here is not to cook the wood, but rather to gently warm and relax the fibers. Think of it like ironing a delicate garment. Use a circular or back-and-forth motion, applying even pressure and avoiding prolonged heat exposure in any one spot.
Periodically lift the cloth to check the wood’s surface. It should be slightly warm to the touch, but not excessively hot or steaming. If the cloth dries out, re-dampen it before continuing. Repeat this process for several minutes, focusing on the areas where the warping is most pronounced.
Clamping for Controlled Straightening
After applying heat, carefully position the door on the flat surface so that the warped area is facing upwards. Now it’s time to apply the clamps.
Place protective pads (such as wood scraps or thick cardboard) between the clamp jaws and the door’s surface to prevent the clamps from marring the finish. Strategically position the clamps around the warped area, applying even pressure to encourage the door to return to its original shape.
Deep-reach clamps are particularly useful here, allowing you to apply pressure in the center of the door without obstruction. Parallel jaw clamps will distribute pressure evenly across wider sections. Gradually tighten the clamps, checking frequently to ensure that the door is not being overstressed. Avoid excessive force, which could lead to cracking or splitting.
Strategic Use of Weights
In addition to clamping, you can use weights to further encourage straightening. Place heavy objects, such as books, bricks, or dumbbells, on top of the warped area, distributing the weight evenly.
The strategic placement of these weights can help to maintain consistent pressure and prevent the door from springing back into its warped shape. Experiment with different weight configurations to find what works best for your specific situation.
The Waiting Game: Time is Your Ally
Once the door is clamped and weighted, the most challenging part begins: waiting. Patience is paramount in this process.
Leave the door clamped and weighted for an extended period, ideally 24-48 hours. This allows the wood fibers to slowly relax and conform to the desired shape. Resist the urge to check on the door frequently, as disturbing it can hinder the process.
The longer you can leave the door clamped, the better the chances of achieving a lasting correction. In some cases, particularly with severe warps, you may need to leave it for several days or even a week. Think of it as giving the wood time to "re-learn" its original shape.
Having coaxed the wood back towards its original form, the next step hinges on the severity of the initial warp. If the distortion was minor, and the heat and pressure treatment proved successful, you might be able to skip ahead to refinishing. However, for more pronounced cases of warping, or if the door exhibits any separation in its construction, reinforcement is key to ensuring a long-lasting repair.
Reinforcing the Repair: Gluing and Securing (Optional)
This section details how to strategically employ wood glue and, optionally, screws to bolster the door’s structural integrity, preventing the warp from recurring. This stage is crucial for doors that showed significant delamination or stubborn bending.
Identifying Areas for Gluing
Before reaching for the glue bottle, meticulously inspect the door. Pay close attention to the joints, corners, and any areas where the wood appears to be separating or has visible gaps.
Delamination, the separation of wood layers, is a common issue in warped doors. Carefully examine the edges and surfaces for signs of this.
Any visible gaps, even hairline cracks, should also be addressed with glue. These areas represent potential weak points where the warp could reassert itself.
Applying Wood Glue: A Delicate Balance
The key to successful gluing is using the right amount of adhesive. Too little, and the bond will be weak; too much, and you’ll end up with a messy cleanup.
Apply a thin, even layer of high-quality wood glue to the affected areas. A small brush, a toothpick, or even your fingertip can be used to ensure thorough coverage.
For larger areas, consider using a glue spreader to ensure an even distribution.
Be sure to choose a wood glue appropriate for the type of wood your cabinet door is made from.
The Importance of Clamping
Clamping is essential for achieving a strong and durable glue bond.
After applying the glue, immediately re-clamp the door, carefully aligning the pieces and ensuring that the glued areas are pressed firmly together.
Use clamps of appropriate size and strength to provide even pressure across the entire glued surface. Deep-reach clamps can be particularly useful for reaching into recessed areas.
Protect the surface of the door with wood scraps or padding between the clamps and the wood to prevent indentations.
Screws for Added Security (Optional)
In cases of severe warping or significant gaps, screws can provide an extra layer of reinforcement. However, this step requires careful execution to avoid splitting the wood or creating unsightly blemishes.
If you choose to use screws, pre-drill pilot holes slightly smaller than the screw diameter. This will prevent the wood from splitting and make it easier to drive the screws straight.
Use screws that are long enough to penetrate both pieces of wood being joined, but not so long that they protrude through the other side.
Countersink the screw heads slightly below the surface of the wood. The resulting indentation can then be filled with wood filler for a seamless finish.
Cleaning Up Excess Glue
Excess glue squeeze-out is inevitable, but it’s important to address it promptly.
Use a damp cloth to wipe away any excess glue before it dries. Dried glue can be difficult to remove and can interfere with the finishing process.
Be sure to wring out the cloth thoroughly to avoid saturating the wood.
Allowing Adequate Drying Time
Patience is paramount. Allow the glue to dry completely according to the manufacturer’s instructions. This is not the time to rush.
Typically, wood glue requires at least 24 hours to fully cure.
Resist the temptation to remove the clamps or apply any stress to the glued areas until the glue is completely dry. Premature removal can compromise the bond and lead to failure.
Having addressed any structural weaknesses and ensured a solid foundation for your cabinet door, the final stretch involves breathing new life into its appearance and returning it to its rightful place. This transformation hinges on meticulous refinishing, a process that not only revitalizes the door’s aesthetics but also provides a protective barrier against future environmental stressors.
Finishing Touches: Refinishing and Reinstallation
Refinishing is more than just applying a fresh coat of paint; it’s about meticulously preparing the surface, addressing imperfections, and applying the finish with precision to achieve a durable and aesthetically pleasing result. And, of course, it all culminates in the satisfying act of reinstallation, restoring your cabinet to its full functionality.
Sanding for Success: Preparing the Surface
Sanding is the unsung hero of any refinishing project. Its primary goal is to create a smooth, even surface that will readily accept primer and paint or varnish, ensuring optimal adhesion and a flawless final look.
Start with a medium-grit sandpaper (around 120-grit) to remove any existing imperfections, such as scratches, dents, or remnants of the old finish. Follow this with a finer-grit sandpaper (220-grit or higher) to smooth the surface further, creating a velvety texture ideal for refinishing.
Always sand with the grain of the wood to avoid creating unsightly scratches. Use a sanding block or orbital sander for larger surfaces to ensure even pressure and a consistent finish. Remember to thoroughly remove all sanding dust with a tack cloth before proceeding to the next step.
Addressing Imperfections: The Art of Wood Filling
Even with careful sanding, you might encounter small holes, cracks, or imperfections that require filling. This is where wood filler comes to the rescue.
Choose a wood filler that matches the color of your cabinet door as closely as possible. Apply the filler with a putty knife, pressing it firmly into the imperfection and slightly overfilling the area.
Allow the filler to dry completely according to the manufacturer’s instructions. Once dry, sand the filled area smooth with fine-grit sandpaper (220-grit or higher), blending it seamlessly with the surrounding surface.
Priming for Perfection: Creating a Flawless Base
Primer is the crucial link between the raw wood and the final finish. It seals the wood, providing a uniform surface for the paint or varnish to adhere to.
Apply a thin, even coat of high-quality primer to the entire surface of the door, using a brush, roller, or spray gun. Ensure you choose a primer compatible with your chosen paint or varnish.
Allow the primer to dry completely, as recommended by the manufacturer. Lightly sand the primed surface with fine-grit sandpaper (320-grit) to remove any imperfections and create an ultra-smooth base for the finish coat.
The Grand Finale: Painting or Varnishing
This is where your vision comes to life. Whether you opt for a vibrant coat of paint or the warm glow of varnish, applying the finish is the culmination of all your hard work.
Apply the paint or varnish in thin, even coats, using a high-quality brush, roller, or spray gun. Multiple thin coats are always better than one thick coat, as they minimize the risk of drips, runs, and uneven coverage.
Allow each coat to dry completely before applying the next. Lightly sand between coats with very fine-grit sandpaper (400-grit or higher) to remove any imperfections and create an incredibly smooth finish.
Reinstallation: Bringing it All Together
With the refinishing complete, it’s time to reinstall the door onto the cabinet frame. Carefully align the hinges with the corresponding holes on the frame.
Insert the screws, ensuring they are snug but not overtightened. Overtightening can strip the screw holes and damage the wood.
Fine-Tuning: Adjusting the Hinges
Even with careful reinstallation, the door might not sit perfectly flush with the frame or close smoothly. This is where hinge adjustments come into play.
Most cabinet hinges have adjustment screws that allow you to fine-tune the door’s position. Experiment with these screws to achieve the perfect alignment and smooth operation.
A small adjustment can make a big difference. If you’re unsure how to adjust your specific type of hinges, consult the manufacturer’s instructions or search for online tutorials.
Preventing Future Warping: Maintaining Your Cabinet Doors
Warped cabinet doors, a frustrating and common household issue, are often the result of environmental factors acting upon the wood over time. While repair is possible, prevention is undoubtedly the superior strategy. By proactively managing the conditions around your cabinets, you can significantly extend their lifespan and maintain their aesthetic appeal.
Humidity Control: The Primary Defense
Humidity is arguably the greatest enemy of wooden cabinet doors. Wood is a hygroscopic material, meaning it readily absorbs and releases moisture from the air. Excessive humidity causes wood to swell, while low humidity leads to shrinkage. These fluctuations in moisture content create internal stresses that can lead to warping, cracking, and joint failure.
Maintaining a consistent humidity level is paramount. Ideally, you should aim for a relative humidity of between 30% and 50% in your home.
Dehumidifiers and Humidifiers
In humid climates, a dehumidifier is an essential tool for maintaining stable moisture levels. Place a dehumidifier near your cabinets, especially in areas prone to high humidity such as kitchens and bathrooms.
Conversely, in dry climates, a humidifier can add moisture to the air and prevent the wood from drying out excessively.
Ventilation is Key
Proper ventilation is another critical aspect of humidity control, particularly in kitchens and bathrooms.
Ensure that exhaust fans are used during cooking and showering to remove excess moisture from the air. Regular use of these fans helps to prevent moisture from seeping into the wood of your cabinets.
Check that your vents are not blocked by anything that might obstruct airflow. Good airflow will improve the overall indoor air quality.
Temperature Regulation: Avoiding Extremes
While humidity often takes center stage, temperature fluctuations also play a significant role in cabinet door warping. Rapid and extreme changes in temperature can cause wood to expand and contract unevenly, leading to stress and potential warping.
Aim for a stable indoor temperature to minimize these effects.
Seasonal Adjustments
Be mindful of seasonal temperature changes. During the winter months, when indoor heating systems are in use, the air can become excessively dry, leading to shrinkage. In the summer, high temperatures combined with humidity can exacerbate swelling.
Adjust your home’s heating and cooling systems accordingly to maintain a consistent temperature year-round.
Placement Considerations
Avoid placing cabinets in direct sunlight or near heat sources such as ovens or radiators. Prolonged exposure to direct sunlight can cause the wood to dry out and warp, while proximity to heat sources can create localized temperature fluctuations.
Water Damage Prevention: A Proactive Approach
Water damage is a direct and often devastating cause of cabinet door warping. Even small leaks or spills can penetrate the wood and cause swelling, staining, and ultimately, structural damage.
Prompt action is essential to mitigate water damage.
Immediate Cleanup
Wipe up any spills or leaks immediately with a clean, dry cloth. Do not allow water to sit on the surface of the cabinets for any length of time.
Pay particular attention to areas around sinks, dishwashers, and refrigerators, where leaks are most likely to occur.
Sealing and Protection
Ensure that your cabinet doors are properly sealed with a water-resistant finish. This will help to prevent moisture from penetrating the wood.
Regularly inspect the seals around sinks and countertops and reapply sealant as needed to maintain a waterproof barrier.
Regular Cleaning: Maintaining a Healthy Surface
Regular cleaning is not only essential for maintaining the appearance of your cabinets, but also for preventing the buildup of dirt, grime, and other contaminants that can contribute to warping.
Gentle cleaning is key to avoid damaging the finish.
Mild Soap and Water
Use a mild soap and water solution to clean your cabinet doors regularly. Avoid using harsh chemicals or abrasive cleaners, as these can damage the finish and leave the wood vulnerable to moisture.
Proper Drying
After cleaning, dry the cabinet doors thoroughly with a clean, soft cloth. Do not allow water to sit on the surface of the wood.
When to Call a Pro: Recognizing the Limits of DIY
While a can-do attitude and readily available online tutorials empower many homeowners to tackle common household repairs, knowing when to concede and enlist professional help is equally crucial. Cabinet door repair is no exception. Attempting to fix damage that exceeds your skill level or available resources can lead to further complications, wasted time and money, and potentially irreparable harm to your cabinetry.
Here’s a guide to recognizing situations where calling a professional is the wisest course of action.
Unyielding Warping and Twisting
Minor warps can often be addressed with careful application of heat, pressure, and patience. However, severe warping or twisting that resists your best efforts indicates a deeper problem. This might involve internal structural damage within the wood or a warp so ingrained that DIY methods are simply insufficient.
Forcefully attempting to correct such a warp could lead to cracking or breakage, turning a repairable issue into a replacement scenario. Professionals possess specialized equipment and experience to handle stubborn warps, sometimes involving steaming or specialized clamping techniques that are beyond the scope of most DIYers.
Extensive Water Damage and Rot
Wood and water are not friends. While a small water stain might be easily remedied, extensive water damage or rot significantly compromises the structural integrity of the cabinet door.
Signs of serious water damage include:
- Soft, spongy wood
- Visible mold or mildew
- Discoloration that penetrates deep into the wood
- A musty odor
Attempting to repair rotten wood is generally futile, as the decay will continue to spread. Furthermore, mold and mildew pose health risks, making professional remediation essential. A professional can assess the extent of the damage, determine if the door can be salvaged, and safely address any mold issues. In many cases, replacement might be the only viable option.
Delamination Requiring Specialized Tools
Cabinet doors, particularly those made from engineered wood products like plywood or MDF, can suffer from delamination – the separation of the wood layers. While minor delamination might be glued back together, severe separation requires specialized clamps, adhesives, and techniques to ensure a lasting repair.
Furthermore, if the core material is damaged or crumbling, simply re-gluing the layers will not provide a long-term solution. A professional woodworker can assess the damage, determine the best course of action, and execute a repair that restores the door’s structural integrity. In some cases, they may even be able to fabricate a new core for the door.
Self-Assessment: Skill, Confidence, and Resources
Honest self-assessment is paramount. If you lack confidence in your ability to perform the necessary repairs, or if you simply don’t enjoy woodworking, it’s best to leave the job to a professional. A botched repair can often be more expensive to fix than hiring a pro in the first place.
Similarly, if you lack the necessary tools or materials, acquiring them can quickly negate any potential cost savings from DIY repair. Specialized clamps, woodworking tools, and professional-grade finishes can be a significant investment.
Consider your time as well. DIY repairs can be time-consuming, and if your schedule is already packed, hiring a professional might be the most efficient and stress-free solution.
FAQs: Fixing Warped Cabinet Doors
Got more questions after tackling your warped cabinet door? Here are some common queries to help you get a perfect fix.
Why did my cabinet door warp in the first place?
Cabinet doors warp due to changes in humidity and temperature. Wood expands and contracts with moisture, and uneven exposure can cause it to bend. In short, understanding why your door warped is the first step to understanding how to fix warped cabinet door issues effectively.
How long does it take to fix a warped cabinet door using the methods described?
Depending on the severity of the warp and the chosen method (like the damp towel and weight technique), it can take anywhere from a few hours to a couple of days. Monitor the door’s progress regularly. It’s always better to be patient when figuring out how to fix warped cabinet door problems, rather than forcing a quick solution.
Can I prevent my cabinet door from warping again after I fix it?
Yes, maintaining a stable humidity level in your home is crucial. Consider using a dehumidifier or humidifier as needed. Applying a quality sealant or finish to all sides of the door can also help protect it from moisture. This is essential in preventing future problems that require you to figure out how to fix warped cabinet door problems.
What if the warped cabinet door is made of MDF (Medium-Density Fiberboard) instead of solid wood?
MDF is generally more stable than solid wood but can still warp with extreme moisture exposure. The damp towel and weight method may still work, but be very careful not to oversaturate the MDF, as it can swell and become damaged. If MDF is significantly warped, replacement might be the more practical option, as how to fix warped cabinet door issues on MDF can be more complex.
So there you have it! Armed with these easy steps, you can tackle that warped cabinet door like a pro. Hopefully, you’ve gained some valuable insight on how to fix warped cabinet door. Good luck with your project!