Considering enhancing your property’s curb appeal and security without breaking the bank? Building a diy metal fence is an accessible project for homeowners with basic skills. The benefits extend beyond cost savings to include customization options for style preferences. Many hardware stores like The Home Depot offer a variety of pre-cut metal panels and posts, simplifying the construction process. When installing, remember that proper measurement is paramount for achieving a professional finish and it may also be important to consult with your local municipality to determine if any permits or permission is required before you start your project.
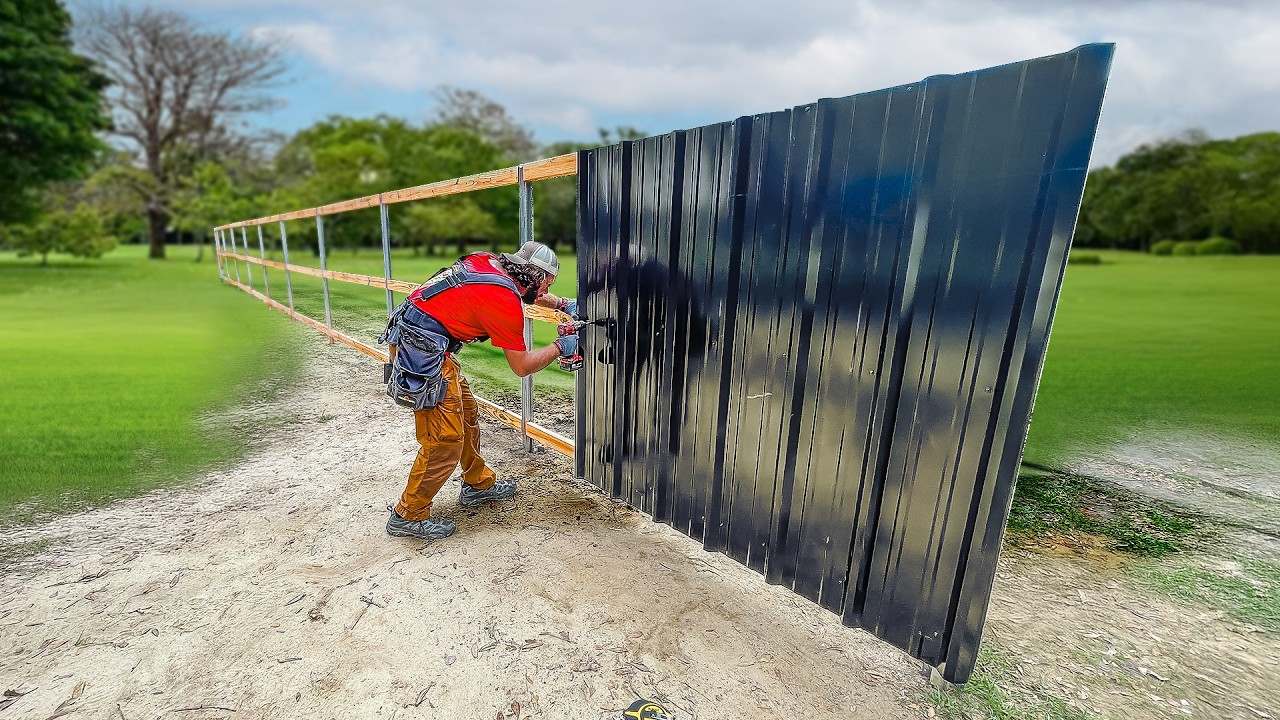
Image taken from the YouTube channel HAXMAN , from the video titled Fence Contractors Hate Me For Showing You This! .
Dreaming of a stylish and secure perimeter for your property? A metal fence offers an appealing combination of durability, aesthetics, and security.
However, the price tag for professional fence installation can often be a significant barrier. Labor costs, material markups, and project management fees can quickly inflate the overall expense, making a professionally installed fence seem like an unattainable luxury.
The DIY Alternative: A Smart Investment
But what if you could achieve the same results, or even better results, while keeping a substantial amount of money in your pocket? That’s where the beauty of a DIY metal fence comes in.
Building your own metal fence is not just about saving money; it’s about taking control of your project and creating a fence that perfectly reflects your personal style and property needs.
Unleash the Benefits of a DIY Metal Fence
Embarking on a DIY metal fence project offers a multitude of advantages:
- Significant Cost Savings: The most obvious benefit is the dramatic reduction in cost. By eliminating labor expenses and carefully sourcing your materials, you can save a considerable amount of money.
- Unparalleled Customization: Design your fence exactly as you envision it. Choose the style, height, color, and gate placement to perfectly complement your property.
- Personal Satisfaction and Accomplishment: There’s immense satisfaction in building something with your own hands. A DIY fence is a tangible testament to your skills and dedication.
Demystifying the Process
Many homeowners shy away from DIY fence projects, fearing they are too complex or require specialized skills. While some effort is undoubtedly required, the process is more manageable than you might think.
With careful planning, the right tools, and clear instructions, anyone can successfully build their own metal fence.
This comprehensive guide is designed to simplify the process, breaking it down into manageable steps and providing all the information you need to confidently tackle your DIY metal fence project. Prepare to be empowered to transform your property with a beautiful and affordable metal fence, built by you.
Dreaming of a stylish and secure perimeter for your property? A metal fence offers an appealing combination of durability, aesthetics, and security. However, the price tag for professional fence installation can often be a significant barrier. Labor costs, material markups, and project management fees can quickly inflate the overall expense, making a professionally installed fence seem like an unattainable luxury. But what if you could achieve the same results, or even better results, while keeping a substantial amount of money in your pocket? That’s where the beauty of a DIY metal fence comes in. Building your own metal fence is not just about saving money; it’s about taking control of your project and creating a fence that perfectly reflects your personal style and property needs. Unleash the Benefits of a DIY Metal Fence. Embarking on a DIY metal fence project offers a multitude of advantages. Significant Cost Savings: The most obvious benefit is the dramatic reduction in cost. By eliminating labor expenses and carefully sourcing your materials, you can save a considerable amount of money. Unparalleled Customization: Design your fence exactly as you envision it. Choose the style, height, color, and gate placement to perfectly complement your property. Personal Satisfaction and Accomplishment: There’s immense satisfaction in building something with your own hands. A DIY fence is a tangible testament to your skills and dedication.
Many homeowners shy away from DIY fence projects, fearing they are too complex or require specialized skills. While it’s true that some planning and effort are required, the process is more accessible than you might think. The key to a successful DIY metal fence project lies in thorough preparation.
Planning and Preparation: Setting the Foundation for Success
Before you even think about picking up a tool, a solid plan is essential. This initial phase is the most crucial, as it sets the stage for a smooth and successful fence-building experience. Careful planning prevents costly mistakes and ensures your fence meets your needs and complements your property. Let’s break down the key elements of this crucial phase.
Why Choose Metal Fencing?
Metal fencing offers a compelling combination of benefits that make it an ideal choice for many homeowners. Unlike wood, metal is naturally resistant to rot, decay, and insect damage, translating to long-term cost savings and reduced maintenance. Here are just a few of the reasons to choose metal:
-
Durability: Metal fences are incredibly strong and can withstand harsh weather conditions, providing lasting security for your property.
-
Security: The inherent strength of metal makes it an excellent deterrent against intruders and provides a safe enclosure for children and pets.
-
Modern Aesthetics: Metal fences offer a sleek, contemporary look that can enhance the curb appeal of your home.
-
Minimal Maintenance: Unlike wood fences that require regular staining or painting, metal fences require minimal upkeep, saving you time and money.
Essential Tools and Materials
Having the right tools and materials on hand will streamline the construction process and ensure a professional-looking result. Invest in quality tools; they will last longer and make the job easier. Here’s a comprehensive list to get you started:
-
Measuring Tools:
-
Measuring Tape: Essential for accurate measurements of property lines and fence sections.
-
Level: Crucial for ensuring posts are plumb (vertical) and the fence is straight.
-
-
Safety Gear:
-
Safety Glasses: Protect your eyes from flying debris during cutting, drilling, and welding.
-
Work Gloves: Protect your hands from sharp edges, splinters, and concrete.
-
-
Materials:
-
Concrete Mix: Used to securely anchor the fence posts in the ground.
-
Fence Posts: The vertical supports of your fence, typically made of steel or aluminum.
-
Fence Panels: The sections that connect to the posts, creating the fence enclosure.
-
Gate Hardware: Hinges, latches, and handles for the gate.
-
Rust-Resistant Paint: Protects the metal from corrosion and enhances its appearance.
-
-
Tools (If Welding):
-
Welding Machine: For joining metal pieces together (if you choose to weld).
-
Angle Grinder: For cutting metal, removing rust, and smoothing edges.
- Consider renting the more expensive tools to reduce costs.
- A simple level is all you need to make sure you are perfectly vertical!
-
Designing Your Fence
A well-designed fence not only looks great but also serves its intended purpose effectively. Take the time to carefully plan the layout, considering your property lines, desired style, and gate placement.
- Accurately Measure the Property Line: Precise measurements are essential for determining the length of the fence and the placement of posts. Don’t estimate; use a measuring tape to get accurate figures.
- Plan the Layout Carefully: Consider the terrain, existing landscaping, and any underground utilities before finalizing your fence layout. Clearly mark the location of each post and gate.
- Gate Placement: Strategically position the gate for convenient access to your yard or garden. Consider the width needed for lawnmowers, wheelbarrows, or other equipment.
-
Online Resources:
-
Consult Online Tutorials: YouTube is your friend! Search for DIY metal fence tutorials for inspiration and guidance on design and construction techniques.
-
**Look at other fences in your neighborhood for ideas.
-
- Professional Advice:
- **Ask a professional fence company for advice if your fence is complex in nature.
- Do not be afraid to solicit advice from others.
- **Ask a professional fence company for advice if your fence is complex in nature.
By meticulously planning and preparing, you’ll set yourself up for a successful and rewarding DIY metal fence project. Remember, a little extra effort in the beginning can save you a lot of time, money, and frustration down the road.
Dreaming up the perfect fence design is one thing, but bringing it to life is where the real transformation begins. Now it’s time to get into the heart of the project.
Step-by-Step Construction: Building Your Metal Fence
The following section details the practical steps involved in assembling your DIY metal fence. We will be covering everything from setting the foundational posts to securely attaching the panels and installing the gate.
Installing the Posts: The Foundation of Your Fence
The fence posts are the backbone of your entire structure, so it’s crucial to get this step right. The stability and longevity of your fence depend on the proper installation of these posts.
Measure twice, dig once is a worthy mantra during this phase.
Digging the Post Holes
Start by digging post holes at consistent intervals. Aim for a spacing of 6-8 feet apart; this is generally accepted as the sweet spot for fence stability. However, always factor in the dimensions of your fence panels.
The depth of the holes is equally critical. As a rule, holes should be at least one-third the height of the post above ground. This provides ample anchoring. For example, if you have a 6-foot post, bury at least 2 feet of it.
Use a post hole digger or an auger for efficiency. Keep the sides of the hole as straight as possible.
Setting the Posts in Concrete
With your holes dug, it’s time to set the posts in concrete. This is where you transform a simple hole into a sturdy anchor.
Center each post in its hole. Ensure it’s perfectly plumb (vertical) using a level. This is not an area to compromise, as even a slight lean can compound over the length of the fence.
Mix your concrete according to the manufacturer’s instructions. Pour the concrete mix into the hole around the post, filling it to a few inches below ground level.
Use a trowel to slope the concrete away from the post; this will help water runoff and prevent premature corrosion.
Ensuring Alignment and Evenness
While the concrete is still wet, take a moment to double-check the alignment.
Use a level to ensure that all posts are even in height and aligned correctly.
A string line stretched between the first and last post can act as a visual guide, helping you maintain a straight line. Make any necessary adjustments before the concrete sets.
Allow the concrete to cure fully, following the recommended drying time on the concrete mix packaging. Patience here pays off in the long run.
Attaching the Fence Panels: Creating the Enclosure
With the posts firmly in place, you can now attach the fence panels. This step brings your fence design to life, creating a defined boundary.
Prioritizing Safety
Before you begin, put on your safety glasses and work gloves. Safety should always be your top priority, especially when working with metal and power tools.
Welding the Panels (If Applicable)
If you are welding the panels to the posts, ensure you have the necessary welding equipment and experience.
Precise cuts with an angle grinder are essential for achieving clean, professional-looking welds. Remember to wear appropriate safety gear, including a welding helmet and gloves.
Utilizing Brackets and Screws
For those who prefer a non-welding approach, brackets and screws offer a reliable alternative.
Attach brackets to the posts using screws. Then, align the fence panels with the brackets and secure them in place with additional screws.
Choose screws that are specifically designed for outdoor use to prevent corrosion. Stainless steel screws are an excellent choice.
Ensuring a Secure Fit
Regardless of the method you choose, make sure the fence panels are securely attached to the posts.
Check for any wobbling or loose connections. Reinforce as needed to ensure the stability of the fence.
Adding the Gate: Entrance to Your Haven
The final major step is installing the gate. The gate will serve as the welcoming entrance to your property.
Secure Gate Hardware Installation
Start by securely installing the gate hardware. This includes hinges, latches, and any other necessary components.
Follow the manufacturer’s instructions carefully to ensure proper installation. Use appropriate screws or bolts to attach the hardware to the gate and the adjacent fence post.
Ensuring Smooth Operation
Once the hardware is installed, test the gate to ensure it swings freely and latches properly.
Adjust the hinges as needed to achieve a smooth, even swing. Make sure the latch engages securely to keep the gate closed when desired.
Making Final Adjustments
Take a step back and examine the gate’s overall appearance.
Make any final adjustments to ensure it aligns correctly with the rest of the fence. A well-installed gate is the perfect finishing touch to your DIY metal fence project.
Finishing Touches: Protecting and Beautifying Your Fence
With the structural elements of your metal fence now in place, it’s time to focus on the details that will ensure its longevity and aesthetic appeal. This final stage is all about protecting your investment from the elements and adding a touch of personal style.
Surface Preparation: The Key to a Lasting Finish
Before applying any protective coatings, meticulous surface preparation is essential. Think of it as creating the perfect canvas for your artwork. This stage ensures optimal adhesion and long-term durability of the paint or coating.
Cleaning the Surface
The first step is to thoroughly clean the entire metal surface. Remove any dirt, grime, oil, or other contaminants that may have accumulated during the construction process.
A simple solution of soap and water, followed by a thorough rinse, can work wonders. For stubborn residues, consider using a specialized metal cleaner.
Rust Removal: Addressing Corrosion
Rust is the enemy of metal, and any existing corrosion must be addressed before proceeding. Small spots of rust can often be removed with a wire brush and elbow grease.
For more significant rust buildup, an angle grinder with a rust-removal disc is your best bet. Always wear safety glasses and gloves during this step.
The goal is to achieve a clean, smooth surface that is free of any rust or loose debris. This ensures the protective coating adheres properly.
Painting or Coating: Protection and Personalization
Now comes the fun part: adding color and protection to your metal fence. The choice of paint or coating will significantly impact its overall appearance and resistance to weathering.
Rust-Resistant Paint: A Reliable Choice
Applying a high-quality, rust-resistant paint is a practical and cost-effective way to protect your metal fence. Look for paints specifically formulated for outdoor metal surfaces.
These paints typically contain corrosion inhibitors that help prevent rust from forming. Apply at least two coats, following the manufacturer’s instructions, for optimal protection.
When selecting a color, consider your personal preferences and the overall aesthetic of your property. Neutral tones like black, gray, or brown are popular choices that complement a wide range of architectural styles.
Powder Coating: A Durable and Professional Finish
For a more durable and professional-looking finish, consider powder coating. This process involves applying a dry powder to the metal surface and then baking it in an oven.
The heat melts the powder, creating a smooth, even, and incredibly tough coating. Powder coating is highly resistant to chipping, scratching, and fading.
While powder coating typically requires specialized equipment and is often best left to professionals, the investment can be well worth it for long-lasting protection and a premium aesthetic.
Whether you choose paint or powder coating, taking the time to properly prepare the surface and apply the coating correctly will ensure that your metal fence looks beautiful and provides years of reliable service.
With your fence taking shape, it’s crucial to pause and reflect on the most important aspect of any DIY project: your safety. Building a metal fence involves tools and techniques that demand respect and caution. Let’s make sure we’re equipped with the knowledge and practices to keep ourselves safe from start to finish.
Safety First: Protecting Yourself During the Project
No matter how eager you are to see your new fence standing tall, your well-being must always be the top priority. This section is dedicated to reinforcing safety measures that should be consistently applied throughout the entire project. Remember, a beautiful fence isn’t worth risking your health or safety.
Safety Glasses and Work Gloves: Your Constant Companions
Safety glasses and work gloves aren’t optional; they’re essential personal protective equipment (PPE). Make it a habit to put them on before you even think about picking up a tool.
Safety glasses shield your eyes from flying debris, sparks, and dust particles – all common occurrences when working with metal. Choose glasses that provide a snug fit and wrap-around protection.
Work gloves protect your hands from cuts, abrasions, and burns. Opt for durable gloves that provide a good grip and allow for dexterity. Leather or synthetic gloves are excellent choices for this project.
Welding Safety: If Sparks are Flying, Be Extra Vigilant
If your fence design involves welding, safety protocols become even more critical. Welding generates intense heat, sparks, and fumes that can be hazardous if not handled correctly.
Essential Welding PPE
In addition to safety glasses and work gloves, welding requires specific PPE:
- A welding helmet with an auto-darkening lens to protect your eyes from the intense UV and IR radiation.
- Welding gloves made of leather or flame-resistant material to protect your hands and wrists from burns.
- A welding jacket or apron to shield your body from sparks and heat.
- Long pants and sleeves made of natural fibers (cotton or wool) to minimize the risk of burns.
Ventilation is Key
Welding fumes can be toxic, so ensure adequate ventilation in your workspace. Welding outdoors is ideal, but if you must weld indoors, use a ventilation system or open windows and doors to create airflow.
Fire Safety
Welding can easily ignite flammable materials. Before welding, clear the area of any combustible items, such as wood, paper, or gasoline. Keep a fire extinguisher nearby and know how to use it.
Never Weld Alone
It’s always a good idea to have someone nearby while welding in case of an emergency.
Angle Grinder Safety: Respect the Power
The angle grinder is a versatile tool, but it can also be dangerous if used improperly. Always treat it with respect and follow these safety guidelines:
- Use the correct wheel or disc for the task at hand. Different wheels are designed for cutting, grinding, or polishing, and using the wrong one can lead to breakage and injury.
- Inspect the wheel or disc for cracks or damage before each use. Never use a damaged wheel.
- Ensure the wheel is securely mounted and the guard is in place.
- Hold the grinder firmly with both hands and maintain a stable stance.
- Avoid applying excessive pressure. Let the grinder do the work.
- Never remove the safety guard. The guard is there to protect you from flying debris and wheel breakage.
- Be aware of the direction of sparks and ensure they are directed away from yourself and any flammable materials.
Remember: Taking a few extra moments to prioritize safety can prevent serious injuries and ensure you can enjoy your beautiful new metal fence for years to come.
So there you have it – tackling a diy metal fence isn’t as daunting as it might seem! Hope you’re feeling inspired to get out there and build something awesome. Good luck!