Wood floors, a beautiful feature in many homes, often fall victim to accidents, particularly from our furry friends. Vinegar, a common household ingredient, shows promise when used in a homemade dog urine cleaner for wood floors, but requires careful application to avoid damage. Baking soda, another staple, helps neutralize odors, making it an essential component of many cleaning solutions. Understanding the species of wood, such as oak or maple, is crucial as different wood types react differently to cleaning agents. Knowing these variables will help you formulate a homemade dog urine cleaner for wood floors that works best for your specific situation.
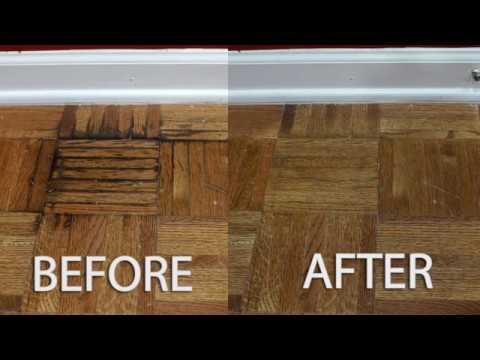
Image taken from the YouTube channel cameratest , from the video titled How to remove pet urine stains from hardwood floor with hydrogen peroxide .
Unleash the Power of DIY Dog Urine Cleaners for Wood Floors!
Few things are as frustrating for homeowners as discovering a dog urine accident on their beautiful wood floors. The unsightly stains and lingering odors can quickly turn a pristine space into a source of constant irritation. While countless commercial cleaning products promise to eliminate the problem, they often come with a hefty price tag and a list of ingredients that are less than desirable.
But what if there was a better way?
A solution that was not only effective but also affordable, environmentally friendly, and allowed you complete control over the ingredients used in your home? The answer lies in the power of DIY dog urine cleaners.
The Appeal of Homemade Solutions
Homemade cleaning solutions offer a compelling alternative to their commercial counterparts. They are incredibly cost-effective. Often utilizing ingredients you already have in your pantry. This can save you a significant amount of money compared to consistently purchasing specialized cleaners.
Perhaps even more importantly, DIY cleaners put you in control. You know exactly what’s going into your cleaning solution. This is particularly crucial for pet owners who are concerned about the potential harm of harsh chemicals.
The environmental benefits are also undeniable. By using readily available, biodegradable ingredients. You can reduce your environmental footprint and contribute to a more sustainable cleaning routine.
Effective and Economical Cleaning
Many people underestimate the cleaning power of common household items like vinegar, baking soda, and hydrogen peroxide. When combined correctly, these ingredients can create incredibly effective cleaning solutions that rival, and even surpass, the performance of commercial products.
While it may sound too good to be true. The effectiveness of these simple, homemade remedies is surprisingly impressive.
With the right recipes and techniques. You can effectively remove dog urine stains and odors from your wood floors. Restoring them to their former glory without breaking the bank or exposing your family to harmful chemicals.
Understanding the Enemy: How Dog Urine Affects Wood Floors
Before diving into DIY solutions, it’s crucial to understand why dog urine is so damaging to wood floors. This knowledge will inform your cleaning approach and help you prevent future problems.
The Science of Destruction: Acidity and Wood
Dog urine is inherently acidic. This acidity is the primary culprit behind the damage it inflicts on wood.
The acidic components of urine actively corrode the wood fibers, breaking down the material at a microscopic level. Over time, this corrosion weakens the wood, leading to discoloration, structural damage, and that lingering, unpleasant odor.
Penetration and Persistence
The damage doesn’t stop at the surface.
Urine’s liquid nature allows it to seep deep into the wood’s pores. This penetration is what causes stubborn stains and deeply embedded odors that are difficult to eradicate with surface cleaning alone.
Once urine penetrates, it creates a breeding ground for bacteria. These bacteria further contribute to the odor and can exacerbate the damage to the wood fibers.
Sealed vs. Unsealed: A Matter of Protection
The type of finish on your wood floor plays a significant role in its vulnerability to urine damage.
Sealed wood floors have a protective layer of polyurethane, varnish, or similar sealant. This barrier provides a degree of protection against moisture and stains.
However, this protective layer is not impenetrable.
- Compromised Seal: Scratches, cracks, or wear in the sealant can create entry points for urine.
- Prolonged Exposure: Even an intact sealant can only withstand urine exposure for so long before it begins to break down.
Unsealed wood floors, on the other hand, offer virtually no protection. Their porous nature makes them highly susceptible to urine penetration.
The liquid quickly absorbs into the wood. Leading to rapid staining and odor absorption. Cleaning unsealed floors requires a different approach.
Hardwood vs. Softwood: Density Matters
The type of wood itself also affects how urine is absorbed and the extent of the damage.
Hardwoods, such as oak, maple, and cherry, are denser and less porous than softwoods.
This means they generally absorb urine at a slower rate than softwoods. They are more resistant to staining.
Softwoods, like pine and fir, are more porous and absorbent.
This makes them more vulnerable to deep staining and odor retention.
Softwood floors often require more aggressive cleaning techniques.
Assembling Your Arsenal: Key Ingredients for a Homemade Urine Cleaner
Now that we understand the destructive nature of dog urine on wood floors, it’s time to arm ourselves with the right tools for the job. Fortunately, effective cleaning solutions can be crafted from readily available and surprisingly potent ingredients. Let’s explore the key components of a DIY dog urine cleaner, understanding their individual properties and how they contribute to a cleaner, fresher home.
Vinegar: The Odor Neutralizer
Vinegar, particularly white distilled vinegar, is a powerhouse when it comes to neutralizing odors. Its effectiveness lies in its acidic nature, which counteracts the alkaline components often found in dried urine. On a chemical level, vinegar’s acetic acid interacts with the ammonia in urine, effectively breaking it down and eliminating the source of the unpleasant smell.
It’s also a mild disinfectant, further contributing to a cleaner environment. However, it’s essential to dilute vinegar properly with water, as undiluted vinegar can be too harsh for some wood finishes.
Baking Soda: The Absorber and Deodorizer
Baking soda, or sodium bicarbonate, is a versatile ingredient with both absorbent and deodorizing capabilities. Its slightly alkaline nature helps to neutralize acidic odors, working in tandem with vinegar for a comprehensive odor-fighting approach.
Baking soda’s fine, powdery texture allows it to penetrate into the porous surface of wood, drawing out moisture and embedded odors. When used as a paste, it can lift stains and trap odor molecules, making them easier to remove. Its gentle abrasive action can also help to scrub away surface residue without damaging the wood.
Hydrogen Peroxide: The Stain Lifter (Handle with Care)
Hydrogen peroxide is a potent stain remover, thanks to its oxidizing properties. It works by breaking down the chemical bonds of stain molecules, making them colorless and easier to lift from the wood. However, its bleaching action requires careful use, especially on darker wood finishes.
Always test hydrogen peroxide in an inconspicuous area first to ensure it doesn’t discolor or damage the wood. Use a low concentration (3% is standard) and apply sparingly. It’s crucial to avoid prolonged contact, as it can lighten the wood’s natural color.
Enzyme Cleaners: Molecular Odor Annihilators
Enzyme cleaners offer a different approach to odor removal. Instead of simply masking the smell, they contain enzymes that break down the organic components of urine at a molecular level. These enzymes essentially digest the urine, eliminating the source of the odor completely.
Look for enzyme cleaners specifically formulated for pet urine, as these contain a blend of enzymes designed to target the proteins and other compounds found in dog urine. These cleaners are generally safe for wood floors when used according to the manufacturer’s instructions. They represent one of the most effective ways to rid your floors of both stain and scent.
Essential Oils: Aromatic Boost and Mild Disinfectant
Essential oils can add a pleasant scent to your homemade cleaner and provide some additional disinfectant properties. However, it’s crucial to choose oils that are safe for pets.
Pet-Safe Essential Oils
Lavender and lemon essential oils are generally considered safe for dogs and offer a refreshing scent. Lavender has calming properties, while lemon provides a bright, clean aroma. Adding a few drops of these oils to your cleaning solution can enhance the overall cleaning experience.
Essential Oils to Avoid
Certain essential oils, such as tea tree, pennyroyal, and pine, are toxic to dogs and should never be used in cleaning products. Always research the safety of an essential oil before using it around pets.
Water: The Universal Diluent
Water is an essential component for diluting and mixing the other ingredients. It helps to distribute the cleaning agents evenly across the surface and prevents them from being too harsh on the wood finish. Use distilled or filtered water to avoid mineral deposits that could potentially stain or damage the floor. The precise amount of water required will depend on the specific recipe and the severity of the stain or odor.
With our arsenal of natural cleaning agents assembled and their individual strengths understood, it’s time to delve into the practical application of these ingredients. Let’s move on to crafting some magic recipes that tackle dog urine stains and odors head-on.
The Magic Recipes: Step-by-Step DIY Dog Urine Cleaner Guide
Here, we’ll provide clear, step-by-step instructions for creating and applying different homemade dog urine cleaning solutions. These recipes cover a range of stain severities and odor problems, ensuring you have the right solution for every situation. Remember to always test any cleaning solution in an inconspicuous area first to ensure it doesn’t damage your floor’s finish.
Recipe 1: Vinegar and Water Solution – The Everyday Cleaner
This simple yet effective solution is perfect for fresh accidents and general odor control.
Vinegar is a workhorse in fighting pet odors, and when diluted, it’s a safe and reliable option for most wood floors.
Ideal Mixing Ratios
The key to success lies in the correct dilution. For lightly soiled areas or routine cleaning, a 1:1 ratio of white vinegar to water is ideal.
For stronger odors, you can increase the vinegar concentration slightly, but never exceed a 2:1 ratio (two parts vinegar to one part water). Excessively strong vinegar solutions can dull some finishes.
Application Techniques
-
Preparation: Blot up as much fresh urine as possible with paper towels or a clean cloth. The quicker you act, the less urine will penetrate the wood.
-
Application: Pour the vinegar solution into a spray bottle. Lightly mist the affected area, ensuring the wood is damp but not soaked.
-
Dwelling Time: Allow the solution to sit for 5-10 minutes. This gives the vinegar time to neutralize the odors.
-
Blotting: Use a clean, dry paper towel or microfiber cloth to blot up the solution. Avoid rubbing, as this can spread the stain or damage the finish.
Proper Drying
After blotting, allow the area to air dry completely. You can use a fan to speed up the drying process. Ensure the area is thoroughly dry to prevent moisture damage to the wood.
Recipe 2: Baking Soda Paste for Stubborn Stains
When a simple vinegar solution isn’t enough, baking soda steps in to tackle those more persistent stains and odors.
Its slightly abrasive texture and absorbent properties make it an excellent choice for drawing out impurities from the wood.
Creating and Applying the Paste
-
Mixing: In a small bowl, mix baking soda with just enough water to form a thick paste. The consistency should be similar to toothpaste.
-
Application: Apply the paste generously to the stained area, completely covering it.
-
Gentle Scrubbing (Optional): For very stubborn stains, you can gently scrub the paste into the wood using a soft-bristled brush (like an old toothbrush). Be extremely careful not to apply too much pressure, as this can scratch the finish.
Recommended Dwell Time
Allow the paste to sit on the stain for several hours, or even overnight. The longer it sits, the more time it has to absorb the stain and odor.
Removal and Cleanup
-
Vacuuming: Once the dwell time is complete, vacuum up the dried baking soda paste. A hose attachment can be helpful for reaching into grooves and crevices.
-
Wiping: Use a damp cloth to wipe away any remaining residue. Ensure the cloth is only slightly damp to avoid over-wetting the wood.
-
Drying: Allow the area to air dry completely. As with the vinegar solution, you can use a fan to speed up the process.
Recipe 3: Hydrogen Peroxide and Baking Soda for Set-In Stains (Use with Extreme Caution!)
This powerful combination is reserved for only the most stubborn, set-in stains that haven’t responded to other treatments. Hydrogen peroxide can bleach or damage wood finishes, so extreme caution is essential.
Testing and Safety Precautions
- Before proceeding, ALWAYS test this solution in an inconspicuous area of your wood floor. This is non-negotiable.
- Wear gloves and eye protection to prevent skin and eye irritation.
- Ensure the room is well-ventilated.
Specific Application Method
-
Mixing: In a small bowl, mix 1/4 cup of hydrogen peroxide (3% solution) with 1 tablespoon of baking soda. Mix until it forms a thin paste.
-
Application: Apply the paste sparingly to the stained area. Do not saturate the wood.
-
Dwell Time: Allow the paste to sit for no more than 1-2 hours. Check the area frequently for any signs of bleaching or damage.
Monitoring for Damage
- Every 15-20 minutes, check the treated area for any signs of lightening, discoloration, or damage to the finish.
- If you notice any adverse effects, immediately remove the paste and wipe the area with a damp cloth.
Removal and Cleanup
-
Wiping: Carefully wipe away the paste with a damp cloth. Ensure you remove all traces of the hydrogen peroxide.
-
Drying: Blot the area dry with a clean cloth and allow it to air dry completely.
This recipe should be considered a last resort, and if you’re uncomfortable using it, it’s best to consult a professional cleaning service.
Addressing Persistent Problems: Tackling Lingering Odors and Stubborn Stains
Sometimes, despite our best efforts, the unpleasant reminders of past accidents linger. Tackling deeply embedded odors and stubborn stains requires a more strategic approach. Don’t despair; with patience and the right techniques, you can often restore your wood floors to their former glory.
Tackling Lingering Pet Odor
Lingering pet odor is a common frustration, often stemming from urine that has seeped deep into the wood fibers. The key is to neutralize the odor at its source rather than simply masking it.
Baking Soda as a Deodorizer
Baking soda is a powerful, natural deodorizer that absorbs odors instead of covering them up. This makes it an ideal solution for lingering pet smells.
Application:
Generously sprinkle baking soda over the affected area. Ensure complete coverage, especially if you suspect the urine has spread beyond the visible stain.
Dwell Time:
Allow the baking soda to sit for at least 24-48 hours. For particularly strong odors, you can leave it for up to a week. The longer it sits, the more odor it will absorb.
Removal:
Vacuum up the baking soda thoroughly using a vacuum cleaner with a brush attachment. For hardwood floors, use a gentle setting to avoid scratching the surface.
After vacuuming, wipe the area with a damp (not wet) cloth to remove any remaining residue.
The Importance of Airing Out the Room
Ventilation is crucial for eliminating residual odors. Open windows and doors to allow fresh air to circulate through the room. This helps to dissipate any remaining odor molecules and speed up the drying process.
Using fans can further enhance air circulation, especially in areas with poor ventilation.
Stain Removal: Advanced Techniques
Stubborn stains can be challenging to remove, particularly if they’ve been left untreated for an extended period. The age and severity of the stain will dictate the approach needed.
Age Matters:
Fresh stains are generally easier to remove than old, set-in stains. The longer a stain sits, the deeper it penetrates the wood, making it more difficult to eradicate.
Severity Assessment:
Evaluate the stain’s depth and color. Light stains may respond to milder treatments, while dark, deeply embedded stains may require more aggressive methods. However, always start with the gentlest approach to avoid damaging the wood.
Consider using a targeted enzyme cleaner specifically designed for pet urine. These cleaners contain enzymes that break down the urine’s components at a molecular level, effectively removing both the stain and the odor.
Follow the manufacturer’s instructions carefully, and always test in an inconspicuous area first.
For extremely stubborn stains, you might consider gently sanding the affected area, but this should be done with extreme caution and only as a last resort. Sanding can remove the wood’s finish and potentially damage the floor if not done properly. If you’re not comfortable with this process, it’s best to consult a professional.
After you’ve worked hard to remove existing stains and odors, the next logical step is to implement strategies that minimize the chances of future accidents occurring on your wood floors. A proactive approach, combining training, maintenance, and swift responses, will safeguard your beautiful floors and maintain a fresh, clean home environment.
Prevention is Better Than Cure: Minimizing Future Accidents
The most effective way to deal with dog urine on wood floors is to prevent it from happening in the first place. This involves a multi-faceted approach that addresses the root causes of accidents and promotes a clean and well-maintained environment.
The Foundation: Training Your Dog
House training is paramount to preventing future accidents. While the specific methods vary depending on the dog’s age, breed, and temperament, some core principles remain constant.
-
Establish a Routine: Dogs thrive on routine. Consistent feeding times, regular walks, and designated potty breaks help regulate their bodily functions and reduce the likelihood of indoor accidents.
-
Positive Reinforcement: Reward successful potty breaks with praise, treats, or toys. Positive reinforcement strengthens the desired behavior and encourages your dog to eliminate outside.
-
Crate Training (If Applicable): A crate can be a valuable tool for house training, as dogs instinctively avoid soiling their den. However, it’s crucial to use the crate humanely and avoid leaving your dog confined for extended periods.
-
Supervision and Early Detection: Closely supervise your dog, especially during the initial stages of training. Watch for signs that they need to go outside, such as circling, whining, or scratching at the door.
-
Professional Help: If you’re struggling with house training, don’t hesitate to consult a professional dog trainer or veterinarian. They can provide personalized guidance and address any underlying medical or behavioral issues.
Regular Cleaning and Maintenance: A Proactive Defense
Consistent cleaning is essential for maintaining the integrity of your wood floors and preventing future staining. Urine can penetrate wood over time, leading to lasting damage. Regular cleaning removes surface contaminants and minimizes the risk of long-term issues.
-
Sweep or Vacuum Regularly: Remove dirt, dust, and debris that can scratch the floor’s finish and trap odors.
-
Damp Mopping: Use a damp (not wet) mop with a pH-neutral cleaner specifically designed for wood floors. Avoid harsh chemicals or excessive water, as they can damage the wood.
-
Re-Sealing: Consider re-sealing your wood floors periodically to provide an extra layer of protection against moisture and staining. The frequency depends on the type of finish and the amount of traffic the floor receives.
Promptly Addressing Accidents: The Golden Rule
Even with the best training and maintenance, accidents can still happen. The key is to act quickly and decisively to minimize the damage. The longer urine sits on the floor, the greater the risk of staining and odor penetration.
-
Immediate Action: As soon as you notice an accident, clean it up immediately.
-
Absorb the Urine: Use paper towels or a clean cloth to blot up as much of the urine as possible. Avoid rubbing, as this can spread the stain.
-
Clean and Disinfect: Use a DIY cleaner (from the recipes in the previous sections) or a commercial pet-stain remover to thoroughly clean the affected area.
-
Dry Thoroughly: Ensure the area is completely dry to prevent moisture damage.
By combining effective training techniques, regular cleaning practices, and a prompt response to accidents, you can significantly reduce the likelihood of dog urine damaging your wood floors. This proactive approach will help maintain a beautiful and healthy home environment for both you and your furry friend.
After you’ve worked hard to remove existing stains and odors, the next logical step is to implement strategies that minimize the chances of future accidents occurring on your wood floors. A proactive approach, combining training, maintenance, and swift responses, will safeguard your beautiful floors and maintain a fresh, clean home environment.
Safety First: Protecting Yourself and Your Floors
Creating your own cleaning solutions offers control and cost savings, but it’s essential to prioritize safety. Using homemade cleaners carelessly can lead to personal injury or irreversible damage to your precious wood floors. This section outlines crucial precautions to protect yourself and your home.
The Importance of Spot-Testing
Before applying any homemade cleaner to a visible area of your wood floor, always test it in an inconspicuous spot. A small area under a rug, inside a closet, or behind a piece of furniture are ideal testing locations.
This precautionary step helps determine how your floor’s finish will react to the solution. Look for any signs of discoloration, dulling, softening, or lifting of the finish.
If any adverse reactions occur, do not use the solution on the rest of your floor. You may need to dilute the cleaner further or choose a different recipe altogether. This simple test can save you from costly and frustrating damage.
Ensuring Adequate Ventilation
Many cleaning solutions, even natural ones, release fumes that can be irritating or harmful, especially in poorly ventilated areas. Always ensure proper ventilation when working with any cleaning product.
Open windows and doors to create a cross-breeze. Use a fan to circulate air if necessary. This is particularly important when using hydrogen peroxide, vinegar, or essential oils in higher concentrations.
Proper ventilation not only protects your respiratory system but also helps speed up the drying process, preventing moisture from lingering on your wood floor.
Pay close attention to how you feel while cleaning. If you experience any dizziness, nausea, or difficulty breathing, stop immediately and get fresh air.
Safe Storage Practices
Once you’ve mixed your homemade cleaning solution, proper storage is crucial to prevent accidents, spills, and degradation of the ingredients.
Store your cleaners in clearly labeled containers. This is especially important if you have children or pets. Use airtight containers to prevent evaporation and maintain the solution’s effectiveness.
Keep cleaning solutions out of reach of children and pets. A locked cabinet or high shelf is ideal.
Store solutions in a cool, dark place away from direct sunlight and heat, which can alter their chemical composition and reduce their efficacy.
Never store cleaning solutions in containers that previously held food or drinks. This can lead to accidental ingestion.
After you’ve worked hard to remove existing stains and odors, the next logical step is to implement strategies that minimize the chances of future accidents occurring on your wood floors. A proactive approach, combining training, maintenance, and swift responses, will safeguard your beautiful floors and maintain a fresh, clean home environment.
Safety First: Protecting Yourself and Your Floors
Creating your own cleaning solutions offers control and cost savings, but it’s essential to prioritize safety. Using homemade cleaners carelessly can lead to personal injury or irreversible damage to your precious wood floors. This section outlines crucial precautions to protect yourself and your home.
The Importance of Spot-Testing
Before applying any homemade cleaner to a visible area of your wood floor, always test it in an inconspicuous spot. A small area under a rug, inside a closet, or behind a piece of furniture are ideal testing locations.
This precautionary step helps determine how your floor’s finish will react to the solution. Look for any signs of discoloration, dulling, softening, or lifting of the finish.
If any adverse reactions occur, do not use the solution on the rest of your floor. You may need to dilute the cleaner further or choose a different recipe altogether. This simple test can save you from costly and frustrating damage.
Ensuring Adequate Ventilation
Many cleaning solutions, even natural ones, release fumes that can be irritating or harmful, especially in poorly ventilated areas. Always ensure proper ventilation when working with any cleaning product.
Open windows and doors to…
Calling in the Cavalry: When to Seek Professional Help
DIY solutions can be incredibly effective for addressing dog urine accidents on wood floors, but there are situations where even the most diligent homeowner should recognize the limitations of a do-it-yourself approach. Knowing when to call in professional help can save you from further damage and potentially costly repairs.
Recognizing the Limits of DIY
While homemade remedies offer an accessible and affordable starting point, some issues require specialized equipment, expertise, and professional-grade cleaning agents. Attempting to tackle these problems without the right tools and knowledge can lead to further damage, ultimately increasing the cost of restoration.
Severe Damage: When the Problem Runs Deep
Superficial stains and odors can often be addressed with DIY methods. However, if the urine has deeply penetrated the wood, causing structural damage such as warping, cupping, or separation of planks, professional intervention is usually necessary.
These types of damage indicate that the urine has saturated the wood fibers, and simply cleaning the surface will not solve the problem. Professionals have access to specialized drying equipment and wood restoration techniques to address structural damage effectively.
Extensive Staining: A Matter of Scale
A single, isolated incident can often be managed with a homemade solution. However, widespread or deep-set staining across a large area presents a different challenge.
This could be the result of repeated accidents or a single, large volume of urine that wasn’t addressed promptly. In these situations, professional cleaning services have the resources and expertise to treat the entire affected area evenly and effectively.
They can use specialized equipment like floor sanders to remove the stained layers of wood or apply professional-grade stain removers that are more potent than over-the-counter options.
Uncertainty About Your Wood Floor Type: Playing it Safe
One of the biggest risks with DIY cleaning is using the wrong products or techniques on your particular type of wood floor. Different wood species (e.g., oak, maple, pine) and finishes (e.g., polyurethane, wax, oil) react differently to various cleaning agents.
If you’re unsure about the type of wood or finish on your floors, it’s best to consult a professional. They can accurately identify the wood and finish and recommend the appropriate cleaning methods to avoid damage.
Using the wrong cleaner could strip the finish, discolor the wood, or even cause irreversible damage. Professional identification and treatment are a worthwhile investment to protect the integrity of your floors.
The Value of Professional Expertise
Ultimately, the decision to seek professional help depends on the severity of the damage, the extent of the staining, and your comfort level with DIY solutions. When in doubt, consulting a professional cleaning service can provide peace of mind and ensure that your wood floors are restored to their original beauty without causing further harm.
FAQs: DIY Dog Urine Cleaner for Wood Floors
Here are some common questions about making and using our homemade dog urine cleaner for wood floors, designed to keep your floors spotless and odor-free!
What exactly is in this DIY dog urine cleaner for wood floors?
Our cleaner consists of common household ingredients: white vinegar, baking soda, hydrogen peroxide, and a gentle dish soap. These components work together to neutralize odors, lift stains, and disinfect.
Is this homemade dog urine cleaner safe for all types of wood floors?
While effective, it’s always best to test the cleaner on an inconspicuous area first. Different finishes react differently. If you notice any discoloration or damage, discontinue use.
How often can I use this cleaner on my wood floors?
Avoid over-cleaning. Use the homemade dog urine cleaner for wood floors only when necessary, after an accident occurs. Consistent over-cleaning can damage the finish over time.
Will this cleaner completely remove old, set-in dog urine stains and odors?
Fresh stains respond best. Older, deeper stains may require multiple applications and some extra elbow grease. For very stubborn stains, professional cleaning might be necessary.
So, there you have it! Hopefully, you’re feeling confident about tackling those pet messes with your own homemade dog urine cleaner for wood floors. Give it a try and let us know how it goes – happy cleaning!