Achieving that perfect, polished look with crown molding for angled ceilings can feel like a daunting DIY task, but it’s entirely within reach. Miter saws, essential for precise cuts, become your best friend in this project. The challenge often lies in understanding the complex angles presented by cathedral ceilings, requiring accurate measurements. Remember that installation techniques can vary greatly depending on whether you’re tackling a simple slope or a more complex intersection. With the right preparation and approach, transforming your space using crown molding for angled ceilings will be incredibly fulfilling.
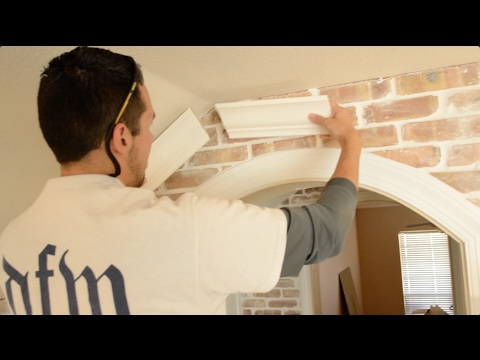
Image taken from the YouTube channel Finish Carpentry TV , from the video titled Vaulted Crown Moulding – How to Find Peak Angles .
Crafting the Perfect "Crown Molding for Angled Ceilings" DIY Install Guide
To create a truly helpful and informative article on installing crown molding on angled ceilings, focusing on the keyword "crown molding for angled ceilings," we need a layout that guides readers seamlessly through the process. Here’s a structured approach:
1. Introduction: Understanding the Challenge and Possibilities
Begin by setting the stage. Don’t assume readers have prior knowledge.
- Hook: Start with a relatable scenario. For example: "Dreaming of adding architectural flair to your room with crown molding, but your angled ceiling throws a wrench in your plans? You’re not alone!"
- Define the Topic: Briefly explain what crown molding is and why it’s aesthetically pleasing, particularly when addressing angled ceilings. Mention that it may seem daunting, but with the right knowledge, it’s achievable.
- Address the Specific Challenge (Angled Ceilings): Emphasize the difference between installing crown molding on standard 90-degree corners and the complexities presented by angled ceilings. Highlight the importance of accurate measurements and specialized cuts.
- Promise a Solution: Clearly state that the guide will provide a step-by-step approach to successfully installing "crown molding for angled ceilings."
- Brief Overview: Outline the major sections of the guide. For example: "In this guide, we’ll cover everything from measuring your angles to cutting the molding and securing it in place."
2. Preparation is Key: Gathering Tools and Materials
This section is all about ensuring the reader is equipped to begin.
- List of Necessary Tools: Provide a comprehensive list of tools. Use bullet points for easy readability.
- Miter Saw (with a sharp blade designed for crown molding)
- Coping Saw (for fine-tuning joints)
- Measuring Tape (accurate to at least 1/16 inch)
- Angle Finder/Protractor
- Pencil
- Construction Adhesive
- Caulk Gun and Paintable Caulk
- Nail Gun (or hammer and finishing nails)
- Safety Glasses
- Stud Finder
- Level
- Putty Knife
- Wood Filler
- Material Checklist: List the necessary materials.
- Crown Molding (sufficient quantity, plus extra for mistakes) – Note: Consider recommending specific types of crown molding that are easier to work with for angled ceilings, like paintable polystyrene.
- Wood Glue
- Paint (primer and topcoat, matching your desired finish)
- Painter’s Tape
3. Mastering the Angles: Measuring and Calculating
This is the crucial part that separates success from failure. Be extra detailed.
- Understanding Spring Angle: Explain what the "spring angle" is and why it matters. (The angle at which the crown molding sits against the wall and ceiling.) A simple diagram illustrating this angle would be incredibly helpful.
- Measuring the Wall Angle: Provide clear instructions on how to accurately measure the angles where the walls meet. Use numbered steps for clarity.
- Use an angle finder or protractor to measure the angle.
- Double-check the measurement to ensure accuracy.
- If walls are uneven, take multiple measurements and average them.
-
Calculating Miter and Bevel Angles: Explain how to use the measured wall angle to determine the correct miter and bevel settings for your miter saw.
-
Table for Common Angles: Include a table showing pre-calculated miter and bevel angles for common wall angles (e.g., 135 degrees, 45 degrees). Note: Mention that these are starting points and may need slight adjustments based on the molding profile. Wall Angle Miter Angle Bevel Angle 135 Degrees 22.5 Degrees 33.9 Degrees 45 Degrees … … -
Using an Online Calculator (Optional): Mention that there are online miter angle calculators available, and provide links to reputable ones.
-
- Dealing with Compound Angles: Explain that some rooms may have compound angles (angles that are not perfectly horizontal or vertical). Emphasize the need for careful measurement and test cuts in these situations.
4. Making the Cuts: A Step-by-Step Guide
This section provides hands-on instructions.
- Safety First: Emphasize the importance of safety glasses and proper handling of the miter saw.
- Setting Up the Miter Saw: Provide clear instructions on how to set the miter and bevel angles on the miter saw, referencing the calculations from the previous section. Include photos or diagrams illustrating the proper settings.
- The Upside-Down and Backwards Method: Clearly explain and demonstrate the "upside-down and backwards" cutting technique for crown molding. This is critical for accurate cuts. Use illustrations.
- Cutting Inside Corners: Describe how to cut crown molding for inside corners.
- Cutting Outside Corners: Describe how to cut crown molding for outside corners.
- Coping Inside Corners (Alternative Method): Explain and illustrate the coping method for inside corners. This allows for a tighter, more professional-looking fit, especially with imperfect angles.
- Test Cuts and Adjustments: Emphasize the importance of making test cuts on scrap pieces of crown molding before cutting the actual pieces. Explain how to adjust the miter and bevel angles based on the results of the test cuts.
5. Installation: Securing the Crown Molding
- Locating Studs: Explain how to use a stud finder to locate studs behind the wall.
- Applying Construction Adhesive: Describe how to apply construction adhesive to the back of the crown molding.
- Positioning and Nailing: Explain how to position the crown molding against the wall and ceiling, ensuring it is level and flush. Describe how to use a nail gun (or hammer and finishing nails) to secure the molding to the studs.
- Dealing with Gaps: Explain how to use wood filler to fill any gaps at the joints or along the wall and ceiling.
- Caulking: Explain how to caulk the top and bottom edges of the crown molding to create a seamless, professional finish.
- Painting: Describe how to paint the crown molding, including priming and applying the topcoat.
6. Troubleshooting: Common Problems and Solutions
Address common issues readers might encounter.
- Gaps at Joints: Discuss potential causes (inaccurate cuts, uneven walls) and offer solutions (coping, wood filler, caulk).
- Crown Molding Not Sitting Flush: Discuss potential causes (uneven walls, improper nailing) and offer solutions (shims, adjusting nail placement).
- Miter Saw Blade Chipping the Molding: Discuss potential causes (dull blade, incorrect cutting technique) and offer solutions (sharpen or replace blade, use a finer-tooth blade, use a backer board).
7. Advanced Techniques (Optional)
For more experienced DIYers, you can include these topics:
- Installing Crown Molding on Curved Walls: Briefly explain the techniques involved, such as using flexible crown molding or creating custom-cut segments.
- Adding LED Lighting Behind Crown Molding: Describe how to integrate LED strip lights for a unique and modern look.
Crown Molding on Angled Ceilings: Frequently Asked Questions
Here are some common questions about installing crown molding for angled ceilings. We hope these answers help you with your DIY project!
Can I install crown molding on any angled ceiling?
Yes, you can! However, the process involves making precise cuts to accommodate the specific angle. Our guide focuses on techniques that will help you install crown molding for angled ceilings successfully, regardless of the angle’s severity.
What tools are essential for installing crown molding on angled ceilings?
A miter saw is crucial for accurately cutting the angles. You’ll also need a measuring tape, a level, a nail gun or hammer and nails, wood glue, and a coping saw for fine-tuning joints. Having these tools will make installing crown molding for angled ceilings much easier.
How do I calculate the correct miter and bevel angles?
Calculating the angles can be tricky, but our guide provides formulas and resources to help. Using a protractor or angle finder can also assist in accurately determining the angles for your specific ceiling. Precise measurements are key to achieving seamless joints when installing crown molding for angled ceilings.
What if the corner angles aren’t perfectly 45 degrees?
Most corners aren’t perfectly square! Our guide explains how to cope joints, which is a technique that allows you to create tight-fitting seams even when corner angles are slightly off. Coping is a valuable skill for any DIYer installing crown molding for angled ceilings.
Well, that’s a wrap on crown molding for angled ceilings! Hopefully, you feel ready to tackle this project yourself. Happy molding!