Achieving a professional finish requires understanding surface preparation, a foundational element when considering how to apply water based polyurethane. Proper preparation, combined with the use of a high-quality Wooster brush, ensures a smooth and durable coating. Minwax, a leading manufacturer, offers a range of water-based polyurethanes known for their ease of use and low VOC content. Mastering the application techniques, detailed below in six actionable steps, allows even a novice DIYer to obtain results comparable to those achieved by a professional wood finishing shop.
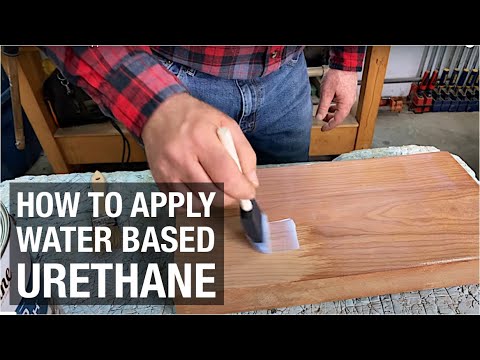
Image taken from the YouTube channel Bailey Line Road , from the video titled How to Apply Water Based Urethane .
Achieving a Professional Finish with Water-Based Polyurethane: A Comprehensive Guide
Water-based polyurethane has become a favorite among DIY enthusiasts and professionals alike, prized for its user-friendly properties and environmentally conscious formulation. Unlike its oil-based counterparts, water-based polyurethane boasts significantly lower volatile organic compounds (VOCs), contributing to better indoor air quality and reduced environmental impact. Its durability, quick drying time, and straightforward cleanup with water further solidify its appeal.
This article aims to provide a comprehensive, step-by-step guide to achieving a professional-quality finish using water-based polyurethane. We will break down the process into six manageable steps, ensuring even a novice can achieve stunning results.
Understanding Water-Based Polyurethane
Water-based polyurethane is a synthetic resin dissolved in water, forming a protective coating when applied to surfaces like wood, metal, and concrete. Its key advantages stem from its unique composition:
-
Low VOCs: This makes it a healthier choice, especially for indoor projects.
-
Durability: While often perceived as less durable than oil-based options, modern water-based polyurethanes offer excellent resistance to scratches, abrasions, and chemicals, especially when properly applied.
-
Fast Drying Time: Water-based formulas dry significantly faster, allowing for multiple coats in a single day.
-
Easy Cleanup: Simply use soap and water to clean brushes, rollers, and other equipment.
The Importance of Proper Application
While water-based polyurethane is relatively easy to use, achieving a truly professional finish hinges on meticulous application. Improper techniques can lead to a host of issues, including:
-
Uneven Coverage: Resulting in a blotchy or inconsistent appearance.
-
Brush Marks: Leaving visible streaks that detract from the overall finish.
-
Bubbles: Creating unsightly imperfections in the dried coating.
-
Poor Adhesion: Causing the finish to peel or chip prematurely.
By following the six-step guide outlined in this article, you can avoid these common pitfalls and create a beautiful, durable, and professional-looking finish that will enhance the longevity and aesthetic appeal of your project.
Step 1: The Foundation of Success – Surface Preparation
The pursuit of a flawless finish with water-based polyurethane invariably begins long before the first drop of coating is applied. Surface preparation is the cornerstone of a successful project, dictating not only the aesthetic outcome but also the longevity and durability of the finish. Neglecting this crucial step is akin to building a house on sand – the results will inevitably be disappointing.
A properly prepared surface provides the necessary "tooth" for the polyurethane to adhere effectively. It also ensures a uniform substrate, free from imperfections that could compromise the evenness and smoothness of the final coating.
The Importance of Adhesion
Adhesion is paramount. Water-based polyurethane, while durable, relies on a strong bond with the underlying material. Contaminants like dust, grease, or existing finishes can act as barriers, preventing proper adhesion and leading to peeling, cracking, or blistering over time.
Sanding: Achieving the Ideal Surface Profile
Sanding is the primary method for creating a receptive surface. The process involves using abrasive materials to smooth imperfections, remove existing coatings, and generate a slightly roughened texture. This texture increases the surface area available for the polyurethane to grip, resulting in a stronger and more resilient bond.
Grit Progression for Wood
When working with wood, a strategic grit progression is essential. This involves starting with a coarser grit to remove significant imperfections and gradually moving to finer grits to refine the surface.
A typical grit progression might include:
-
120 Grit: For removing old finishes, deep scratches, or planing marks.
-
180 Grit: To smooth the surface after using a coarser grit and remove minor imperfections.
-
220 Grit: To further refine the surface, creating an ideal profile for the polyurethane to adhere to.
Sanding Techniques
Regardless of the grit used, proper technique is crucial. Always sand with the grain of the wood to avoid creating unsightly scratches that will be highlighted by the finish. Apply even pressure across the sanding block or pad to ensure uniform material removal. Avoid dwelling in one spot, as this can create dips or unevenness.
Cleaning: Removing Dust and Contaminants
Sanding generates dust, which, if left on the surface, will compromise the finish. Thorough cleaning is therefore an indispensable part of surface preparation.
Dust Removal
Begin by vacuuming the entire surface to remove the majority of the sanding dust. Pay particular attention to corners, edges, and crevices where dust tends to accumulate. Following vacuuming, use a tack cloth to pick up any remaining fine dust particles. A tack cloth is a slightly sticky cloth specifically designed for this purpose.
Solvent Wipe (When Necessary)
In some cases, a solvent wipe may be necessary to remove stubborn contaminants like grease, oil, or wax. Mineral spirits or denatured alcohol are effective choices. However, it’s crucial to test the solvent on an inconspicuous area first to ensure it doesn’t damage or discolor the underlying material.
Apply the solvent with a clean cloth, wiping in one direction to avoid spreading contaminants around. Allow the solvent to evaporate completely before proceeding to the next step.
By meticulously following these surface preparation steps, you’ll create a solid foundation for a professional-quality finish with water-based polyurethane.
Surface preparation lays the groundwork, but the quality of your tools dictates the final execution. Now that the foundation is meticulously prepared, it’s time to assemble the essential tools and materials. Selecting the right equipment is just as crucial as the preparation itself.
Step 2: Gathering Your Arsenal – Essential Tools and Materials
Achieving a professional-grade finish with water-based polyurethane demands more than just elbow grease; it requires the right "weapons" in your arsenal. This step provides a comprehensive checklist and guidance on selecting the appropriate tools for the job.
Essential Tool Checklist
Before even cracking open the can of polyurethane, ensure you have the following items readily available:
- High-quality brush (natural or synthetic)
- Foam applicator pads
- Spray gun (optional)
- Assorted sandpaper grits (including those used for surface prep.)
- Tack cloth
- Stir sticks
- Trays and liners
The Brush: Your Primary Weapon
The brush is often the primary applicator, and its quality significantly impacts the final result.
Natural vs. Synthetic Bristles
The age-old debate: natural or synthetic bristles?
For water-based polyurethanes, synthetic brushes are generally preferred. Natural bristles absorb water, causing them to swell and become limp, leading to uneven application and brushstrokes. High-quality synthetic brushes, made of nylon or polyester, resist water absorption, maintain their shape, and provide a smoother finish.
Bristle Quality Matters
Don’t skimp on brush quality. Inexpensive brushes shed bristles, leaving them embedded in your finish, and often apply the finish unevenly. Invest in a brush with flagged or split ends, as these create a finer, smoother application.
Handle Comfort and Control
Consider the handle. An ergonomic handle reduces fatigue, particularly during larger projects. A comfortable grip provides better control, resulting in more precise and consistent application.
Foam Applicator Pads: A Smooth Alternative
Foam pads offer a different approach. They are excellent for achieving an ultra-smooth, even finish, especially on flat surfaces.
- They eliminate brushstrokes entirely.
- However, foam pads may not be suitable for intricate details or contoured surfaces.
Opt for high-density foam pads for better durability and even distribution of the polyurethane.
Spray Guns: For the Advanced User
For large projects or those seeking a flawless, factory-like finish, a spray gun is invaluable.
- Spraying delivers an incredibly even and thin coat of polyurethane.
- This minimizes brushstrokes and imperfections.
However, spraying requires practice and proper equipment, including a well-ventilated workspace and appropriate safety gear. If you’re new to spraying, start with smaller projects to hone your technique.
Don’t Forget the Supporting Cast
While the brush, foam pad, or spray gun takes center stage, other tools play crucial supporting roles.
-
Assorted sandpaper grits are essential for surface preparation and inter-coat sanding.
-
Tack cloths are indispensable for removing dust particles before applying each coat.
-
Stir sticks are necessary for properly mixing the polyurethane, and trays and liners make application cleaner and more efficient.
Selecting the right tools is an investment in the final outcome. Choosing quality over cost will save you time, frustration, and ultimately, result in a superior finish that you can be proud of.
Step 3: The First Layer – Applying the Initial Coat
With your arsenal assembled, it’s time to move from preparation to execution. The first coat of water-based polyurethane is arguably the most crucial, acting as the foundation for subsequent layers. A well-applied initial coat ensures proper adhesion, reveals any imperfections in the surface preparation, and sets the stage for a flawless final finish.
Preparing the Polyurethane
Proper preparation of the polyurethane itself is a small but vital step. Unlike oil-based finishes, water-based polyurethane doesn’t require thinning under normal circumstances. The key is gentle mixing.
Vigorously shaking the can will introduce air bubbles that can be difficult to remove during application and negatively impact the final appearance. Instead, use a clean stir stick to slowly and deliberately blend the polyurethane.
Move the stick in a circular motion, ensuring that any settled solids at the bottom are fully incorporated. Aim for a uniform consistency throughout the mixture.
Application Techniques: Brush vs. Pad
The choice between a brush and a foam pad often comes down to personal preference and the size/complexity of the project. Both methods are capable of producing excellent results with proper technique.
Brushing Techniques
Brushing is ideal for intricate details, edges, and smaller surfaces.
Loading the Brush: Dip the brush into the polyurethane, submerging only about one-third of the bristle length. Gently tap the brush against the inside of the can (or tray) to remove excess finish.
The goal is to load the brush sufficiently without overloading it, which leads to drips and runs.
Applying Evenly: Hold the brush at a slight angle to the surface and apply the polyurethane in long, smooth, overlapping strokes, moving with the grain of the wood (if applicable).
Maintain a wet edge by overlapping each stroke slightly with the previous one. Avoid applying too much pressure, allowing the bristles to glide across the surface.
Tipping Off: After applying a section, use the tips of the bristles to lightly "tip off" the surface. This involves holding the brush at a very low angle and gently dragging it along the freshly applied finish, removing any visible brush marks or imperfections.
The goal of tipping off is to create a perfectly smooth, even surface.
Foam Pad Application
Foam pads are well-suited for larger, flat surfaces where speed and efficiency are paramount.
Saturating the Pad: Dampen the foam pad slightly with water. This helps the pad glide more smoothly and prevents it from absorbing too much polyurethane too quickly.
Then, pour a small amount of polyurethane onto the surface and evenly distribute it across the pad.
Glide Across the Surface: Apply the polyurethane using long, even strokes, overlapping each stroke to maintain a wet edge. Apply light, even pressure to avoid creating streaks or uneven coverage.
Foam pads are particularly good at achieving a thin, uniform coat.
Minimizing and Removing Bubbles
Bubbles are the enemy of a smooth finish. As mentioned earlier, gentle mixing is crucial to prevent introducing them in the first place. However, even with careful preparation, bubbles can still appear during application.
Several techniques can help to minimize and remove bubbles:
-
Apply Thin Coats: Thick coats of polyurethane trap air bubbles more easily. Applying thin, even coats allows the bubbles to rise to the surface and dissipate.
-
Work Quickly: Polyurethane dries relatively quickly, so it’s essential to work efficiently to prevent bubbles from setting in the finish.
-
Use a Bubble Buster: If bubbles persist, consider using a bubble buster – a specialized tool (often a fine-tipped brush or a solvent-dampened cloth) designed to gently pop bubbles without damaging the finish.
-
Check the Temperature: Application in a cool, dry environment will help minimize bubbles. Avoid applying in direct sunlight or when humidity is high.
If you notice bubbles forming, gently feather them out with your brush or pad immediately after applying the polyurethane. Don’t overwork the finish, as this can create more problems than it solves.
Patience and attention to detail during this initial coat will pay dividends in the long run, leading to a professional-quality finish that you can be proud of.
Step 4: Achieving Perfection – Drying and Inter-Coat Sanding
After meticulously applying the initial coat of water-based polyurethane, resist the urge to rush ahead. The next crucial step towards achieving a professional finish is allowing the finish to dry completely and preparing the surface for subsequent coats through inter-coat sanding.
The Patience Game: Understanding Drying Time
Adhering to the manufacturer’s recommended drying time, as indicated on the product label, is paramount. This isn’t merely a suggestion; it’s a critical requirement for the polyurethane to properly cure and form a durable, even film.
Rushing this stage can lead to several problems, including:
- Poor adhesion: Subsequent coats may not bond correctly to an under-dried layer.
- Trapped solvents: Residual solvents can compromise the finish’s integrity and lead to clouding or bubbling.
- Soft finish: The final finish will be less durable and more susceptible to scratches and dents.
Several environmental factors influence the drying time, including temperature, humidity, and ventilation.
- Temperature: Higher temperatures generally accelerate drying, while cooler temperatures slow it down. Aim for a consistent room temperature within the manufacturer’s recommended range.
- Humidity: High humidity can significantly impede drying, as the water in the air slows the evaporation of the water-based polyurethane. Ensure adequate ventilation.
- Ventilation: Proper airflow helps evaporate the water from the finish, speeding up the drying process. Open windows or use fans to improve ventilation, but be mindful of introducing dust.
The Art of Inter-Coat Sanding
Inter-coat sanding, or lightly sanding between coats, is a vital step often overlooked, yet it’s what separates a good finish from a truly exceptional one. This process serves several crucial purposes:
- Creating a Mechanical Key: Sanding creates microscopic scratches on the surface, providing a "key" for the next coat of polyurethane to grip onto, enhancing adhesion.
- Removing Imperfections: Even with careful application, tiny imperfections like dust nibs or raised grain can occur. Sanding gently removes these blemishes, creating a smoother surface.
- Leveling the Finish: Sanding helps to level out any minor inconsistencies in the previous coat, ensuring a more uniform and refined appearance.
Choosing the correct sandpaper grit is essential. For inter-coat sanding of water-based polyurethane, 320-grit or 400-grit sandpaper is generally recommended. These fine grits are abrasive enough to smooth the surface without damaging the existing finish.
Use a light touch and avoid applying excessive pressure. The goal isn’t to remove the previous coat entirely but to lightly scuff the surface. Focus on areas with imperfections, but be sure to sand the entire surface evenly.
Sanding should be performed with a sanding block or a foam sanding pad to ensure even pressure distribution and prevent gouging.
The Immaculate Surface: Cleaning After Sanding
After sanding, thorough dust removal is absolutely critical. Any residual sanding dust will compromise the adhesion and appearance of the subsequent coat, leading to a gritty or uneven finish.
The most effective way to remove sanding dust is with a combination of methods:
- Vacuuming: Use a vacuum cleaner with a brush attachment to remove the majority of the dust from the surface.
- Tack Cloth: A tack cloth is a slightly sticky cloth designed to pick up any remaining dust particles. Wipe the surface gently with the tack cloth, ensuring to use a clean section of the cloth for each pass.
Taking the time to properly dry and prepare the surface between coats may seem tedious, but it is the key to achieving a professional-quality, durable, and beautiful water-based polyurethane finish.
Step 5: Building Depth and Durability – Applying Subsequent Coats
With a flawlessly prepared and sanded surface, the stage is set for enhancing both the aesthetic depth and long-term durability of your project. This is achieved through the strategic application of subsequent coats of water-based polyurethane.
The Magic Number: How Many Coats are Enough?
While a single coat of polyurethane offers a degree of protection, it’s generally insufficient for most applications. The ideal number of coats typically falls between two and three.
Two coats provide a noticeable improvement in durability and sheen, suitable for surfaces with moderate wear and tear. Three coats offer superior protection, creating a richer, more lustrous finish ideal for high-traffic areas or surfaces subjected to frequent use.
Consider the intended use of your project when deciding on the number of coats. A delicate piece of decorative trim might only need two, while a heavily used tabletop would benefit significantly from three.
The Echo of Excellence: Repeating the Process
Achieving a professional-grade finish isn’t about shortcuts; it’s about consistency. Each subsequent coat should be treated with the same meticulous care as the first. This means diligently repeating the processes outlined in Step 3 (Applying the Initial Coat) and Step 4 (Achieving Perfection – Drying and Inter-Coat Sanding).
That is to say: apply the polyurethane evenly, allow it to dry completely according to the manufacturer’s instructions, and then lightly sand the surface to create a smooth base for the next coat. This iterative process ensures optimal adhesion and a flawless final result.
The Critical Eye: Inspecting for Imperfections
Before applying each new coat, take the time to carefully inspect the existing finish. This is your opportunity to address any imperfections that may have arisen during the previous application or drying phase.
Identifying Common Culprits
Common imperfections include:
Runs and drips: These occur when the polyurethane is applied too thickly or unevenly.
Dust nibs: These are small particles of dust or debris that become embedded in the finish during application or drying.
Bubbles: These can form if the polyurethane is shaken vigorously or applied in a dusty environment.
Corrective Action
Addressing these imperfections promptly is crucial. Small runs or drips can often be carefully sanded smooth using fine-grit sandpaper (320 or 400 grit). Dust nibs can also be carefully removed by spot-sanding with the same fine-grit paper. For more significant imperfections, consider lightly sanding the entire surface and applying a thin, even coat of polyurethane to blend the repaired area seamlessly with the existing finish.
Achieving a professional finish isn’t about shortcuts; it’s about consistency. Each subsequent coat should be treated with the same meticulous care as the first. This means diligently repeating the processes outlined in Step 3 (Applying the Initial Coat) and Step 4 (Achieving Perfection – Drying and Inter-Coat Sanding).
That is to say: apply the polyurethane evenly, allow it to dry completely according to the manufacturer’s instructions, and then lightly sand the surface to create a smooth base for the next coat. This iterative process ensures optimal adhesion and…
Step 6: The Final Touches – Curing, Cleanup, and Safety
The last step in achieving a professional-grade finish with water-based polyurethane involves more than just the final coat. It encompasses the crucial curing process, responsible cleanup, and adherence to essential safety precautions. Skipping or rushing these final touches can compromise the quality and longevity of your hard work.
The Art of Patience: Final Curing
Curing is the process where the polyurethane film achieves its maximum hardness, durability, and chemical resistance. This is distinct from simply drying. Drying refers to the evaporation of solvents (in this case, water) from the finish. Curing involves a chemical reaction that strengthens the polyurethane matrix.
Always consult the manufacturer’s instructions for the recommended curing time. This information is critical. Factors like temperature, humidity, and ventilation play a significant role in the curing process. Generally, it’s best to allow the finish to cure for at least 24-72 hours before subjecting it to heavy use.
During the curing phase, it’s advisable to:
-
Avoid placing objects on the finished surface.
-
Protect it from dust and debris.
-
Maintain a consistent temperature and humidity level in the room.
Responsible Practices: Cleanup Procedures
Proper cleanup not only ensures the longevity of your tools but also contributes to a safer and more environmentally conscious work environment.
Brush and Applicator Care
Water-based polyurethane, as the name suggests, cleans up with water. Immediately after use, rinse your brushes and applicators thoroughly with lukewarm water.
Follow up with a mild soap solution to remove any remaining residue. Rinse again until the water runs clear. Shape the bristles of your brushes and allow them to air dry completely before storing them. Proper cleaning will prevent the polyurethane from hardening in the brush, extending its lifespan significantly.
Proper Disposal of Waste
Leftover polyurethane, used rags, and empty containers should be disposed of responsibly, adhering to local regulations. Never pour leftover polyurethane down the drain. Allow any excess polyurethane in the can to dry completely before disposal.
Oil-soaked rags can be a fire hazard. Spread them out to dry completely in a well-ventilated area before discarding them. Check with your local waste management authority for specific guidelines regarding the disposal of paint and finishing products.
Prioritizing Well-being: Safety First
Working with any finishing product requires a commitment to safety. Water-based polyurethane is generally safer than its oil-based counterparts, but it’s still essential to take precautions.
The Importance of Ventilation
Although water-based polyurethanes have low VOCs, adequate ventilation is crucial. Work in a well-ventilated area, ideally with open windows and fans to circulate the air. This minimizes the inhalation of any fumes released during application and drying.
Essential Protective Gear
Protect your skin and eyes from contact with the polyurethane. Wear gloves and safety glasses throughout the application process. A respirator may be necessary if you are sensitive to fumes or working in a poorly ventilated area.
FAQs: Water-Based Polyurethane Application
Here are some frequently asked questions to help you achieve a professional finish when applying water-based polyurethane.
Why choose water-based polyurethane over oil-based?
Water-based polyurethane offers several advantages, including lower VOCs (volatile organic compounds), faster drying times, and easier cleanup with soap and water. It also tends to yellow less over time compared to oil-based options. When learning how to apply water based polyurethane, these benefits often make it a preferred choice.
How many coats of water-based polyurethane are recommended?
Generally, 2-3 coats of water-based polyurethane are sufficient for most projects. Lightly sanding between coats (after the previous coat is completely dry) ensures a smooth and even finish. The more coats you apply, the higher the build and durability.
What type of brush or applicator is best for applying water-based polyurethane?
A high-quality synthetic brush specifically designed for water-based coatings is ideal. Alternatively, a foam brush or a paint sprayer can also be used. The key is to choose an applicator that minimizes brush strokes and applies the finish evenly. These are all viable application methods for learning how to apply water based polyurethane.
What can I do to prevent brush strokes when applying water-based polyurethane?
Use a high-quality brush, avoid over-brushing, and apply thin, even coats. Lightly sanding between coats with fine-grit sandpaper (220-grit or higher) will help remove any imperfections and create a smoother surface. This attention to detail will help with how to apply water based polyurethane and prevent unwanted brush strokes.
So, you’ve learned the ropes! Now you know how to apply water based polyurethane and can get that beautiful, protective finish you’ve been dreaming of. Get out there, give it a shot, and remember to take your time. You got this!